

Best Trail Cameras UK 2026: What I Found Testing Three Budget Models
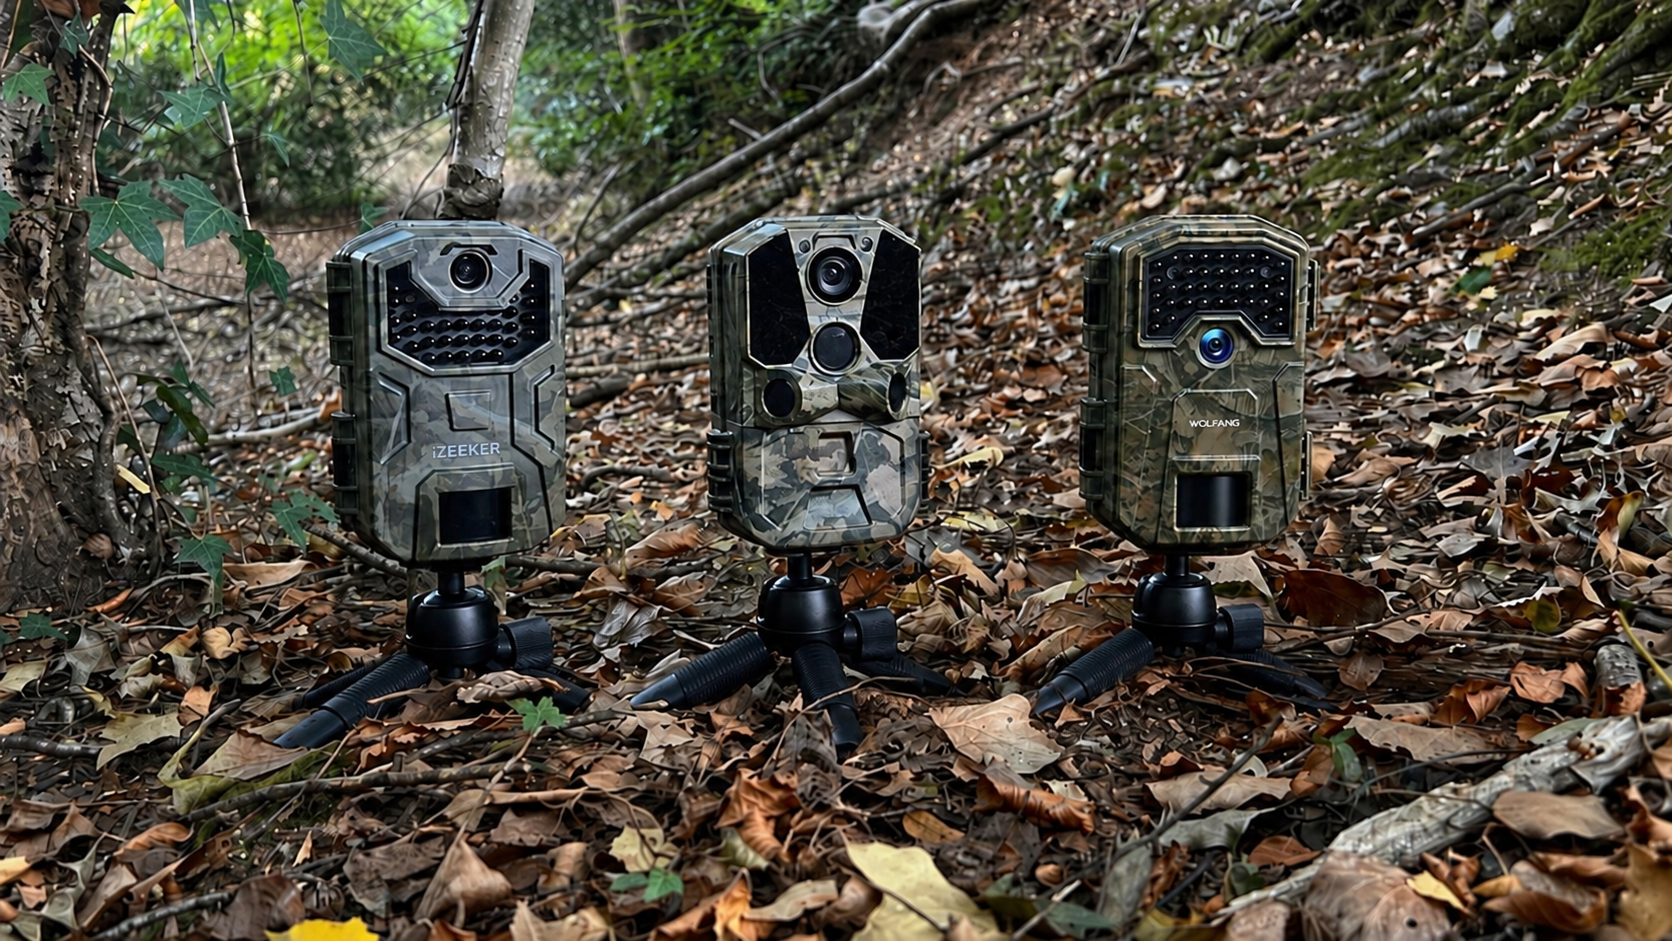
The three budget trail cameras in my field test: iZEEKER iG200, CEYOMUR CY65 and WOLFANG WT01, left to right. Each spent 14 days at the same wildlife site, tested one after another.
A trail camera can reveal far more than which animals are present. It can show a fox repeatedly using the same gap through a hedge, a badger pausing to scent the air or a squirrel changing its route after noticing something new. Over roughly ten years of using trail cameras in Britain and France, I have come to rely on them as a way of testing what I think the tracks, paths and feeding signs are telling me.
That makes choosing the right camera more important than the specifications suggest. At the cheaper end of the market, many models promise much the same package: 4K video, enormous still images, rapid triggering and long-range night vision. In practice, cameras with similar claims can produce very different records of the same kind of wildlife activity.
To find out what a modest budget really buys, I field-tested three popular low-cost cameras: the CEYOMUR CY65, WOLFANG WT01 and iZEEKER iG200. At the time of purchase all were under £35.
Each spent 14 days overlooking the same rabbit-warren site, mounted on the same tripod and aimed at the same area. The cameras were tested one after another over six weeks, so this was not a frame-for-frame comparison. It was a practical test of how reliably each one performed when asked to do the same job.
The site is used by rabbits, foxes, badgers, deer, squirrels and rodents, with occasional visits from stoats and polecats. Some animals approach slowly. Others cross the view in seconds, often after dark. That gave the cameras plenty of opportunities to expose the differences that matter in real use. Does the camera begin recording early enough to capture the useful part of an encounter? Can it illuminate an animal at night without turning it into a white blur? Will its batteries and storage last until I return? After a decade of field use, those questions tell me far more than a quoted megapixel count.
The CEYOMUR CY65 was the clear winner of this three-camera test. Only 7 of 132 assessed encounters started late or caught just part of the animal, compared with 25 of 171 for the WOLFANG and 62 of 304 for the iZEEKER. It also produced the cleanest daylight and night footage.
Because the CY65 is frequently unavailable, however, my practical buying recommendation is the CEYOMUR CY75. It costs about £20 more than many basic cameras however adds solar-assisted power, a rechargeable battery, local Wi-Fi and a supplied 64GB card. I have also used CEYOMUR cameras extensively beyond this comparison, so that recommendation rests on longer experience as well as one six-week test.
Quick Answer to “What is the Best Trail Camera for UK Wildlife?”
If you want the safest recommendation rather than the cheapest acceptable camera, buy the CEYOMUR CY75. It is the model I would choose for routine wildlife monitoring because it combines dependable triggering and good footage with longer-term power and easier local checking.
Buy the CEYOMUR CY65 if you can find the tested 4K 40MP version at a low price. It was the best performer in the controlled budget test.
Buy the CEYOMUR CY75 if you want the most complete and dependable package for only a modest increase in cost (approximately £48 at time of publication).
Consider the WOLFANG WT01 only for short or quiet deployments, or if you are prepared to reduce the recording quality and calculate storage carefully (read the detail of our testing below).
Choose the iZEEKER iG200 only when basic species detection and a very low purchase price matter more than night quality or complete encounters.
Investigate the ZEISS Secacam 3 when you genuinely need images transmitted from a remote site over 4G.
(Some product links in this guide are Amazon Associate links. If you buy through one, I may receive a small commission at no additional cost to you. It helps cover the cost of running The Wildlife Nomad, but it does not change the test results or the order in which I recommend the cameras. All cameras were purchased by myself for this field test and the test is independent).
The CY65 won the test. The CY75 wins the buying decision because availability, power, storage and ease of checking matter after the comparison chart has been forgotten.
The trail camera I would buy
If the CEYOMUR CY65 is in stock at a low price, it is an excellent basic choice. In practice, I would spend the additional £20 or so on the CEYOMUR CY75.
That recommendation is not based on a list of features copied from a product page. I have used CEYOMUR cameras extensively and compared them separately with similarly specified iZEEKER and GardePro models. Again and again, the CEYOMUR cameras have been quicker to react, more efficient with storage and more consistent in the quality of their still images and video.
The CY75 combines a 5,200mAh rechargeable lithium battery with an adjustable solar panel and space for four AA backup batteries. It includes a 64GB SD card and uses local Wi-Fi 6 to connect to the TrailCam Go app. That connection only works when you are near the camera, reportedly within about 33 feet, but it can still save opening the case or removing the card every time you check a site.
The extra £20 is buying more than convenience. The larger card gives the footage room to accumulate. The rechargeable battery and solar panel reduce routine battery changes. AA backup means a spell of poor light does not automatically end the deployment. Those additions solve problems I have repeatedly encountered in the field. I do not regard solar power as permission to forget a camera. A unit on a sunny field edge in June has a very different energy budget from one beneath beech canopy in December. The useful part of the CY75 is the combination of rechargeable battery, solar assistance and AA backup. That arrangement reduces maintenance without pretending the camera is independent of weather, shade or trigger frequency.
Which Trail Camera Should You Choose for the Wildlife You Monitor
There is no single trail camera that suits every project. The right choice depends on how often animals pass, how quickly they move, whether you need video or still images, and how difficult the site is to revisit.
Garden wildlife and familiar animal routes
A conventional SD-card camera is normally enough for a garden, hedge gap, rabbit warren or route you can check easily. You do not need an app or a data plan to discover whether foxes, badgers, hedgehogs or rodents are passing.
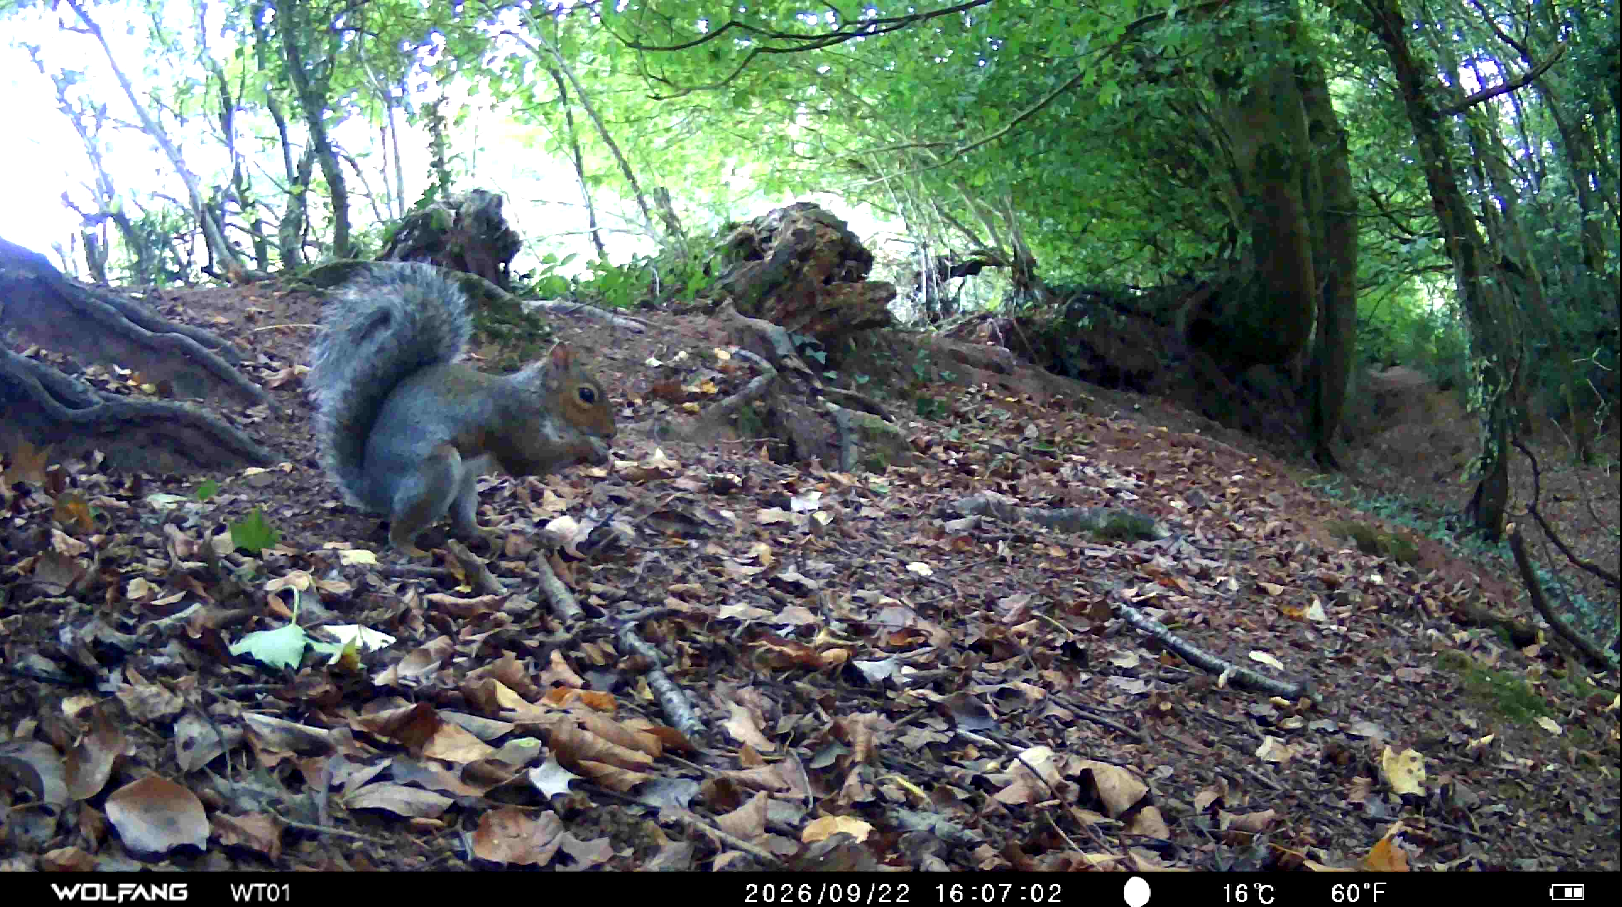
This is where the CEYOMUR CY65 makes sense. It is simple enough to deploy quickly, but its local Wi-Fi can make checking easier. If the site is quiet and the deployment short, the WOLFANG can also do the job. I would avoid using the WOLFANG at maximum resolution on a busy trail unless I had calculated the likely storage demand first (see below).
Fast moving animals and narrow crossing points
Trigger response matters most when an animal crosses the frame rather than approaching the camera. Foxes trotting along a hedge, stoats moving through a gateway and squirrels racing along a log can expose a slow camera very quickly.
Do not rely on a claimed trigger time alone. The PIR detection zone, wake-up time, recording startup and direction of travel all contribute to what appears in the clip. In this test, the CEYOMUR more often recorded animals entering the useful part of the frame. With the WOLFANG and iZEEKER, more encounters began after the animal was already well into the scene or leaving it.
Badgers foxes and other nocturnal mammals
For nocturnal wildlife, even illumination matters more than a huge megapixel figure. A strong pool of infrared light directly in front of the lens can look impressive until a badger steps into it and loses every trace of detail.
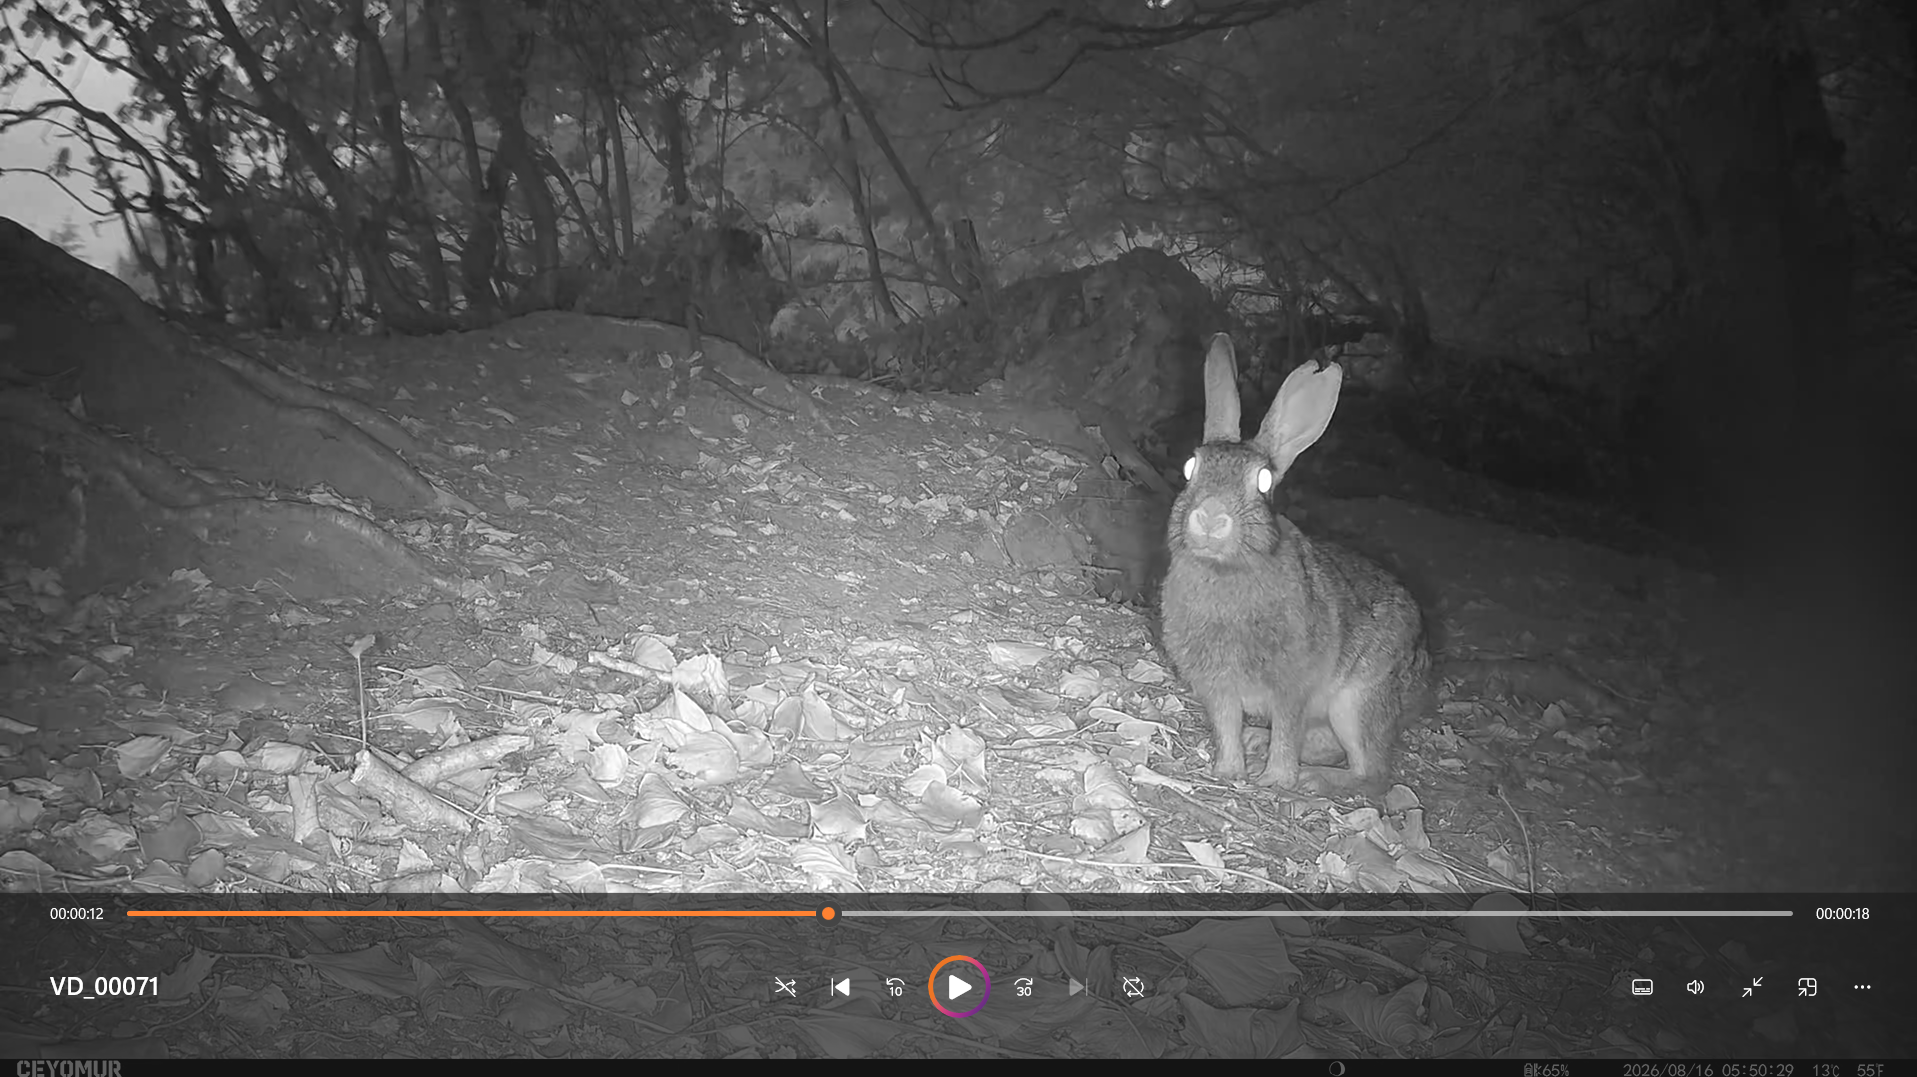
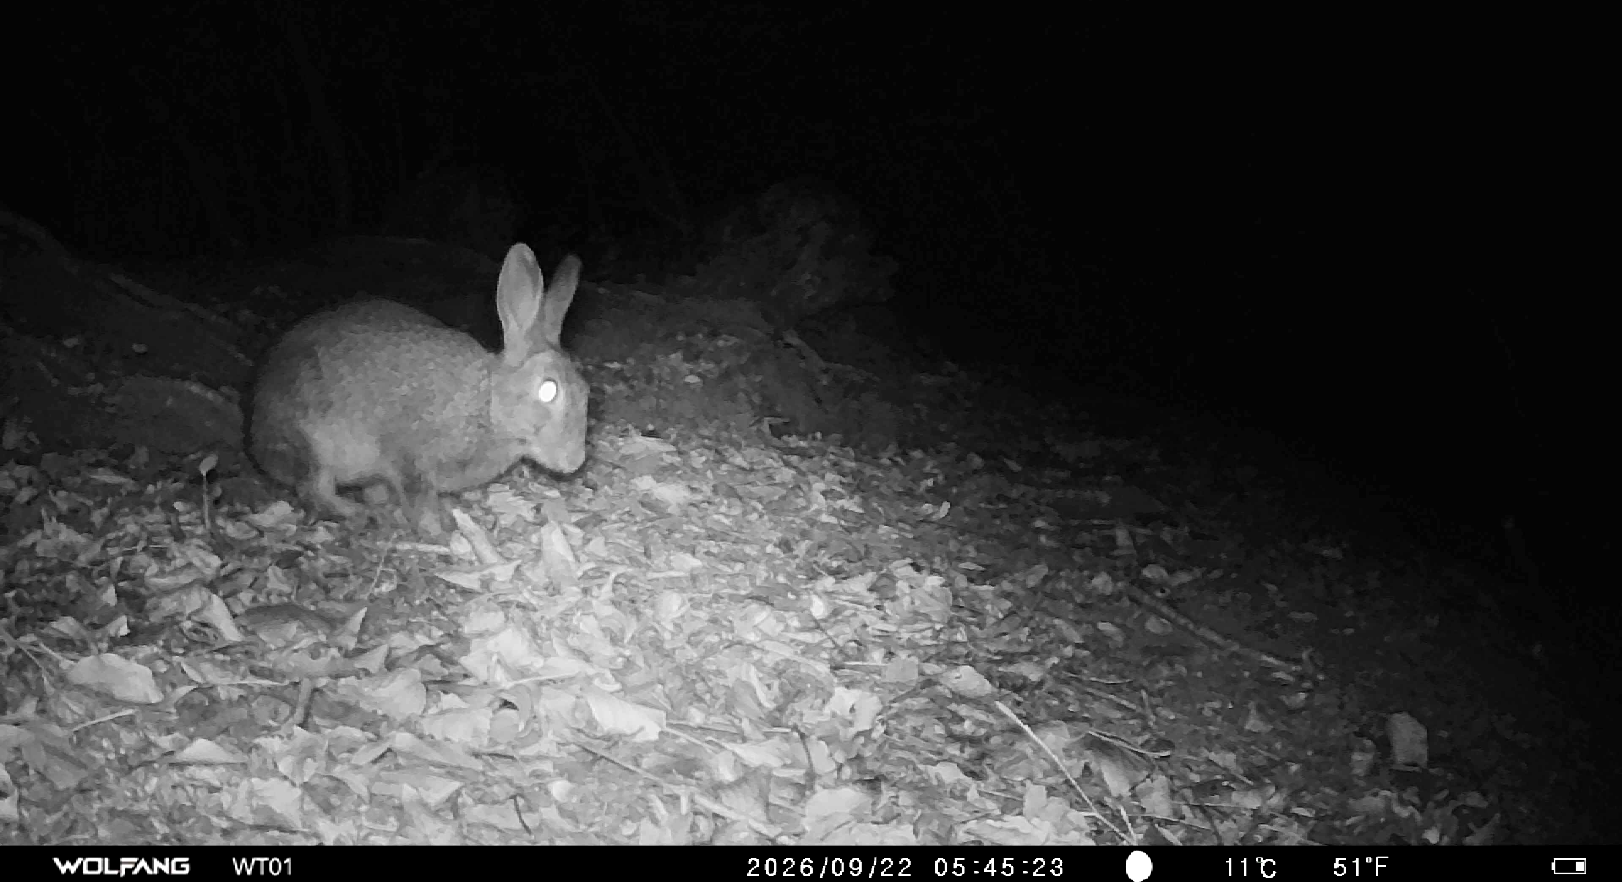
The CEYOMUR CY65 produced the best night footage in this comparison. Its illumination reached farther and spread more evenly across the rabbit-warren site. The WOLFANG's night footage was often too dark, with uneven lighting and limited reach. The iZEEKER struggled differently: grainy images, dark backgrounds and heavily blown highlights when an animal passed close to the LEDs. In many cases it was difficult to identify the animal due to the LEDs blowing out all details.
Longer deployments and sites you want to disturb less often
This is where the CY75 earns the additional cost. Solar-assisted power reduces battery maintenance, the supplied 64GB card increases retention, and local Wi-Fi may allow you to inspect footage without touching the camera. None of those features makes the camera remote. You still need to visit the site. They simply make each visit quicker and less intrusive. A much smarter, ethical choice.
Remote sites and genuine off site monitoring
If you need to know what happened without travelling to the camera, local Wi-Fi is useless. You need a cellular model.
I previously used a Deatti 4G camera successfully, but that model is no longer readily available. If I were buying a new cellular camera now, the ZEISS Secacam 3 would be high on my shortlist. It offers 4G transmission, 940nm no-glow infrared, internal storage and multi-network connectivity.
The Secacam 3 was not part of this six-week test, so I am not presenting it as a tested winner. It belongs in a different category. Before buying, I would calculate the full cost of the camera, transmission plan and power supply rather than looking only at the unit purchase price. They are more costly but offer a truly hands off solution for sensitive sites where disturbance must be kept to a minimum.
Explore More Wildlife monitoring and Fieldcraft
Choosing the camera is only the first decision. The more interesting work begins when you use tracks, paths, feeding signs and landscape features to predict where an animal will pass.
If you want more equipment comparisons and practical camera advice, visit the Wildlife Photography and Gear Guides hub. If you want to become better at choosing the site itself, continue to the Tracks Signs and Wildlife Detective Work hub.
How I Tested the Three Budget Trail Cameras
I wanted a test that reflected how people actually use inexpensive wildlife cameras without pretending it was a laboratory experiment.
The CEYOMUR CY65, WOLFANG WT01 and iZEEKER iG200 were each deployed for 14 days at the same rabbit-warren site. They ran sequentially over six weeks. Every camera used the same tripod position, the same direction of view and broadly comparable video settings.
The site I chose is regularly used by rabbits, foxes, badgers, deer, squirrels and rodents, with occasional visits from stoats and polecats. It was active enough to expose differences in triggering, infrared coverage and storage, but wildlife never follows a test schedule :-) Because the cameras were not operating simultaneously, I cannot make frame-for-frame claims. One model did not record the same fox at the same distance under identical weather. Light, temperature, vegetation and the speed of each animal varied between deployments.
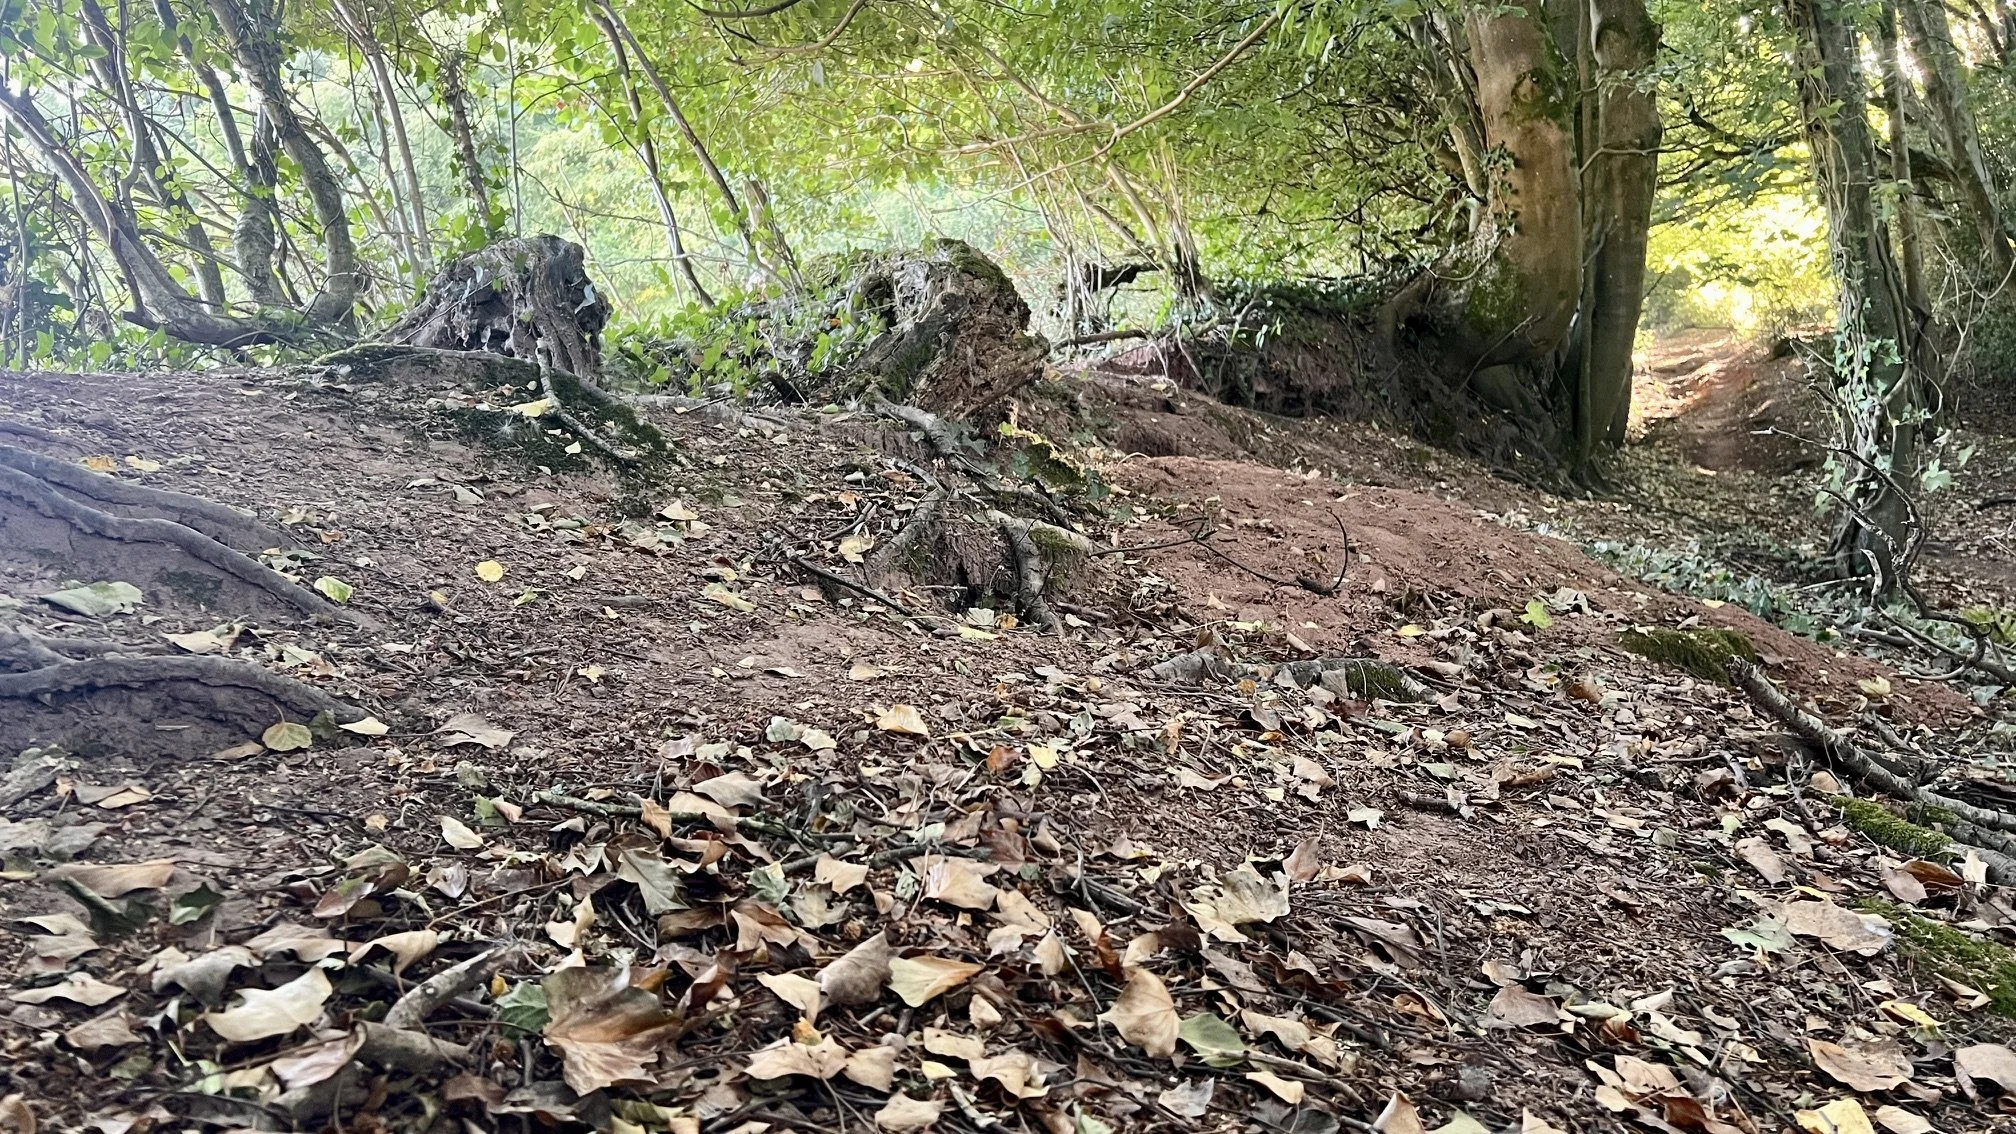
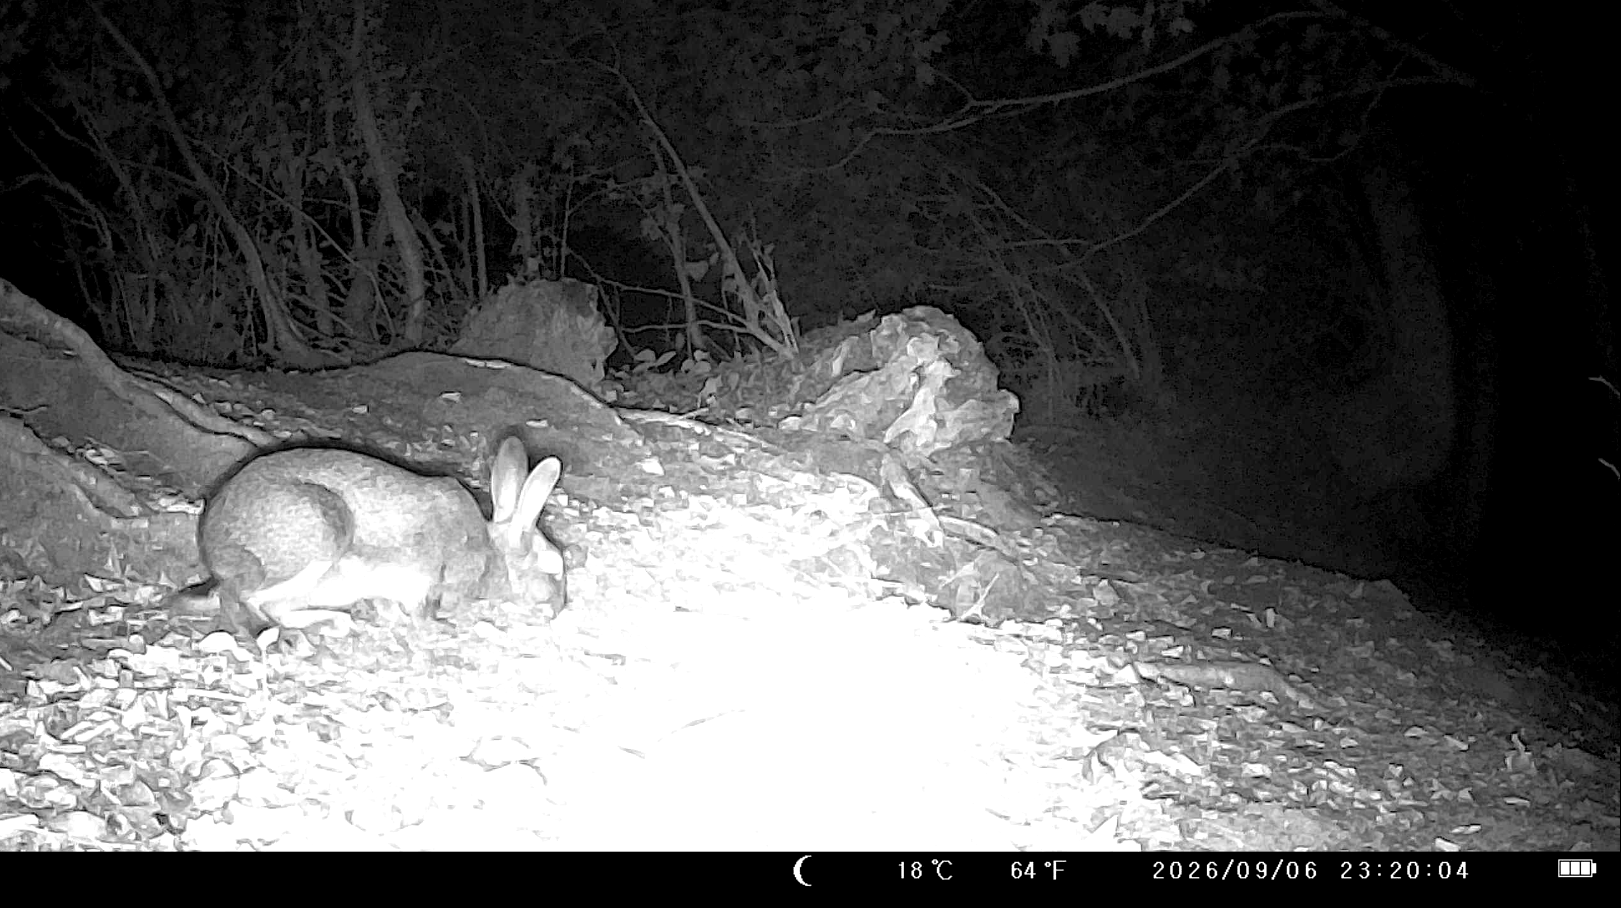
Each camera was mounted in this position and aimed at the same area. The deployments were sequential, so the animals and conditions were different each time, but operating conditions were similar.
What I could compare was how each camera behaved over a meaningful two-week period. I looked at the animal's position when recording began, the proportion of assessed encounters starting late or only partly captured by the camera, daylight detail, infrared coverage, close-range exposure, file size, storage retention and whether the footage helped me interpret behaviour. The CY65's 5.3% rate was substantially below the WOLFANG's 14.6% and the iZEEKER's 20.4%, although sequential deployments cannot isolate camera performance from differences in the passing wildlife.
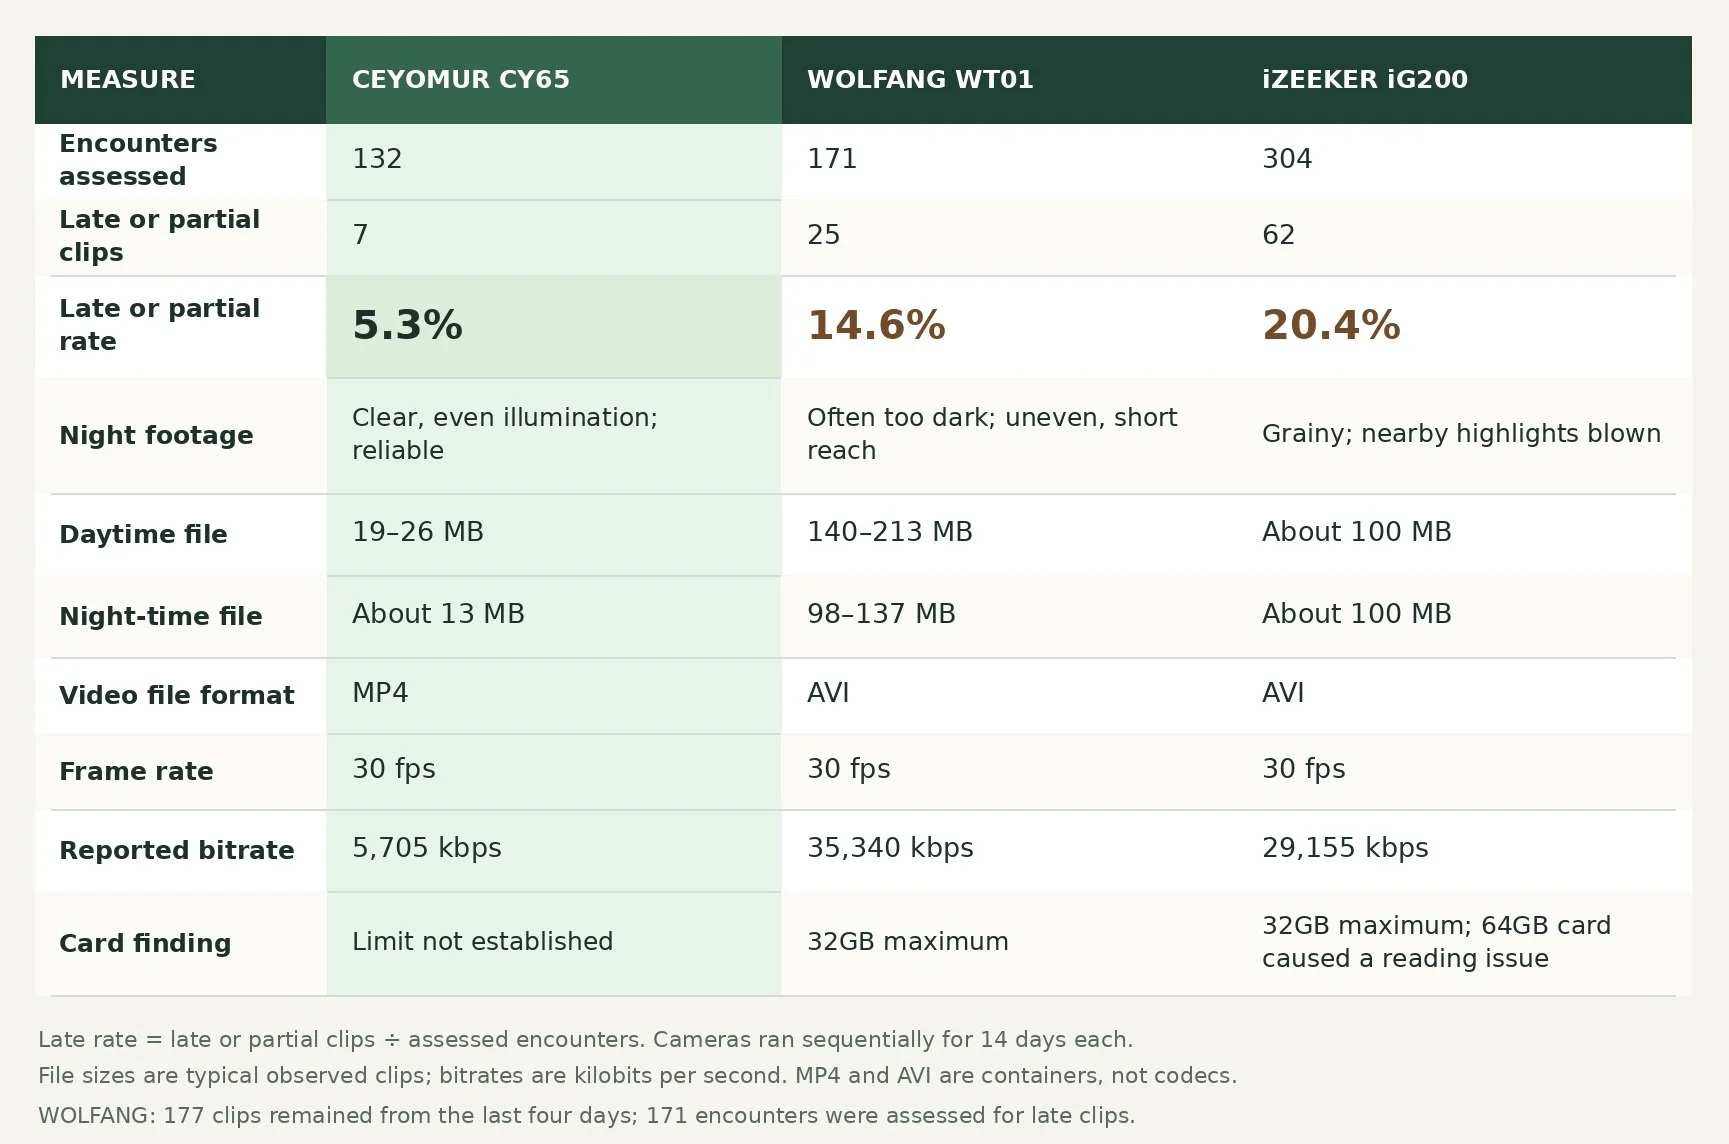
Each camera spent 14 days at the same wildlife site, tested one after another. The CEYOMUR CY65 had the lowest rate of late or partial clips and produced much smaller video files than the other two.
Blank clips need cautious treatment. Vegetation, a heat source outside the visible frame or an animal skirting the detection zone can all activate a PIR sensor. A completely empty recording does not prove the camera was slow. An animal already disappearing from the frame is much stronger evidence.
I am also looking for more than a clean portrait. A useful monitoring clip might show an animal pausing before a gap, changing direction, carrying food or reacting to something outside the frame. Those few seconds can reveal route choice and behaviour. A technically sharper clip that begins after the decision has already been made may tell me less.
How to Choose the Best Trail Camera for Wildlife
Trail-camera listings make the category look more technical than it needs to be. Once I strip away the inflated megapixel figures and optimistic battery claims, I judge a camera in a fairly simple order.
First, will it record the beginning of the encounter? Second, can I see useful detail rather than a silhouette or a white blur? Third, will the power and storage last until I return? Only after those questions are answered do Wi-Fi, solar panels and apps become interesting.
That order prevents an attractive extra feature from distracting you from a weak camera.
Trigger response matters more than the advertised number
Manufacturers often quote trigger times of 0.1 to 0.3 seconds. Treat those figures as a starting point, not proof.
The result in the field depends on the width and shape of the PIR detection zone, the camera's wake-up time, how quickly video begins after detection and the direction in which the animal moves. A fox approaching the camera may remain in view for several seconds. The same fox crossing two metres in front of it may be gone before a slow unit begins recording.
When comparing sample footage, look at the first usable frame. Is the animal entering, centred or leaving? Over several clips, that tells you more than the figure printed on the box.
Night illumination needs reach and control
Infrared wavelength affects how a trail camera behaves after dark. An 850nm low-glow system normally provides stronger illumination and greater range, but the LEDs can produce a faint visible red glow. A 940nm no-glow system is less conspicuous but usually gives the sensor less infrared light to work with.
The CEYOMUR CY65 uses 36 850nm LEDs. Both the WOLFANG and iZEEKER use 36 940nm LEDs. That partly explains why the CEYOMUR illuminated the site more strongly. It does not explain the whole result. The WOLFANG controlled its night exposure better than the iZEEKER despite having the same stated LED count and wavelength.
Score brightness and concealment separately. The brightest camera is not automatically the most discreet, and a no-glow label does not guarantee useful night footage.
File size and card capacity determine the real deployment length
Resolution tells you little about how long a camera can remain in the field. You also need the recording bitrate, clip length, trigger frequency and maximum supported card size.
This was the WOLFANG WT01's decisive weakness. In the observed clips, daytime files were typically 140–213MB and night-time files 98–137MB, yet the camera accepts cards only up to 32GB. A nominal 32GB card could therefore hold roughly 150–325 clips of those sizes before the card was full (depending on the day/night mix). That is a capacity estimate, not a prediction of how many days any particular site will yield.
When I collected the camera after 14 days, it contained 177 clips, all recorded during the final four days. I assessed 171 usable encounters for the late-clip comparison. Cyclic recording had been enabled, so all older footage had been overwritten, and the camera retained only the final four days of this two-week deployment. That is inadequate if you need a complete survey record, whatever combination of cyclic overwriting and wildlife activity produced it.
For a fixed survey period, I normally prefer cyclic recording switched off. A full card that stops is obvious. A card that quietly discards ten days of evidence is much easier to misunderstand. But none the less, a camera that will will record for less than a week at its highest resolution is not what I need.
This is why I now treat storage efficiency as part of camera performance rather than an administrative detail. A camera cannot help me interpret an encounter it has already deleted.
Megapixels and 4K labels are poor measures of useful quality
A 48MP still image is irrelevant if the camera wakes after the animal has crossed the frame. A huge 4K file is wasteful if it contains more noise rather than more useful detail.
The WOLFANG's reported bitrate was 35,340 kbps, against 5,705 kbps for the CY65, yet its footage was not cleaner. The iZEEKER was reported at 29,155 kbps and its roughly 100MB clips did not rescue its weak night illumination. Bitrate and file size depend on settings, scene and clip duration, so this is a comparison of the files I collected, not proof that one codec is inherently more efficient. All the cameras I field tested were set how I use a camera in the field, highest resolution, 30 second video clip length, high PIR sensitivity, with maximum LED illumination.
Judge the detail you can actually use: fur pattern, body shape, direction of travel, behaviour and enough background context to understand the encounter.
Power consumption changes with the work you ask the camera to do
Battery life depends on temperature, battery chemistry, night-time infrared use, the number and length of recordings, Wi-Fi activity and cellular transmission. A quiet camera taking a few photographs can run far longer than one filming thirty-second night videos beside an active warren.
Solar assistance is useful when it replaces some of the energy used each day. It is much less useful beneath dense canopy or during a run of dark winter weather. A rechargeable battery with AA backup, as used by the CY75, gives a more resilient system than a small solar panel working alone.
Local Wi-Fi and 4G solve different problems
Most Wi-Fi trail cameras create their own short-range connection. You stand nearby, connect with a phone and inspect or download files. That can reduce handling, but it does not allow you to check a camera from home.
A 4G camera uses the mobile network to transmit images or information remotely. It costs more, requires coverage, consumes more power and normally involves a data charge. Buy it when avoiding journeys or disturbance has enough value to justify those costs.
Detection angle can be too wide as well as too narrow
A wide detection zone sounds attractive, but side sensors can trigger the camera before an animal reaches the composition you intended. They can also react to moving vegetation beyond the camera's visible centre.
The CY75 allows its side PIR sensors to be switched off, changing the detection coverage from a stated 120 degrees to a narrower 60 degrees. That flexibility is useful. On a defined trail, I often prefer a predictable central zone to the widest possible detection area.
Weather sealing does not remove the need for careful setup
All three budget cameras are sold as IP66 weather resistant. That does not mean I ignore orientation, seals or condensation risk. I check that the card and battery doors are properly closed, avoid pointing the lens into persistent driving rain, and use fresh batteries from the same set. I also format the card in the camera before deployment. Small setup errors account for a surprising number of supposed camera failures.
How to test a trail camera before leaving it for two weeks
I never trust a new camera simply because the menu works indoors.
First, format the supported card in the camera. Then walk through the detection zone at different speeds and distances, approaching head-on and crossing from both directions. Review the beginning of every clip. Check the night exposure with a person or object at the distance wildlife is likely to pass.
Finally, calculate storage. Record several clips using the intended settings, find their average file size and divide the usable card capacity by that figure. It takes ten minutes and can prevent an entire deployment being overwritten.
The Best Trail Cameras for UK Wildlife in 2026
Best budget performer in my field test was the CEYOMUR CY65 (but buy the CEYOMUR CY75)
Good: The CY65 produced the crispest daylight recordings, the strongest and most even night illumination, and the best apparent trigger performance in this test. Its local Wi-Fi and Bluetooth add useful convenience without making operation complicated.
Compromise: The 850nm LEDs may show a faint red glow, and the exact 4K 40MP version is frequently unavailable. Check the listing carefully because product specifications can change while the model name remains similar. The CY65 is really hard to get hold off so I suggest upgrading to the CY75. For less than £20 extra you get Solar and WiFi capability.
Buy it if: You want the best-performing low-cost camera from this test and can find the correct version in stock.
If you can find the tested version at a sensible low price, this is the strongest of the three budget cameras.
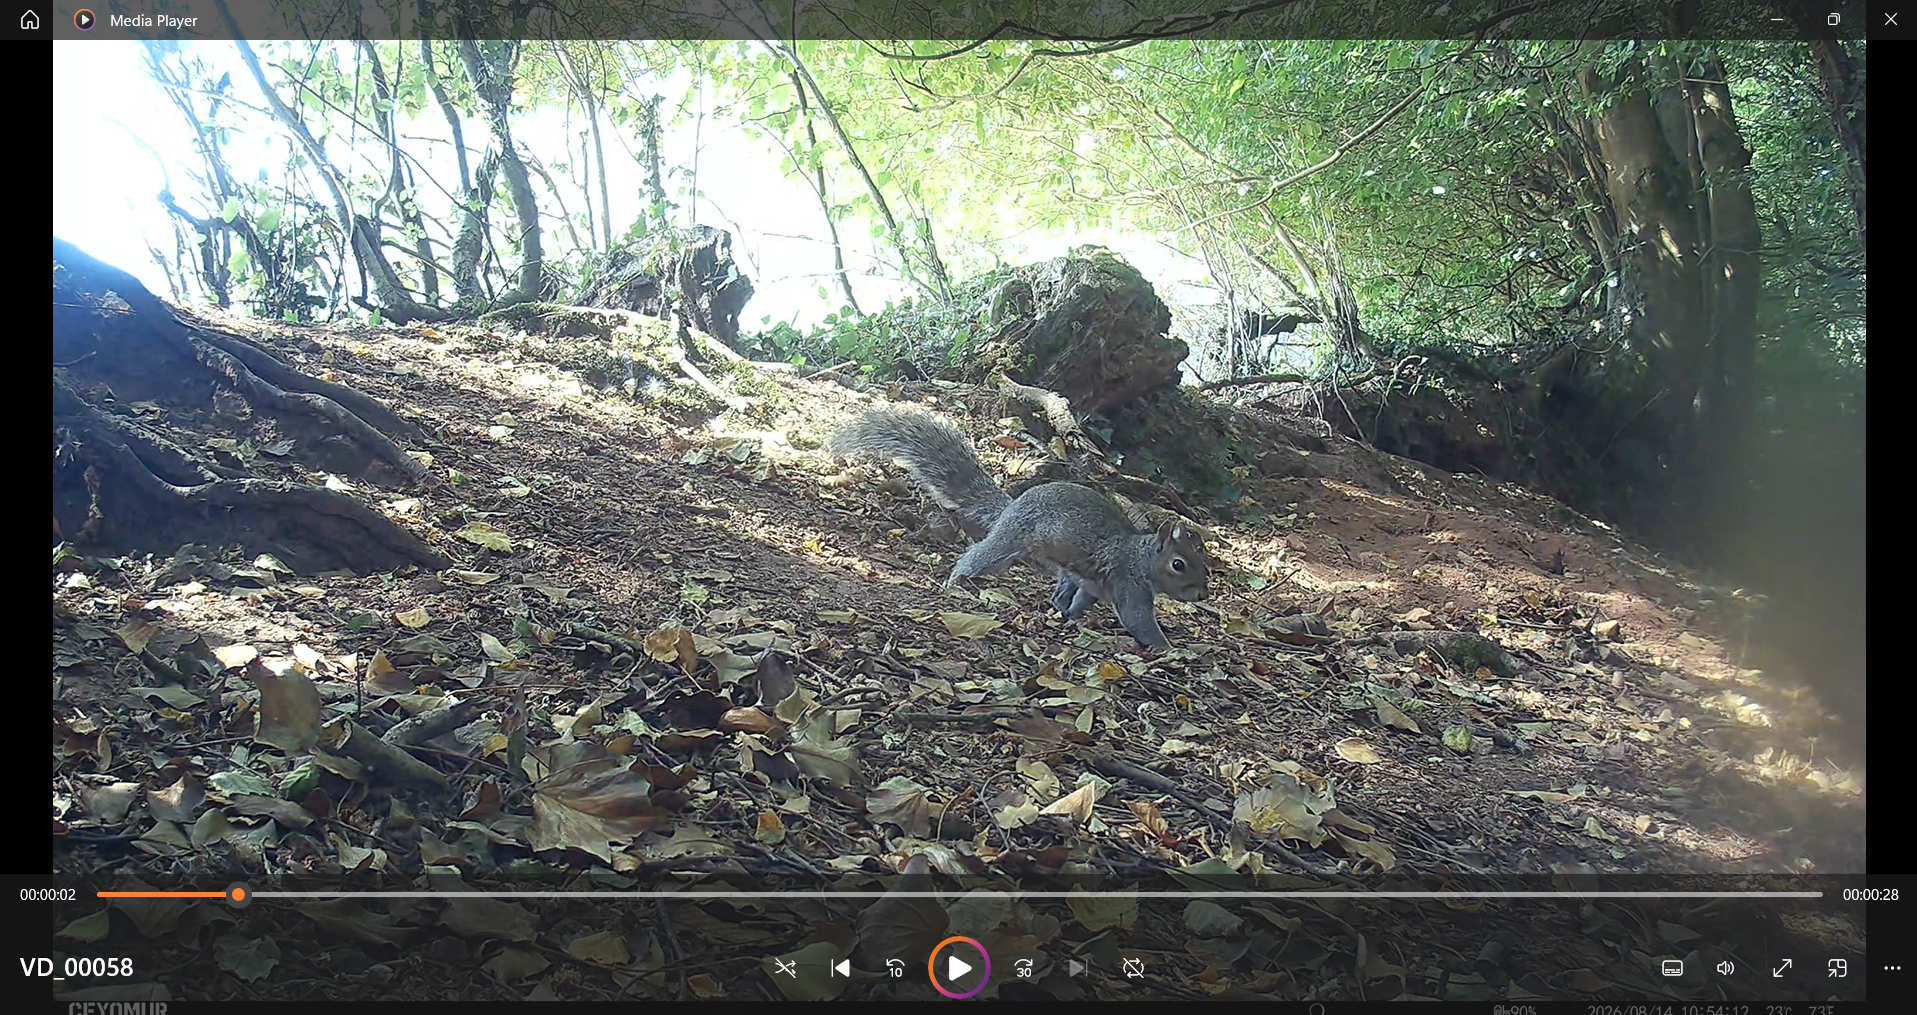
Best practical purchase is the CEYOMUR CY75
Good: Reliable and quick triggering, strong stills and video, efficient storage, a 5,200mAh rechargeable battery, solar assistance, AA backup, local Wi-Fi 6 and a supplied 64GB card. My recommendation is supported by long-term use and separate comparisons with iZEEKER and GardePro cameras with a similar published specification.
Compromise: It costs more than the basic models, the 850nm LEDs are not completely invisible, and Wi-Fi works only when you are near the camera. Solar performance depends on the site and season.
Buy it if: You want one camera that can handle routine garden, woodland and field-edge monitoring without immediately wishing you had bought more storage, easier checking or a better power system. Really good for the money!
For most buyers, the Ceyomur CY75 is where I would spend my money.
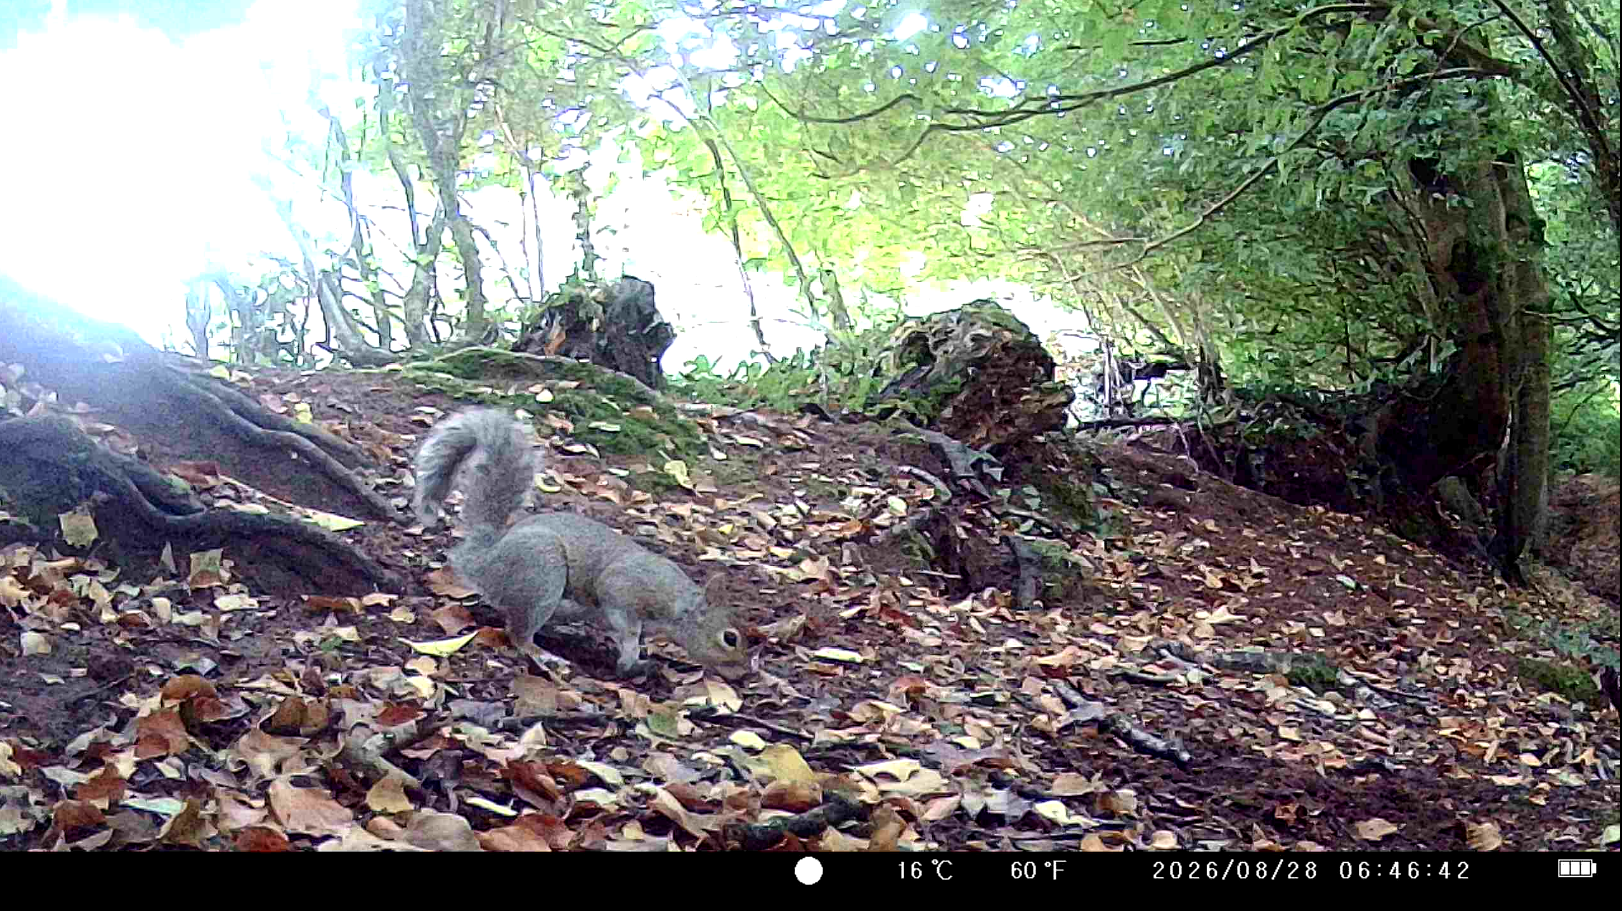
Second in the field test was the WOLFANG WT01
Good: Straightforward operation and dependable recording in the field. Its 940nm LEDs are discreet where a visible infrared glow is undesirable.
Compromise: Daylight footage was noisier than the CEYOMUR's, 25 of 171 assessed encounters were late or partial (14.6%), and night footage was often too dark with patchy, short-range illumination. Large files and the 32GB card limit coincided with only the last four days' clips remaining at this site.
Buy it if: Your site is quiet, the deployment is short and you value no-glow infrared more than maximum night range or best image quality.
The WT01 makes sense for a quiet location or a short deployment. I would not use it at maximum resolution for a busy two-week survey.
Third place in the field test was the iZEEKER iG200
Good: Simple offline operation, 940nm no-glow illumination and enough performance to establish whether a species used a location.
Compromise: It produced soft night footage and grainy day footage, the highest late or partial rate: 62 of 304 assessed encounters (20.4%). Nearby animals could be badly overexposed while the background remained dark. Its AVI files were typically about 100MB per clip.
Buy it if: You only need to confirm that a species visited, and you are not interested in better image quality or reliable triggering. The iZEEKER iG200 is in my opinion the poorest choice of the 3 field tested cameras.
During the original deployment, the camera displayed about 330 recordings but the 64GB card appeared empty when removed. I recovered 303 clips using recovery software. iZEEKER later explained that the camera was designed for cards no larger than 32GB and supplied a compatible replacement (extra points for customer service). Retests with both a 16GB and a 32GB card did not repeat the corruption. I therefore do not count the incident as proof that the camera itself is unreliable. The unsupported card was a material factor. Its poorer triggering and night footage remain valid reasons for placing it third though.
Cellular camera to consider: ZEISS Secacam 3
Good: Genuine remote monitoring, 940nm no-glow infrared, internal storage and multi-network cellular connectivity from an established camera and app system.
Compromise: Higher initial cost, ongoing transmission charges, dependence on mobile coverage and greater power demand. I have not included it in the controlled budget test.
Buy it if: Avoiding repeat visits is worth paying for and the site has reliable cellular coverage.
For remote monitoring, I would treat solar or external power as part of the system rather than an optional extra. You can find the camera here.
What this Field Test Changed My Mind About
I expected three inexpensive cameras with similar headline specifications to produce broadly similar results. They did not.
The largest difference was not whether they detected wildlife. All three did. It was how much of each encounter survived. The CEYOMUR more often recorded an animal entering the scene and gave me enough detail to understand what happened. The iZEEKER was more likely to prove that something had passed without showing the useful beginning. The WOLFANG recorded acceptable footage but could not retain enough of it at its maximum setting.
After a decade of using trail cameras, I should probably have been less surprised. The most valuable cameras in my own monitoring have rarely been those with the most ambitious specifications. They are the ones I can leave alone, retrieve two weeks or four weeks later and trust to have preserved the encounters that mattered.
Where to Place a Trail Camera
Placement will usually change the result more than spending another £50.
I look for evidence of repeated movement: a hedge gap, worn trail, fence crossing, stream edge, latrine route or another natural pinch point. Then I decide what I expect the animal to do and position the camera to test that prediction.
Height, distance, angle, vegetation and direction of travel all affect whether the camera records a complete encounter. I cover those decisions in detail in Eyes in the Woods Mastering the Use of Trail Cameras.
Explore the Fieldcraft and Finding Wildlife hub for choosing promising locations.
Final Thoughts
The CEYOMUR CY65 won this three-camera budget test. It gave me the cleanest footage, the most useful infrared illumination and the best apparent trigger response. Limited availability prevents it from being my uncomplicated recommendation. For most people, I would spend slightly more on the CEYOMUR CY75. It is the camera I trust as a practical all-rounder because I have used it extensively, compared it with credible alternatives and repeatedly found that it works without creating new problems to manage.
Buy the WOLFANG WT01 only if its short retention at maximum resolution fits the job, cost is your main driving factor and image quality is less important. Move to 4G only when remote access solves a real problem.
Then concentrate on the part no product page can do for you. Read the site, predict the route and place the camera where an animal's decision becomes visible.
Frequently Asked Questions About Trail Cameras
What is the best trail camera for wildlife in the UK
The CEYOMUR CY65 produced the best results among the three budget cameras I tested. Because it is frequently unavailable, my practical recommendation is the CEYOMUR CY75, which adds solar-assisted power, a rechargeable battery, local Wi-Fi and a supplied 64GB card.
Are cheap trail cameras any good
Yes, if you need basic species detection and understand their limitations. Cheap cameras vary considerably in trigger response, night exposure, storage efficiency and card support even when their specifications look similar.
Is 850nm or 940nm better for wildlife
An 850nm camera normally provides stronger infrared illumination and greater range, but its LEDs may show a faint red glow. A 940nm camera is less visible but often produces shorter-range or noisier night footage. Choose according to the balance between image quality and concealment required at the site.
Do trail cameras need Wi-Fi
No. A standard trail camera can detect movement and save images or video to an SD card without Wi-Fi or mobile coverage. Local Wi-Fi simply allows nearby checking and downloading through a phone.
Can I view a trail camera from home using Wi-Fi
Usually not. Most Wi-Fi trail cameras create a short-range connection and require you to stand close to the camera. Remote viewing normally requires a 4G cellular model or a security camera connected to an existing network.
How large an SD card does a trail camera need
That depends on file size, clip length and trigger frequency. Check the camera's maximum supported capacity rather than assuming a larger card will work. Record several test clips and calculate how many will fit before beginning a long deployment.
Should cyclic recording be switched on
Use cyclic recording only when keeping the newest footage matters more than preserving the complete deployment. For a fixed wildlife survey, I normally switch it off so the camera stops when full rather than silently deleting the oldest evidence.
How long do trail camera batteries last
There is no reliable single figure. Temperature, battery chemistry, night recording, trigger frequency, clip length, Wi-Fi use and cellular transmission all affect endurance. A camera beside an active warren can consume batteries and storage far faster than one watching a quiet woodland path.
Are solar trail cameras worth buying in Britain
They can be, particularly on open edges, gardens and reasonably exposed sites. Solar contribution will be much lower beneath dense winter canopy. Look for a good internal battery and backup power rather than judging the camera by panel size alone.
What trail camera is best for badgers
Choose a camera with even infrared illumination, controlled close-range exposure and dependable triggering. Solar, local Wi-Fi or 4G can be useful where they reduce repeated visits, but careful placement remains more important than connectivity.
What trail camera is best for foxes
Trigger response matters because travelling foxes often cross the detection zone quickly. Look for real footage showing the animal entering the frame rather than relying entirely on the manufacturer's quoted trigger time.
Related Wildlife Monitoring Guides
Eyes in the Woods Mastering the Use of Trail Cameras for positioning, settings and reducing false triggers.
Watching Badgers at a Wildlife Junction for an example of long-term monitoring built around a specific movement route.
Build a Weasel Cam and Have Your Own Springwatch for a more specialised project aimed at small mustelids.
How Wildlife Uses Paths Rides and Field Edges for learning where repeated animal movement is most likely.