
Eyes in the Woods: Mastering the Use of Trail Cameras
Learn how to set, place, and use trail cameras to uncover the secret lives of British wildlife……..without leaving a trace.
There’s a quiet magic in walking back into the woods, collecting a trail camera you set days before, and discovering what passed unseen. A badger returning to its sett, a tawny owl landing silently on a mossy perch. Equally, using a trail camera in your garden is a great way of monitoring who raids the bird table when you’re in bed. But how do you know “Which is the best low cost trail camera?” or “How to set up a trail camera in my garden?”
Trail cameras give us something rare: the chance to watch without presence. Used well, they extend our fieldcraft, teaching us not only where wildlife moves, but when, and why.
Why Trail Cameras Belong in Every Fieldcraft Kit
Good fieldcraft is about awareness. Knowing when to act, and when to stand back. A well-placed trail camera is the ultimate act of standing back. It gathers knowledge quietly, without scent or sound, showing us how wildlife behaves when we’re not there to influence it.
For photographers, these cameras are reconnaissance tools: they reveal patterns before committing to a dawn hide session. For conservationists and naturalists, they’re long-term recorders of change, helping track species’ return, monitor activity at setts or ponds, and confirm presence through seasons.
But not all trail cameras are equal. The choice between models (and how you use them) will determine what kind of stories you capture.
Understanding Trail Camera Types
There are two broad categories of trail cameras used by naturalists and photographers:
1. All-in-One PIR Cameras
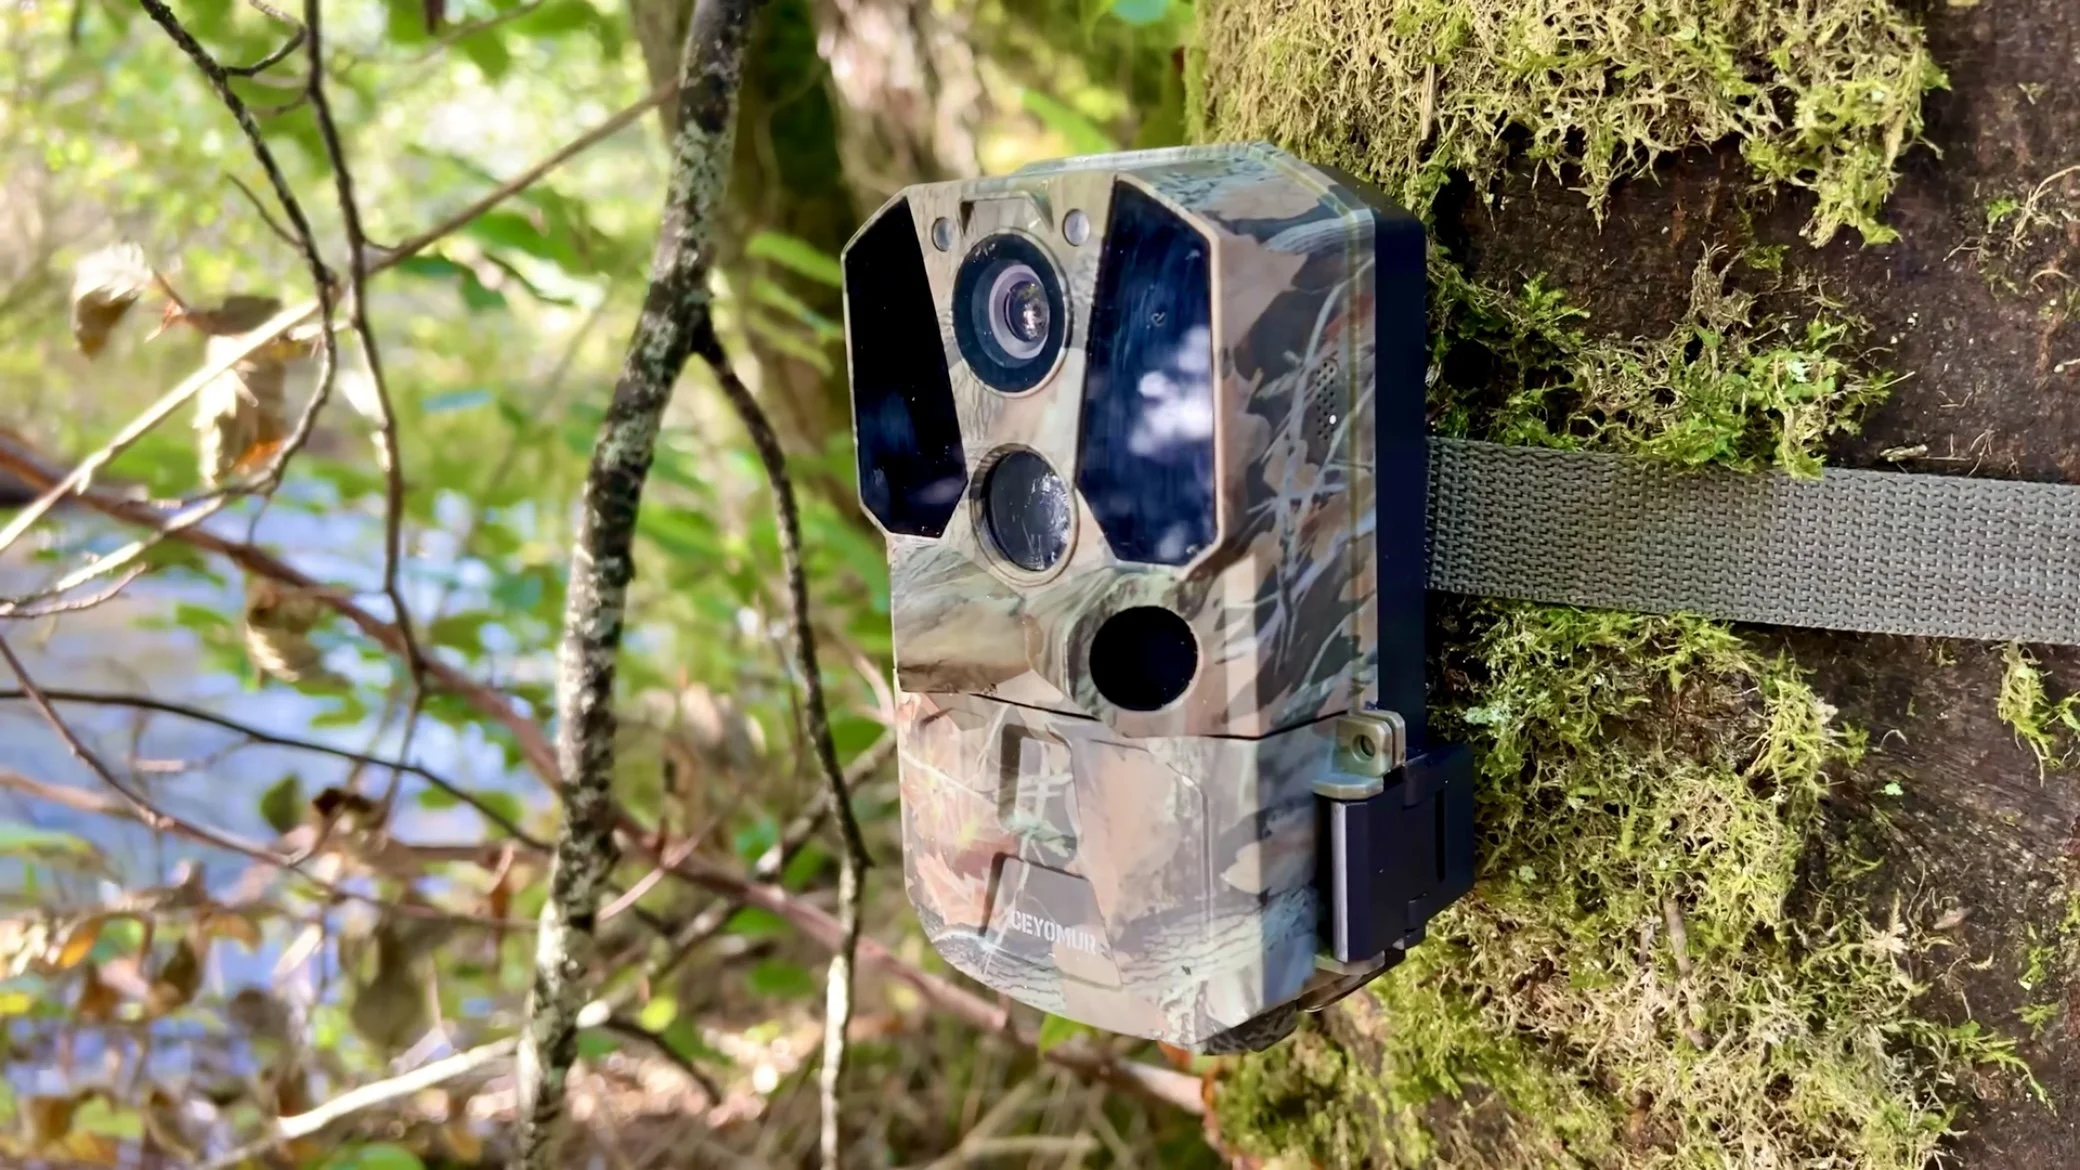
These are the most common type: compact, battery-powered units with an integrated Passive Infrared (PIR) sensor, trigger, and camera all in one weatherproof housing.
How they work:
The PIR detects movement and temperature change in its field of view. When triggered, it activates the shutter and often records a short video or burst of images.
Pros:
Simple, portable, and easy to deploy anywhere.
Require no extra wiring or sensors.
Affordable. Good models range from £50–£150.
Perfect for general wildlife monitoring and scouting photography locations.
Cons:
Trigger range and speed vary widely (0.1s to 1s can mean the difference between a full animal and only a tail!).
Subject detection depends heavily on temperature contrast; can misfire in warm weather or bright sun.
Less control over precise framing — especially for fast-moving animals.
Best for: General observation, pattern tracking, or establishing presence.
Whether you want to see what’s in your garden or monitor a large area with several cameras, relatively low cost trail cameras offer a great solution.
2. Modular “Beam Break” Systems
These systems are designed for photographers who want fine control and high-quality images using DSLR or mirrorless cameras. You can read more about the Camtraptions DSLR system here
How they work:
Instead of a built-in PIR sensor, they use active infrared beam breaks or pressure sensors to trigger a separate camera system. When an animal breaks the beam, the signal fires your camera.
Pros:
Much faster and more precise triggering (milliseconds).
Full creative control over composition, exposure, and lighting.
Can capture professional-quality stills using flash or multiple strobes.
Allows artistic control, perfect for motion freezes or low-light portraits.
Cons:
Requires more setup time, cables, and calibration.
Needs weather protection for cameras and sensors.
More expensive and maintenance-heavy.
Can risk disturbance if checked too often or placed poorly.
Best for: Serious wildlife photographers aiming for publishable stills or artistic night scenes.

A Camtraptions DSLR camera trap. These systems are much more expensive that the “all in one” type PIR trail cameras, but do offer much greater creative control, for example supporting wireless flash.
Features That Matter
Modern trail cameras come with a dizzying list of specifications. But in practice, only a few genuinely affect your results:
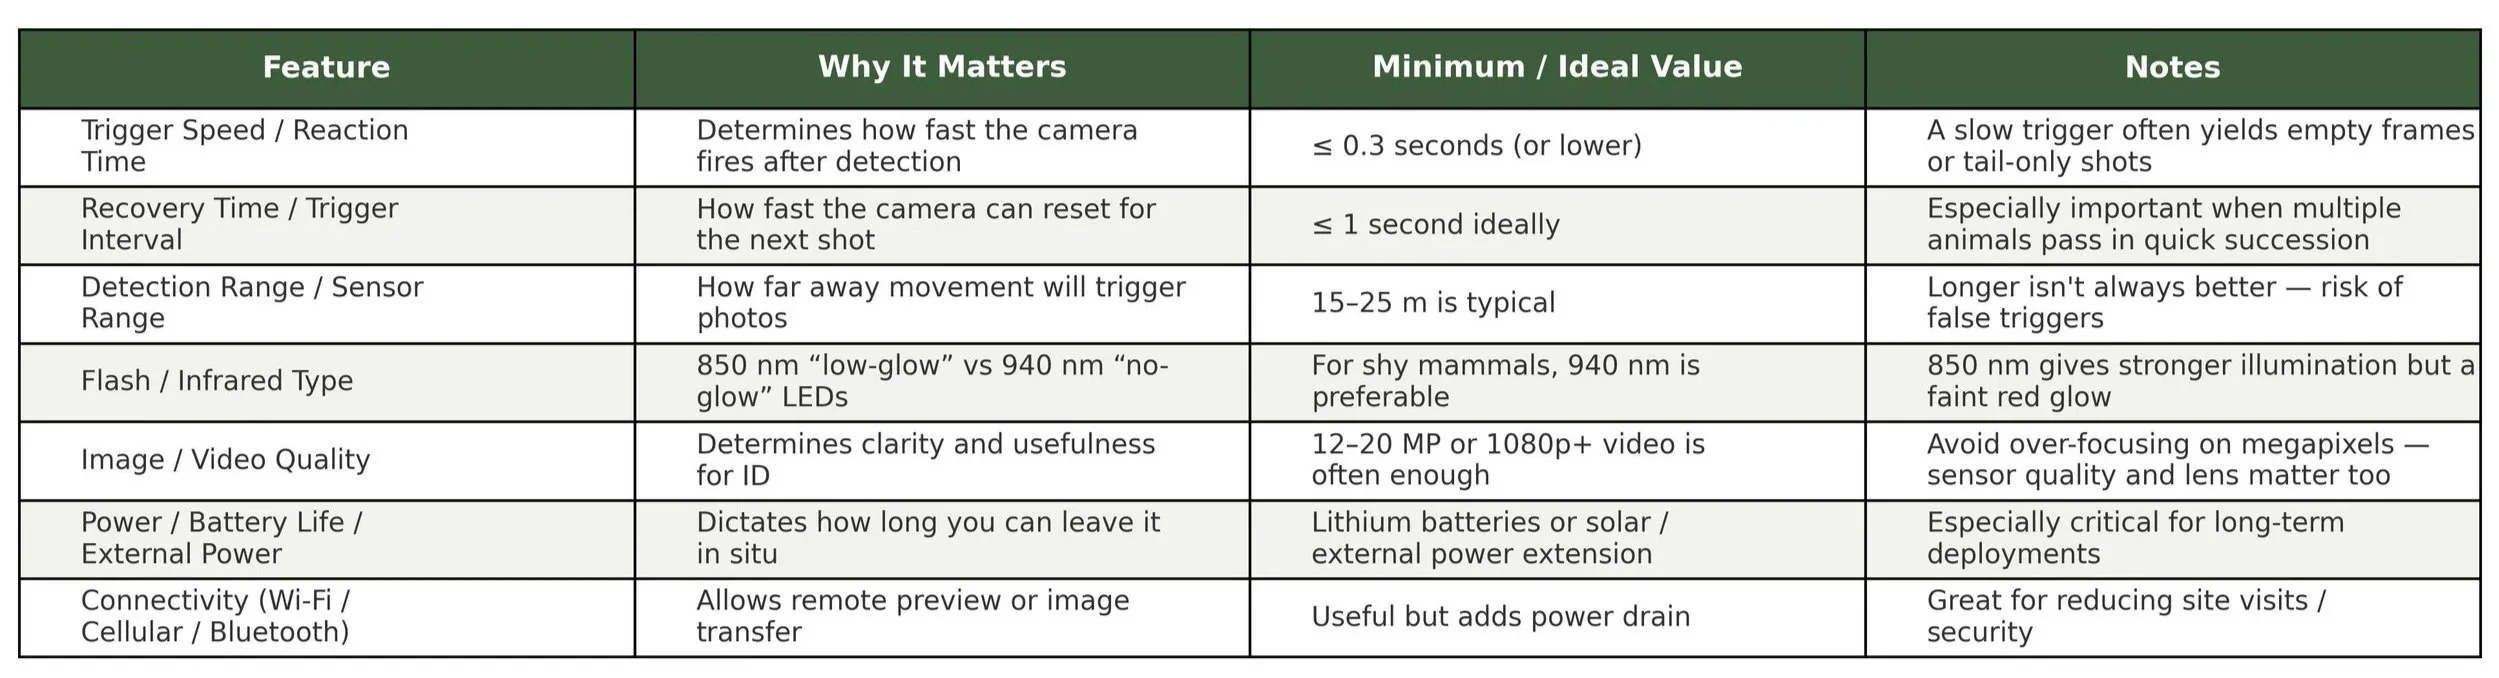
For most fieldworkers, reliability, trigger speed, and power management matter more than megapixels or connectivity. A dependable camera that fires every time will teach you far more than a “smart” model that drops signal or misfires.
Setting Up Your Trail Camera Tips
1. Read the Landscape First
Trail cameras are only as good as your understanding of the ground. Start by walking slowly through your chosen site. Look for runs, scuffed leaves, latrines, or repeated paw prints. If your not sure what to look for try our Fieldcraft for Photographers blog, our blog on reading feeding signs and our blog on Otter tracks
2. Mount with Care
Fix your camera solidly, at animal head height (see below), slightly angled down. Use a tree, post, or small tripod. Mask edges with natural cover like moss or bark, but never block the lens or sensor.
3. Frame with Intent
Imagine the animal entering the frame. Is it moving left to right? Up a slope? Think like a cinematographer — where will it emerge and exit? Place the sensor to catch that line of travel.
4. Check Light and Background
Avoid pointing directly into sunrise or sunset (it confuses PIR sensors). A dark backdrop helps your subject stand out, and east- or north-facing setups reduce glare.
5. Secure Your Kit
Lock your camera or conceal it well. Metal security boxes, python locks, or natural camouflage can save heartache. Always note GPS or a simple landmark map so you can relocate it.
Setting for Different UK Species
The way you set up a trail camera depends entirely on your target species. Here are real-world examples:
Badgers
Location: Along badger paths between sett and feeding areas. Look for well-worn tracks and latrines.
Height: 25–30 cm off the ground.
Angle: Across the path, slightly downwards.
Timing: Night-time capture. Set video length to 15–20 seconds to record behaviour.
Consideration: Badgers are unfazed by trail cameras, but avoid blocking paths or placing cameras too close to sett entrances.
Otters
Location: Riverbanks near holts, slides, or sprainting sites.
Height: 20–30 cm, level with the bank.
Angle: Slightly downstream and across the water’s edge.
Timing: Any time of day, though early morning and evening are most productive.
Consideration: Keep cameras well back from the water’s edge to avoid flooding and to prevent interference with natural movement.
Mounting on a tree or post with a slight downward angle works well.
Legal & Ethical Note:
Otters are a European Protected Species under UK law. It is illegal to disturb otters, their holts, or resting places without a licence.
You must never place a trail camera directly at a holt entrance, sprainting rock, or resting site, and you should avoid approaching too closely in a way that might cause disturbance.
If you suspect otters are present, set cameras up at a distance, focusing on approach trails or feeding areas rather than the holt itself.
Extreme care should be taken to ensure your presence (and your equipment) does not alter the otter’s behaviour in any way.
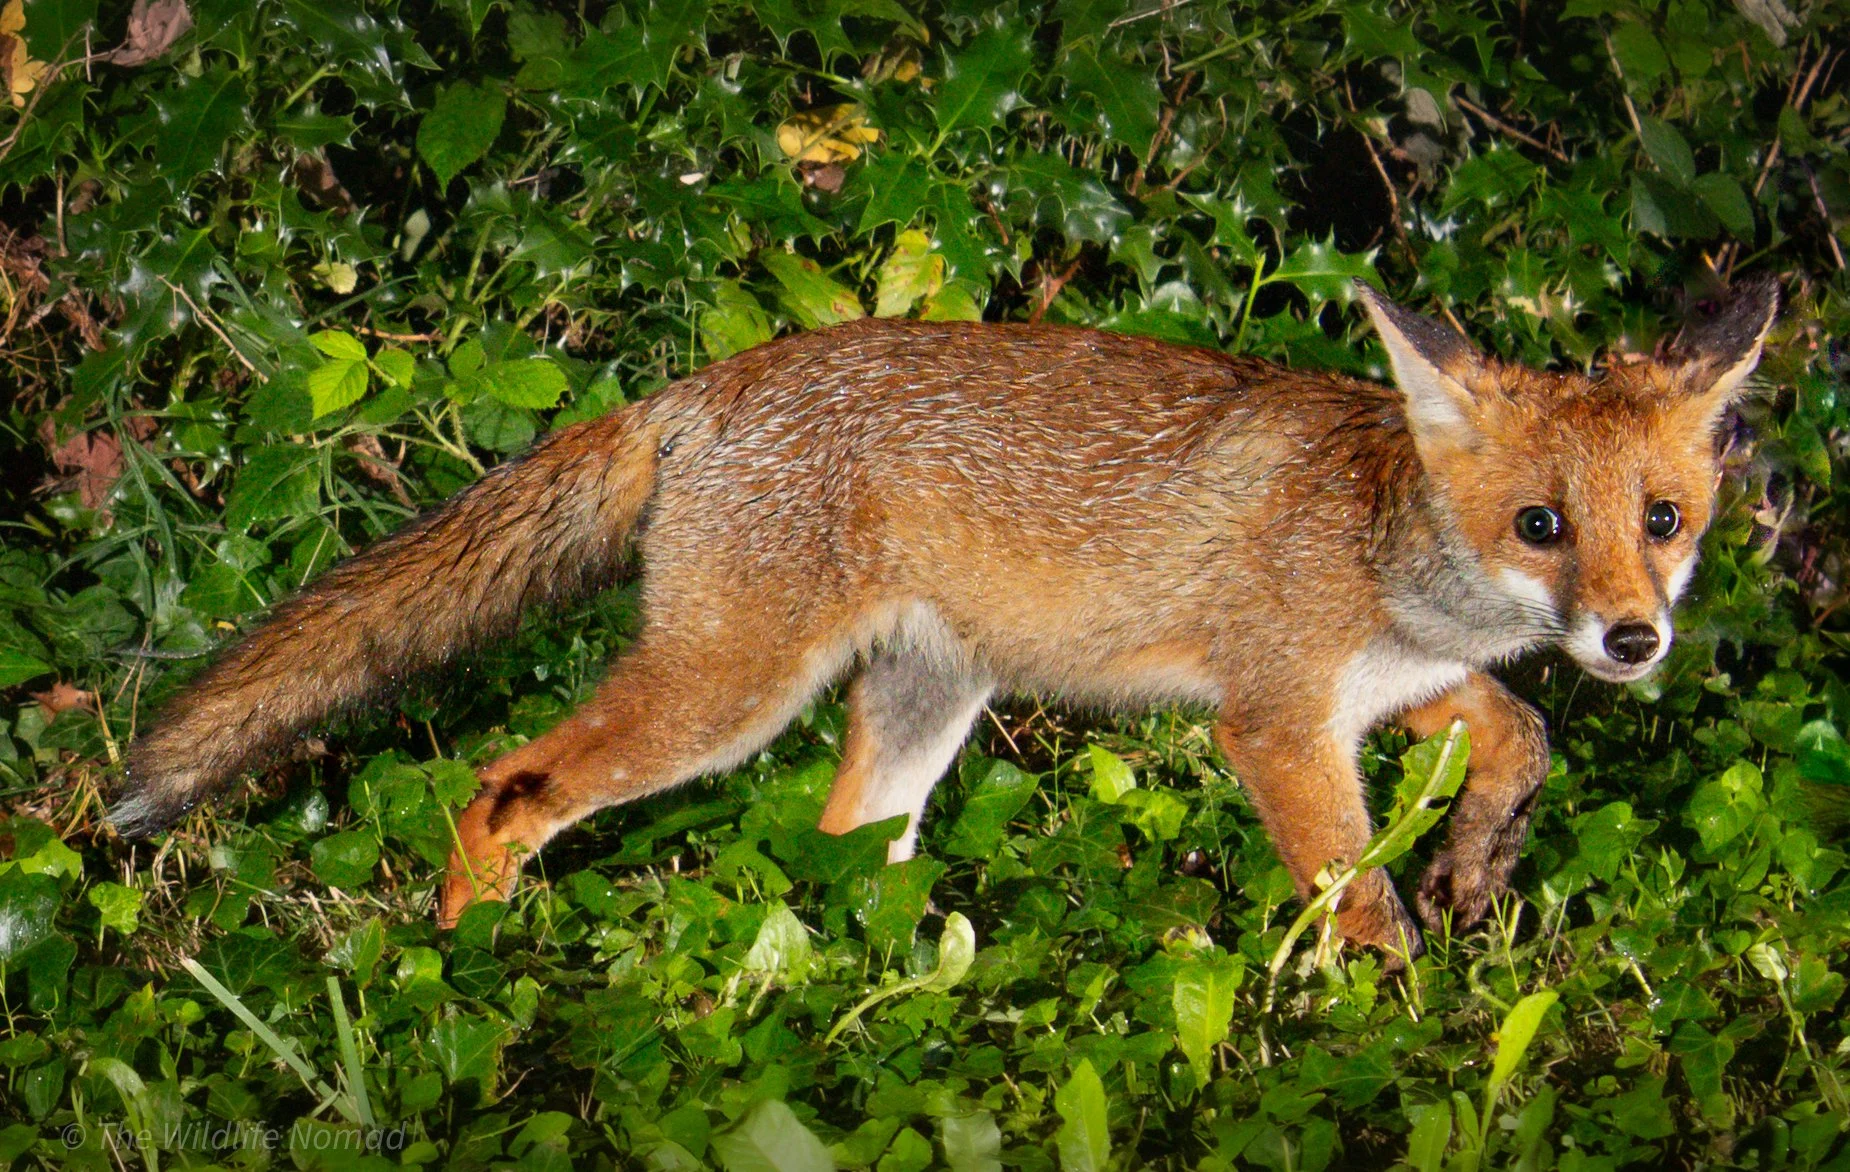
Foxes
Location: Gateways, hedgerow gaps, or field edges.
Height: 25–35 cm.
Angle: Across the line of travel.
Timing: Mostly nocturnal, but also active at dawn and dusk.
Consideration: Foxes can be wary of new objects. Leave the camera in place for a few nights before expecting good footage.
Deer
Location: Woodland rides, deer trails, or feeding clearings.
Height: 50–80 cm depending on species (muntjac vs. red deer).
Angle: Across the trail at a slight downward tilt.
Timing: Early morning and evening are peak movement times.
Consideration: Deer are sensitive to scent. Wear gloves when handling the camera and avoid brushing against vegetation nearby.
Stoats and Weasels
Location: Along stone walls, hedgerows, or near rabbit warrens.
Height: 10–15 cm for weasels, up to 20 cm for stoats.
Angle: Very low and slightly angled to the trail.
Timing: Daytime and crepuscular activity.
Consideration: These species move quickly, use the shortest possible trigger interval to capture multiple clips.
How Long to Leave a Camera in Place
That depends on your goal and the species you hope to record:
Scouting or Species Presence: 3–5 days may be enough to confirm activity if it is a common visitor like a squirrel to a bird feeder. However for subjects like Otters who have much bigger territories you might want to leave the camera out for several weeks.
Behavioural Monitoring: I would suggest you leave for at least 4 weeks to capture patterns over lunar or feeding cycles.
Long-term Study (e.g. setts, dens, waterholes): 1–3 months with solar power or large battery packs.
The key is consistency. Frequent visits introduce scent and risk disturbance. Leave the woods to do the watching. When you do return, approach quietly, as if animals might still be present.
If you can, have more than 1 camera and rotate cameras across your site: while one records, another is with you for downloading and any maintenance or glass cleaning. This rotation builds a non-intrusive rhythm and gives you near-continuous data without over pressuring one area.
Common Mistakes to Avoid
Mounting too high (most animals move at knee height).
Leaving too much foliage in front (false triggers galore).
Not checking the angle (many cameras tilt upward after rain).
Forgetting date/time stamps (critical for behaviour analysis).
Visiting daily “just to check.” Patience, always patience.

Even with an expensive Camtraptions system it’s very easy to misjudge the height the camera should be set at, as demonstrated by this photo I captured of a Tawny Owls feet (and just his feet)!
Interpreting What You Find
Trail cameras don’t just collect clips, they collect lessons.
Watch not only for the animal but for context:
Time of appearance (what hour of night?)
Weather patterns (movement before storms or rain?)
Direction of travel (revealing routes and territories).
Interaction between species
What can you hear in the clips (are there other animals off screen)?
Those observations form the foundation of your fieldcraft, guiding when to set up hides, where to position lenses, and how to predict behaviour.
Ethical and Legal Considerations
Always ensure you have permission to place a camera. Avoid active nests, roosts, or setts unless licensed. Never bait or manipulate animals for footage, and think carefully before sharing exact locations online, particularly for species vulnerable to persecution like badgers or raptors.
Good fieldcraft means leaving no trace…….even electronically!
Choosing the Right Tool for the Job
If you’re starting out, a reliable PIR model like the Ceyomur CY95 or Browning Recon Force is more than enough. Look for:
Trigger speed under 0.3s
I prefer 4K video (it looks better on your webpage or YouTube)
Solar charging if possible
WiFi for easy and low impact setting and checking
940nm no-glow IR (ideally) or low glow IR.
If you’re a photographer chasing creative shots, Camtraptions or Cognisys modular triggers will take you further, letting you use your DSLR or mirrorless camera for pro-level stills, complete with flash or multiple sensors.
Both types can complement each other: the PIR camera scouts; the beam-break rig captures the masterpiece.
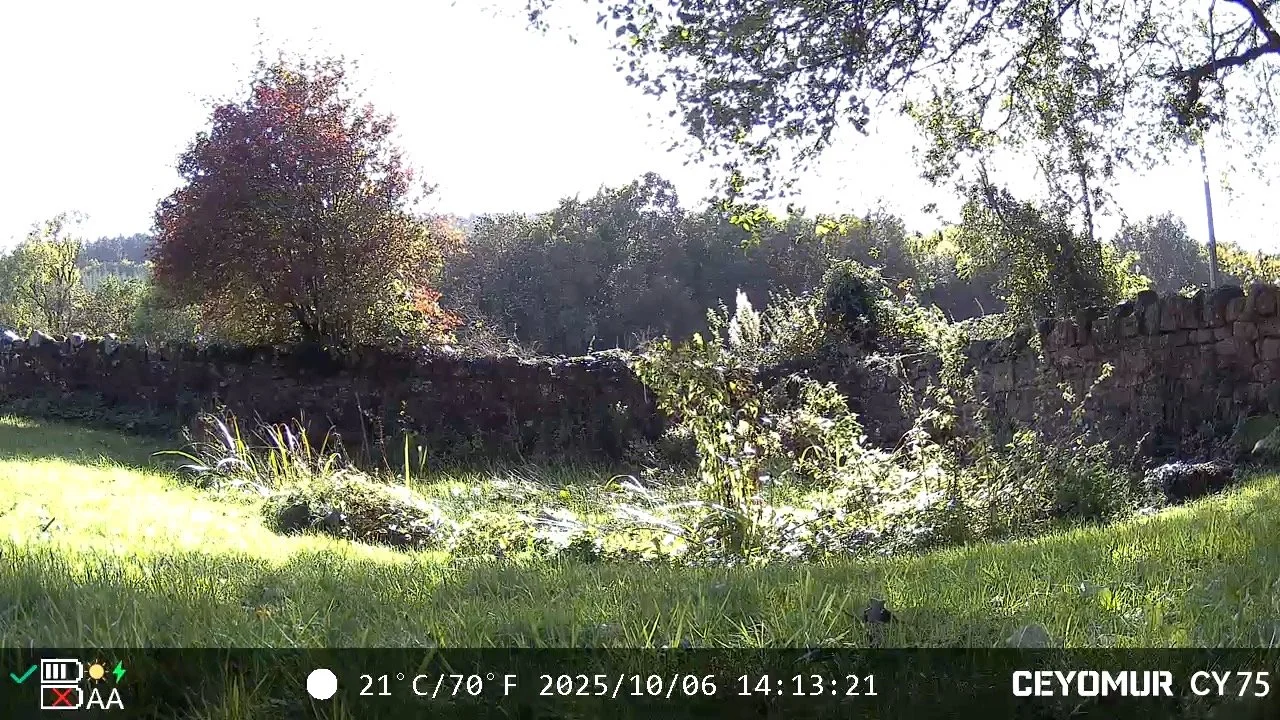
Filmed on a Ceyomur CY75 camera.
Closing Thoughts
Trail cameras teach patience better than any field manual. They remind us that wildlife moves to its own rhythm, often when we’re asleep or elsewhere entirely. Every frame they record is a quiet conversation between time, place, and presence.
So the next time you walk your local patch, leave a camera to keep watch. Let the forest write its own story, one frame at a time.
Watch. Wait. Protect.
Recommended Trail Camera
For general wildlife monitoring I highly recommend the Ceyomur CY75 trail cameras, which have a very good spec and are very good value at Amazon: https://amzn.to/3WvbsXi
—————————————————————-
FAQ: Trail Cameras for Wildlife Monitoring & Filming
What is a trail camera (camera trap) and how does it work?
A trail camera, also called a camera trap, is a weatherproof motion- or beam-triggered camera designed to photograph or film wildlife without a human present. Most models use a PIR (passive infrared) sensor that detects changes in heat and motion. When an animal crosses the sensor zone, the camera triggers a sequence of stills or video. Others use beam-break or pressure sensors to fire external cameras with more precision.
Which type of trail camera is better: PIR all-in-one or beam-break modular?
There’s no one “best” answer, it depends on your goal:
PIR all-in-one cameras are compact, easier to deploy, and less fiddly. They’re excellent for general monitoring, presence surveys, or scouting.
Beam-break / modular systems (e.g. Camtraptions style) let you use a DSLR or mirrorless camera under your control, with millisecond triggers and custom lighting setups. You sacrifice simplicity for precision.
Many wildlife photographers use both: PIR units for broad coverage, beam-break rigs at high-interest runs for that perfect still.
Are trail cameras legal? Can I use them everywhere?
Regulations vary by country, region, and landowner. Some general rules:
Always get permission from landowners.
Avoid placing cameras at dens, nests, or sensitive roosts unless you’re licensed to do so.
Never bait or manipulate wildlife to induce photos.
Be cautious about sharing location data for sensitive species, you may risk disturbance or illicit access.
In public areas (like many parks), cameras may be permitted, but check local wildlife or forestry authorities first. Alos consider the security of your equipment.
Will infrared or LED flash scare animals or affect behaviour?
Generally, no, if you choose the right settings. Modern no-glow (940 nm) models emit no visible light and are largely undetectable to many mammals. Low-glow (850 nm) models emit a faint red flash, which may be visible but often ignored by many species.
Still, for highly secretive or light-shy animals, go no-glow and place your camera carefully, not at prime crossing paths, avoid lighting reflections, and give animals space.
Can I monitor wildlife remotely via Wi-Fi or cellular trail cameras?
Yes, both“trail camera with WiFi” and “4G cellular camera traps” are available. These models send you images (or alerts) remotely, which can reduce site visits and risk. The trade-off: they consume more power, cost more, and may need stronger signal coverage. Use them when your site is accessible electronically or when you want to minimise disturbance.
How do I organise and analyse large numbers of trail-camera images?
It’s a common headache. Some tips:
Use consistent file naming (site code, date, time).
Flag blank or false trigger frames first, then review likely wildlife images.
Use software or machine learning tools (e.g. AI classifiers) to triage and detect images with animals.
Record metadata (moon phase, weather, temperature) to help detect patterns.
Treat “no image” frames as data — absence of detection can indicate behaviour or seasonal change.
Researchers and communities around the globe use camera-trap studies as systematic monitoring tools.