
Fieldcraft Friday: Part 2 - Fieldcraft and Ethical Wildlife Photography
In the first part of this series, we explored the importance of slowing down and thinking before stepping into the field. Now let’s tackle the question every wildlife photographer wrestles with: where do I go to find animals?
The truth is, wildlife doesn’t spread evenly across the land. Animals concentrate where food, shelter, and safe movement overlap. One of the best ways to predict these hotspots is by looking at transition zones, also known as ecotones.
Why Ecotones Matter
An ecotone is the edge where two habitats meet: the woodland fringe against farmland, the reedbed spilling into open water, or the scrubby hedge that cuts across pasture. These places act as ecological crossroads, offering cover, feeding opportunities, and vantage points all within a few steps.
For a fox, roe deer, or heron, that’s a safe and efficient living space. For us, it’s where the stage is set. If you’re going to find wildlife, this is often where it will appear first.
Adding in the Mnemonics
Of course, not every hedge, reedbed, or woodland edge will deliver. To narrow down your search, you can lean on three simple frameworks:
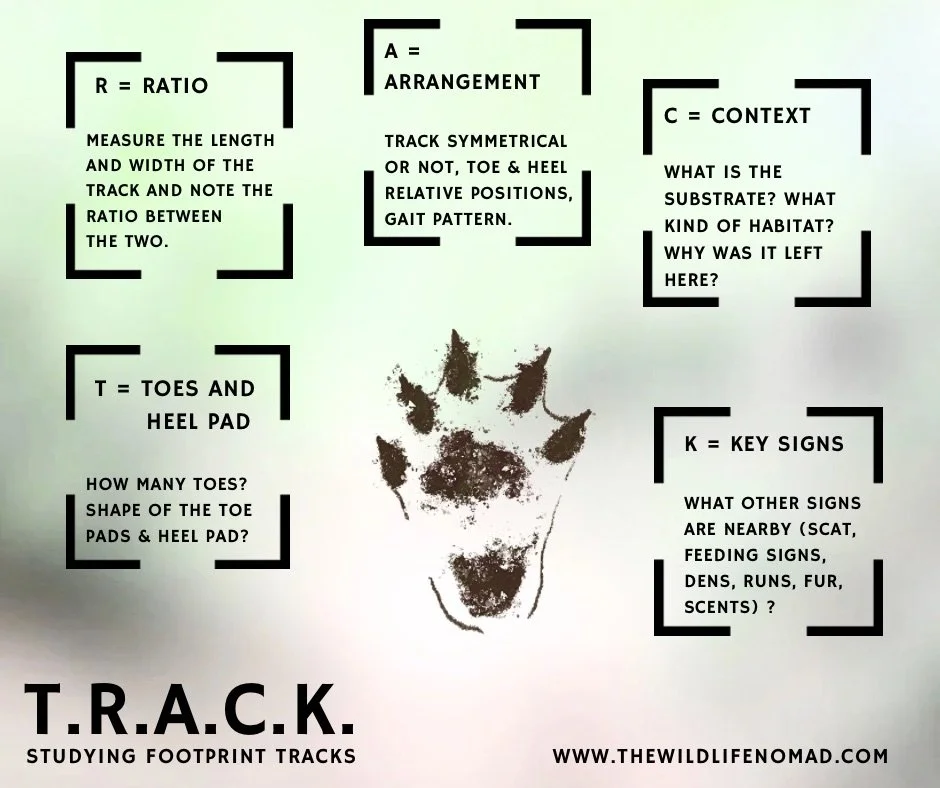
TRACK – for interpreting the form and function of tracks and signs.
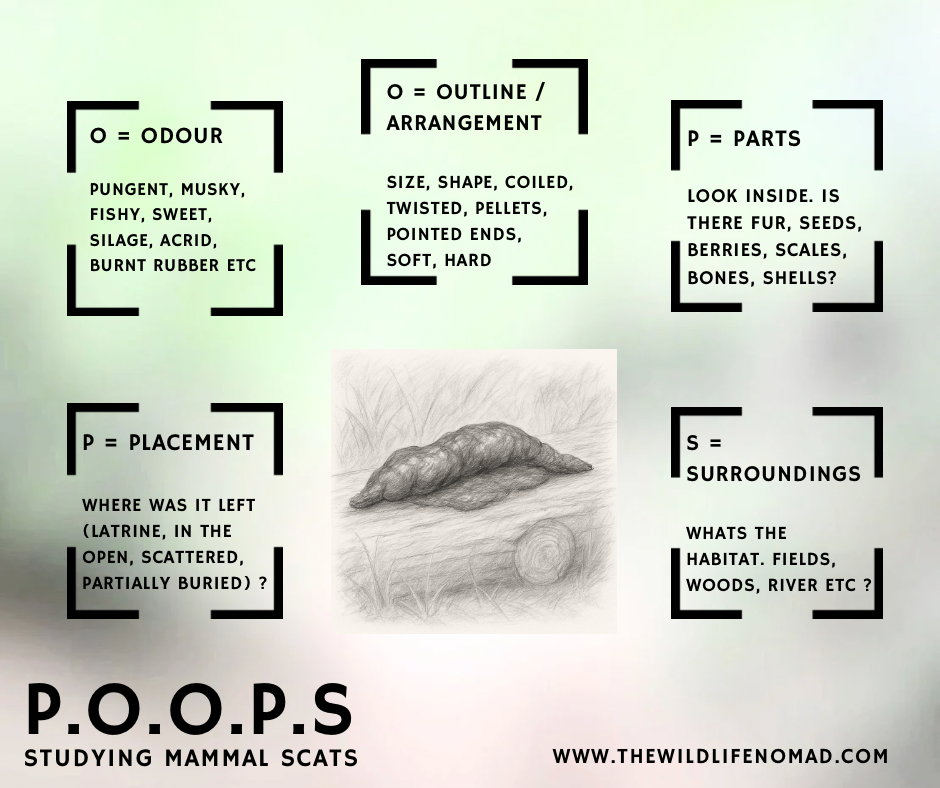
POOPS – for decoding droppings left behind.
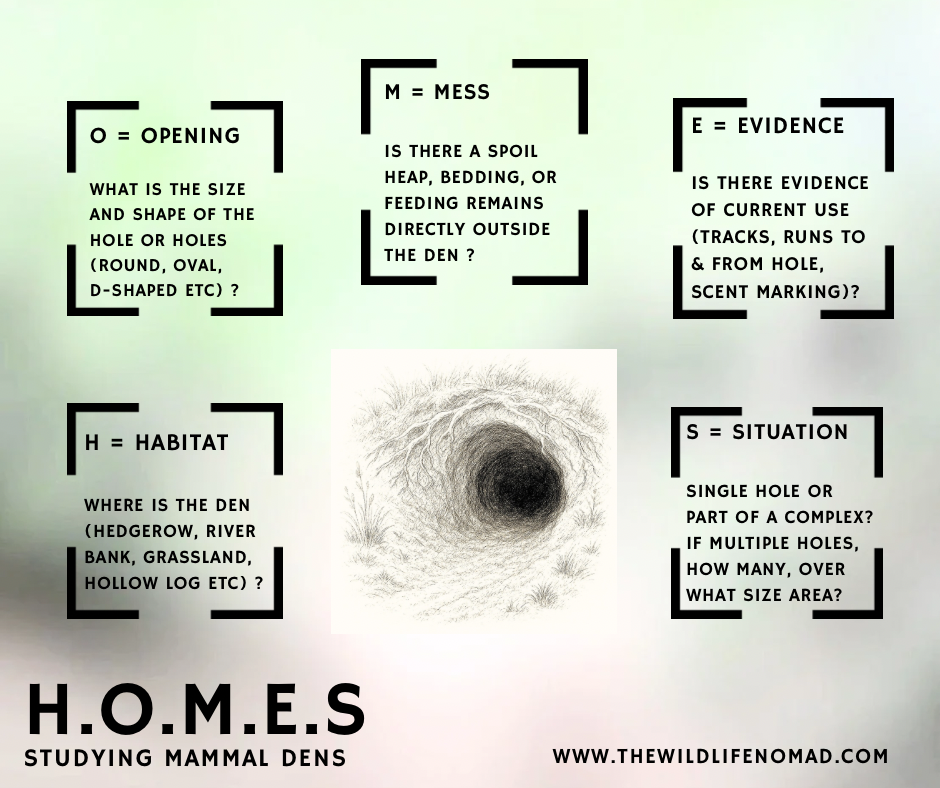
HOMES – for recognising burrows, dens, and nest holes.
Each of these offers a way of “reading” the land. When layered with the knowledge of ecotones, they help you not just choose a place, but understand why it might hold promise.
This isn’t the place to give a blow by blow breakdown of every UK land mammal’s field signs, but if you invest in a book or 2 on UK mammals and tracking (see end of the blog) you’ll soon have a good grasp of what you are looking for…….and practice makes perfect, its all about seeing shapes!
The Ideal Next Step: Sit Before You Shoot
Once you’ve identified a promising ecotone and found field signs, the best next step is not to unpack the tripod. It’s to sit, watch, and learn—without the camera.
This observation stage is invaluable because:
You’ll better understand behaviour – You see when animals emerge, how they move, and which paths they use.
You reduce disturbance – You give animals the space to reveal themselves naturally, without forcing encounters.
You plan photography thoughtfully – You can return later and choose a position that avoids blocking routes or intruding on sensitive areas.
Find yourself a stout tree to put your back against, have the wind in your face (so your scent isn’t blowing towards where you think the animlas may be) and get comfy, you could be in for a long wait! This sit-watch approach is the gold standard. It’s fieldcraft at its most respectful.
When Observation Isn’t Possible
Sometimes, though, a long sit-watch just isn’t practical. You might be travelling through unfamiliar ground, or visiting a location for a single morning. If that’s the case, you can still keep your impact low by building in a few precautions:
Stay on existing paths or natural edges – rather than pushing into the centre of an animal’s territory.
Use distance to your advantage – long lenses and binoculars let you keep back and reduce pressure.
Mind the wind – always position yourself downwind to avoid carrying scent straight to the animals.
Keep stillness as your default – rather than creeping closer, let wildlife approach or reveal itself.
Limit your time – if nothing appears after a couple of hours, resist the urge to linger indefinitely in a sensitive spot.
In other words, even when you can’t build the perfect watch-and-return plan, you can still behave as if you’re a guest.
Example 1: Woodland Meets Pasture

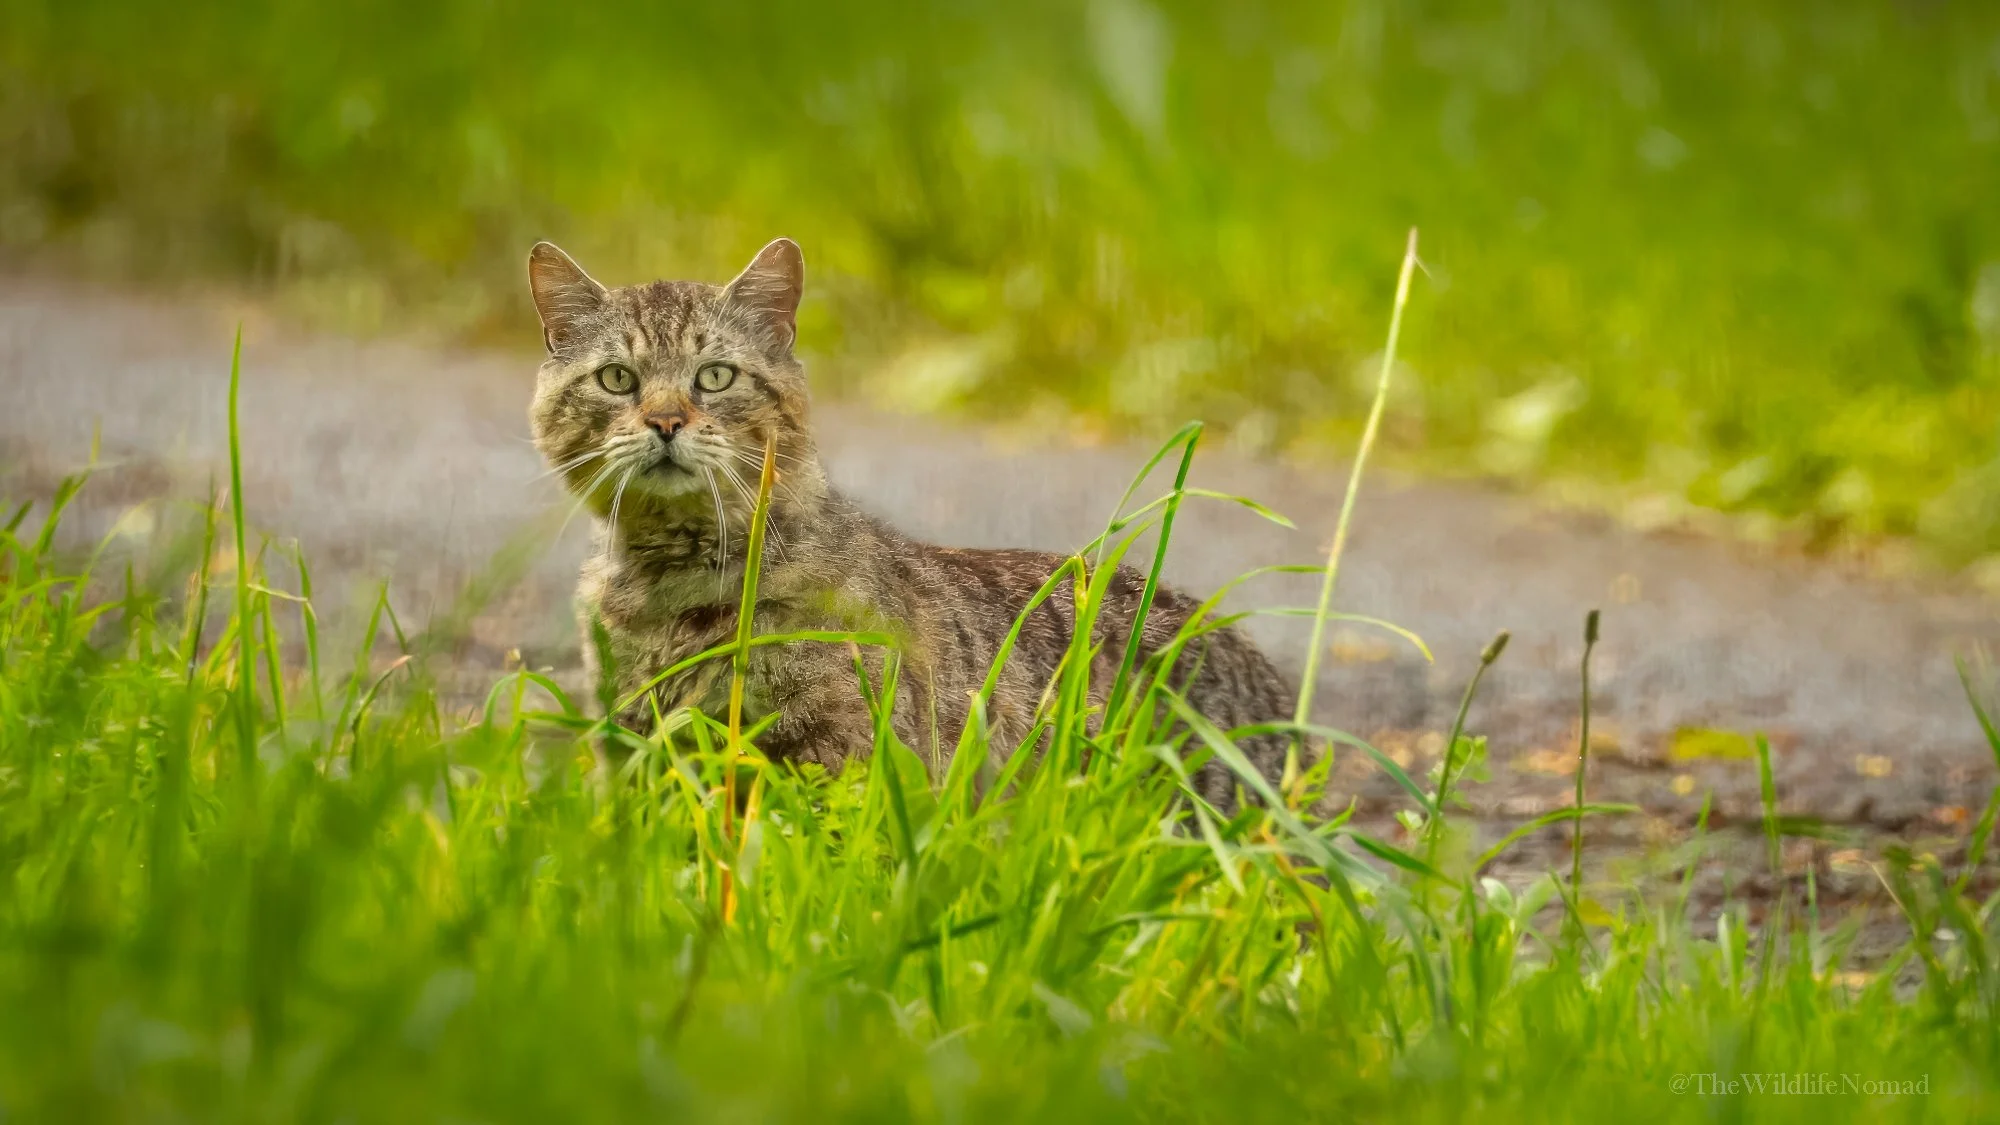
It’s late summer and you’re walking a mixed farm landscape. A strip of oak and hazel woodland borders a field where sheep graze short turf. The boundary is a classic ecotone: cover on one side, feeding opportunities on the other.
TRACK reveals a well-worn track threading through the brambles. The slots are small and rounded—roe deer, not fallow (find out more here)
POOPS confirms it: clusters of dark, pellet-like droppings near the edge, some fresh, some older.
HOMES comes into play when you notice a low entrance dug into the bank under bramble, littered with old bones and fur—evidence of a fox earth.
Ideal scenario (sit-watch): You retreat to a spot 30 metres back, settling against a tree with the wind in your face. Over two or three evenings, you return without a camera, just binoculars and a notebook. You notice the roe consistently emerge from the same track at dusk, favouring the lush grass at the pasture margin before melting back into cover. On one night, you glimpse fox cubs tumbling out of the earth, practising their pounces in the long shadows. By observing first, you’ve mapped their timings and patterns. When you later bring your camera, you know exactly where to wait, positioned so that your presence won’t cut across their route.
Short-visit scenario: You don’t have multiple evenings. So you stick to the woodland edge path instead of pushing further in. You use a long lens from a concealed sit-spot, making sure you’re downwind and partially screened by foliage. You take your chances during that evening window, and if nothing appears you move on rather than loitering at the fox earth. This way, even without a sit-watch, you’ve kept impact low.
📸 Photographer’s Tip: Woodland edges are best worked in the “golden hour” before dusk or after dawn. Position yourself so the first /last light falls into the field from behind you, illuminating deer or foxes as they step into the open. A 300–500mm lens is ideal to keep distance while filling the frame.
Example 2: Reedbed and Riverbank

A wide river curls through a floodplain, edged with dense reedbeds. Dawn mist clings to the surface, and bird calls echo through the stillness. It’s a rich ecotone: water meets reed, reed meets bank, and beyond that grazed meadow. It’s a hub for activity.
TRACK stands out immediately: in the soft mud at the water’s edge, you find a broad, five-toed footprint with a rounded heel pad and clear claw marks—otter (find out more here)
POOPS confirms your hunch. On a prominent rock, a fresh spraint gleams, pungent and fishy, studded with fish scales and tiny bones.
HOMES adds another layer: a tunnel-like burrow opening just above the waterline, too big for a water vole, more likely an otter holt tucked under the bank.
Ideal scenario (sit-watch): You pick a vantage point across the river, back against a willow trunk where your scent drifts away with the breeze. No camera, just patience. Over two mornings you watch as herons stalk the shallows and moorhens skitter in and out of reed cover. At last light, you see ripples and then the unmistakable sinuous shape of an otter sliding into the water and begins hunting. By observing first, you’ve learned its favoured entry point and feeding ground. When you return with a camera, you can position yourself for clean shots without risking disturbance.
Short-visit scenario: You’re only passing through. You stay on the opposite bank, keeping to the existing riverside path. You resist the temptation to cross the shallows or approach the holt directly (illegal). Instead, you use natural vegetation for cover, work with a long lens to keep your distance, and focus on photographing supporting wildlife like herons, reed buntings, or dragonflies while you wait. If the otter doesn’t appear, you still come away with strong images of a rich wetland edge and you’ve left no sign of intrusion.
📸 Photographer’s Tip: Wetland edges often give atmospheric shots in the half-light. A tripod or beanbag helps at slow shutter speeds, while keeping ISO low for sharp detail in the mist. Keep autofocus set to a single point, as reeds can easily trick the camera into focusing on the wrong layer.
Bringing It Together
Fieldcraft isn’t about chasing or forcing encounters. It’s about recognising the edges where animals prefer to live, reading the signs they leave behind, and then making a choice: either watch first and return later—or, if time is short, adjust your approach to keep pressure to a minimum.
By combining the idea of ecotones with TRACK, POOPS, and HOMES, and by committing to either patient observation or extra care when you can’t, you give yourself the best chance of making images that are both authentic and ethically won.
The reward is more than a photograph—it’s the deeper satisfaction of letting wildlife reveal itself on its own terms.
Suggested Reading
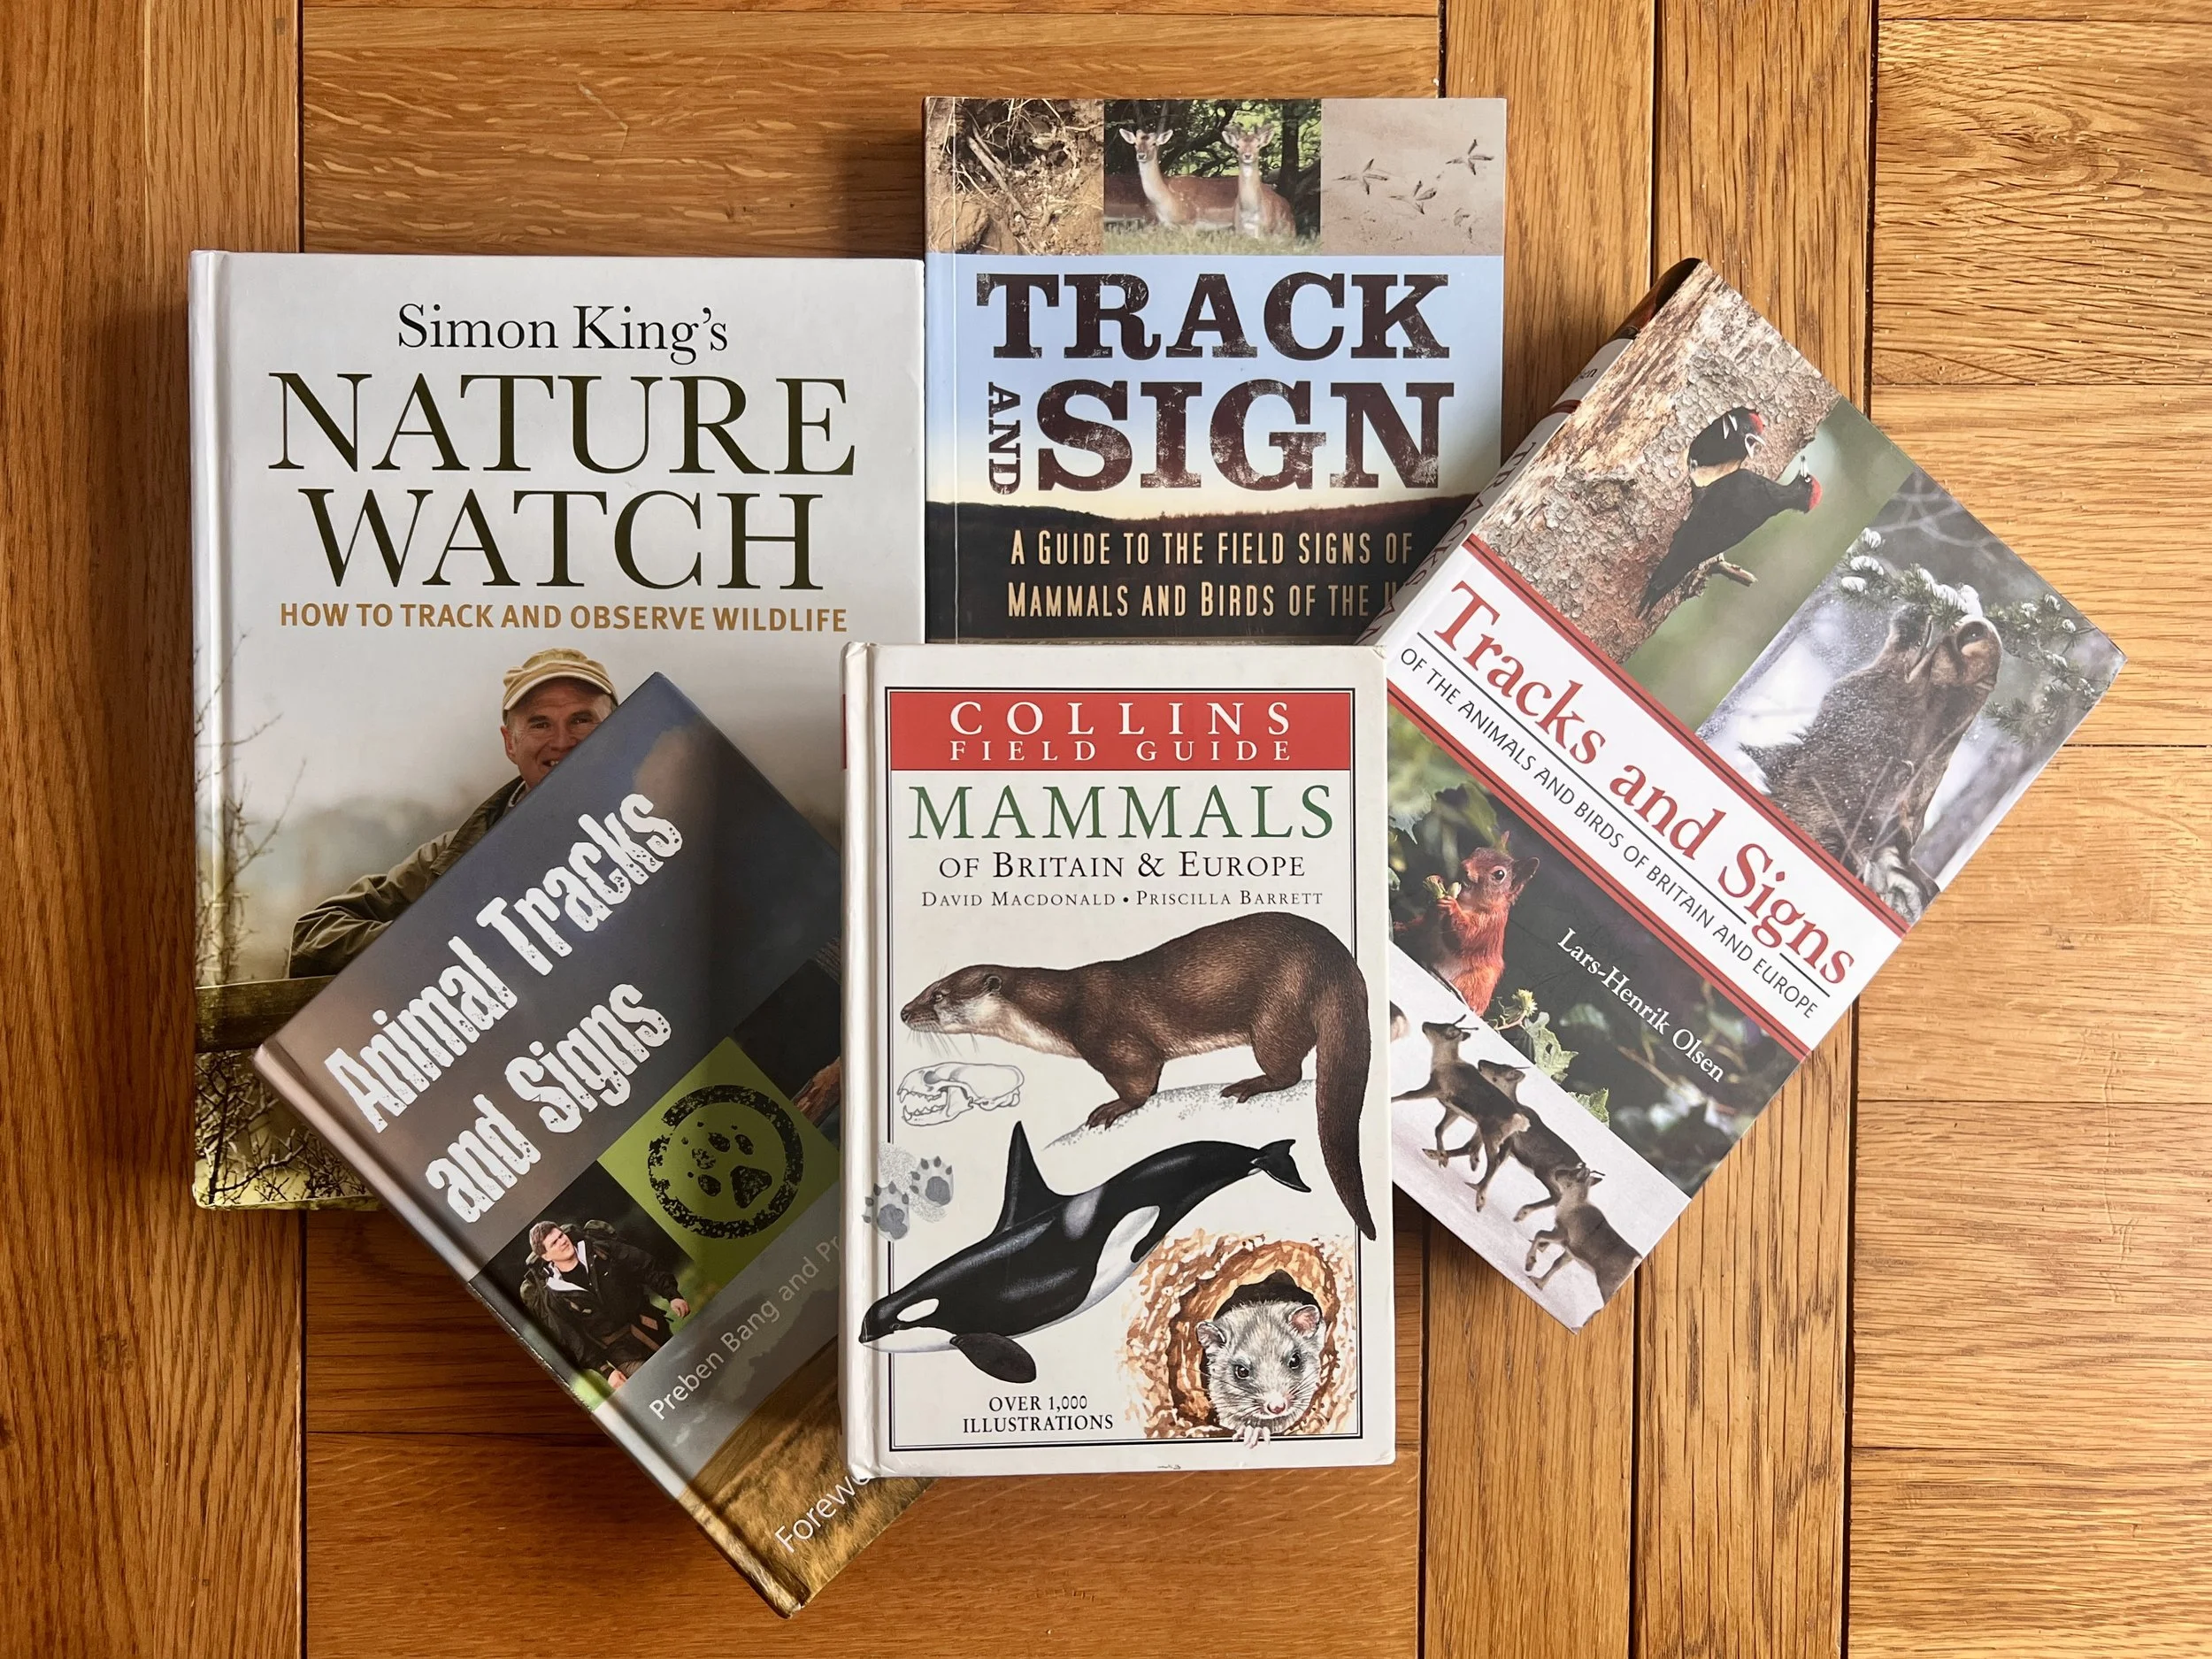
This far from an exhaustive list, but a handful of useful titles covering British Mammal field signs are:
Collins Field Guide - Mammals of Britain & Europe, Macdonald & Barrett, ISBN 0002197790 (A good introduction to each species without getting to detailed, there’s been many different editions, all are equally are good).
Animal Tracks & Signs, Bang & Dahlstrom, ISBN 0199299978 (this has been re-released in many different versions, don’t get to hung up on getting the latest they all have pretty much the same information in them, and all are great to learn the basics).
Tracks & Signs of the Animals and Birds of Britain and Europe, Olsen, ISBN 9780691157535 (lots of quality images which makes it a handy reference book for when your back from the field with a phone full of TRACK, POOPS and HOMES images).
Track and Sign - A guide to the field signs of mammals and birds of the UK, Rhyder, ISBN 9780750996143 (John Rhyder is probably the UK’s greatest tracker (and also was one of my instructors at Woodcraft School). Great content, if a little more technical than the other texts).
Simon King’s Nature Watch - How to track and observe wildlife, King, ISBN 978184949476-2 (Simon King started it all for me, and whilst this isn’t the first book of his that I bought, this 2016 hardback includes some useful tips)
Fieldcraft & Ethical Wildlife Photography FAQ
What is fieldcraft in wildlife photography?
Fieldcraft is the set of skills used to move quietly, read signs, and understand animal behaviour so you can photograph wildlife without disturbing it. It’s about blending into the environment and letting wildlife reveal itself to you.
Why is ethics important in wildlife photography?
Ethics ensure the welfare of the animal always comes first. A great image is never worth causing stress, harm, or disturbance to wildlife. Acting responsibly also builds trust with conservationists and other photographers.
How do you approach wildlife without disturbing it?
Move slowly, stay downwind, and use natural cover. Stop often and let animals get used to your presence. If they change behaviour — freeze, alarm-call, or move away — you’re too close.
What equipment helps reduce disturbance?
A long telephoto lens (300–600mm) lets you photograph from a safe distance. Silent shutter modes, camouflage clothing, and natural hides (hedgerows, trees, or portable hides) also help.
What are the golden rules of ethical wildlife photography?
Respect distance, never bait or lure animals, avoid nesting sites, and always put welfare before the shot. Leave no trace — tread lightly and take nothing but photographs.
How can you tell if your presence is stressing an animal?
Look for warning signs: alarm calls, animals staring at you, moving away, or changing feeding/resting behaviour. If this happens, step back immediately.
Do you need permission to photograph wildlife?
Sometimes, yes. Some species (like bats, otters, and great crested newts) are legally protected, and disturbing them requires a licence. Always check local laws and reserve rules.
What’s the best way to learn fieldcraft?
Spend time outdoors, watch quietly, and keep notes on behaviour and signs. Joining guided walks or workshops can help you pick up skills faster, but patience and observation are the best teachers.