
Preparing for the Rut: Reading Deer Behaviour and Signs in the UK to Capture Better Shots

The deer rut is one of Britain’s most dramatic wildlife spectacles. Stags clash antlers, bucks roar and grunt, and battles for dominance play out across misty valleys and autumn woodlands.
For photographers, this is a golden opportunity to capture raw animal behaviour, but success doesn’t come from rushing out when the first roars echo through the woods. Just like the deer spend weeks preparing for the rut, you need to plan ahead, scout locations, and get your equipment and technique ready well before peak activity.
Preparation beats last-minute action. It leads to better images, a calmer experience, and far less stress for both you and the deer.
Step 1: Know Your Timing
Each deer species in the UK has its own rutting period. Knowing when activity starts helps you plan scouting trips and shoot days so you’re in the right place at the right time:
Red Deer: Late September to early November, peak mid-October.
Fallow Deer: Early October to early November.
Roe Deer: Rut in July–August, well before autumn.
Muntjac: No fixed rut, active all year.
Sika Deer: October–November.
By understanding this timing, you can prioritise which species to focus on and avoid trying to cover too many areas at once.
Red and fallow deer often overlap, so decide early which to pursue to maximise your chances of success.
Step 2: Scout Locations Early
The best rut photographs come from knowing where the action will happen before it begins.
Start visiting potential sites several weeks in advance, ideally by late August or early September:
Identify hotspots:
Look for rubs, scrapes, trails, and fresh slots (hoof prints) to locate rutting grounds.Map access points:
Work out how you’ll enter and exit quietly without disturbing deer.Assess light:
Note how morning and evening light falls across clearings or glades so you know the best positions ahead of time.Check backgrounds and angles:
Consider safe, respectful distances and shooting angles that won’t intrude on the deer.
Early scouting means that when the rut begins, you can go directly to the right spot, rather than wandering and potentially disturbing wildlife.
Step 3: Understand Behaviour Before Peak Action
Deer don’t switch from calm to combat overnight. Their behaviour builds gradually in the weeks leading up to the rut.
Recognising these changes helps you predict where and when to focus your photography:
Early September:
Stags break away from summer bachelor groups and become restless.Mid September:
Parallel walking, scent marking, and low calls begin.Late September:
Dominant males hold ground, call loudly, and start gathering females.
Understanding these stages lets you target different photographic opportunities — from quiet portraits early in the season to intense clashes at the peak.

Step 4: Master the Field Signs
To consistently capture powerful rut images, you must be able to read the landscape like a map of deer activity.
Field signs reveal which deer are present, how recently they’ve passed, and where the best action will occur.
Interpreting these signs correctly allows you to predict behaviour instead of reacting to it, giving you more deliberate and ethical encounters.
Below are the key signs to focus on, with practical details to help you track and plan.
1. Slots (Hoof Prints)
A deer’s footprint, or slot, is one of the clearest indicators of presence and activity.

Freshness indicators:
Fresh slots: Crisp, sharp edges, moist soil, may glisten in early light.
Older slots: Softer edges, debris-filled, or dried and crumbling.
In frosty conditions, fresh slots show dark, exposed earth, while older ones are frozen over.
Photography tip: Capture slots in context using a 35mm or 50mm lens, f/8 for depth, and include natural textures like frost, bracken, or leaves to tell the story.
2. Trails and Runs
Deer travel along established routes, creating worn paths through grass, bracken, or woodland.
Location clues:
Trails connect feeding areas, bedding cover, and water sources.
They funnel towards clearings or open spaces used for rut displays.
Look for compacted soil, bent grasses, or flattened vegetation.
Species differences:
Red/Sika/Fallow: Broad, obvious trails with heavy wear.
Roe/Muntjac: Narrow, subtle scuffs, often weaving through dense cover.
Field use: Mark key trails on a map or GPS now. When the rut peaks, position yourself downwind and to the side of these runs, never directly on them — blocking a trail risks disturbing movement.
3. Feeding Signs
Feeding evidence helps you confirm which areas deer are using most often:
Grazing:
Short, evenly cropped grass patches in meadows or glades.
Red and fallow deer create large grazed areas; roe and muntjac leave smaller, scattered signs.
Browsing:
Twigs and shoots cleanly nipped off, usually at shoulder height for the species:
Red/Fallow: 1–1.5 m above ground.
Roe: 0.5–1 m.
Muntjac: low, near ground level.
Bark stripping:
Vertical grooves or ragged patches on trunks.
Height of damage helps identify the species responsible.
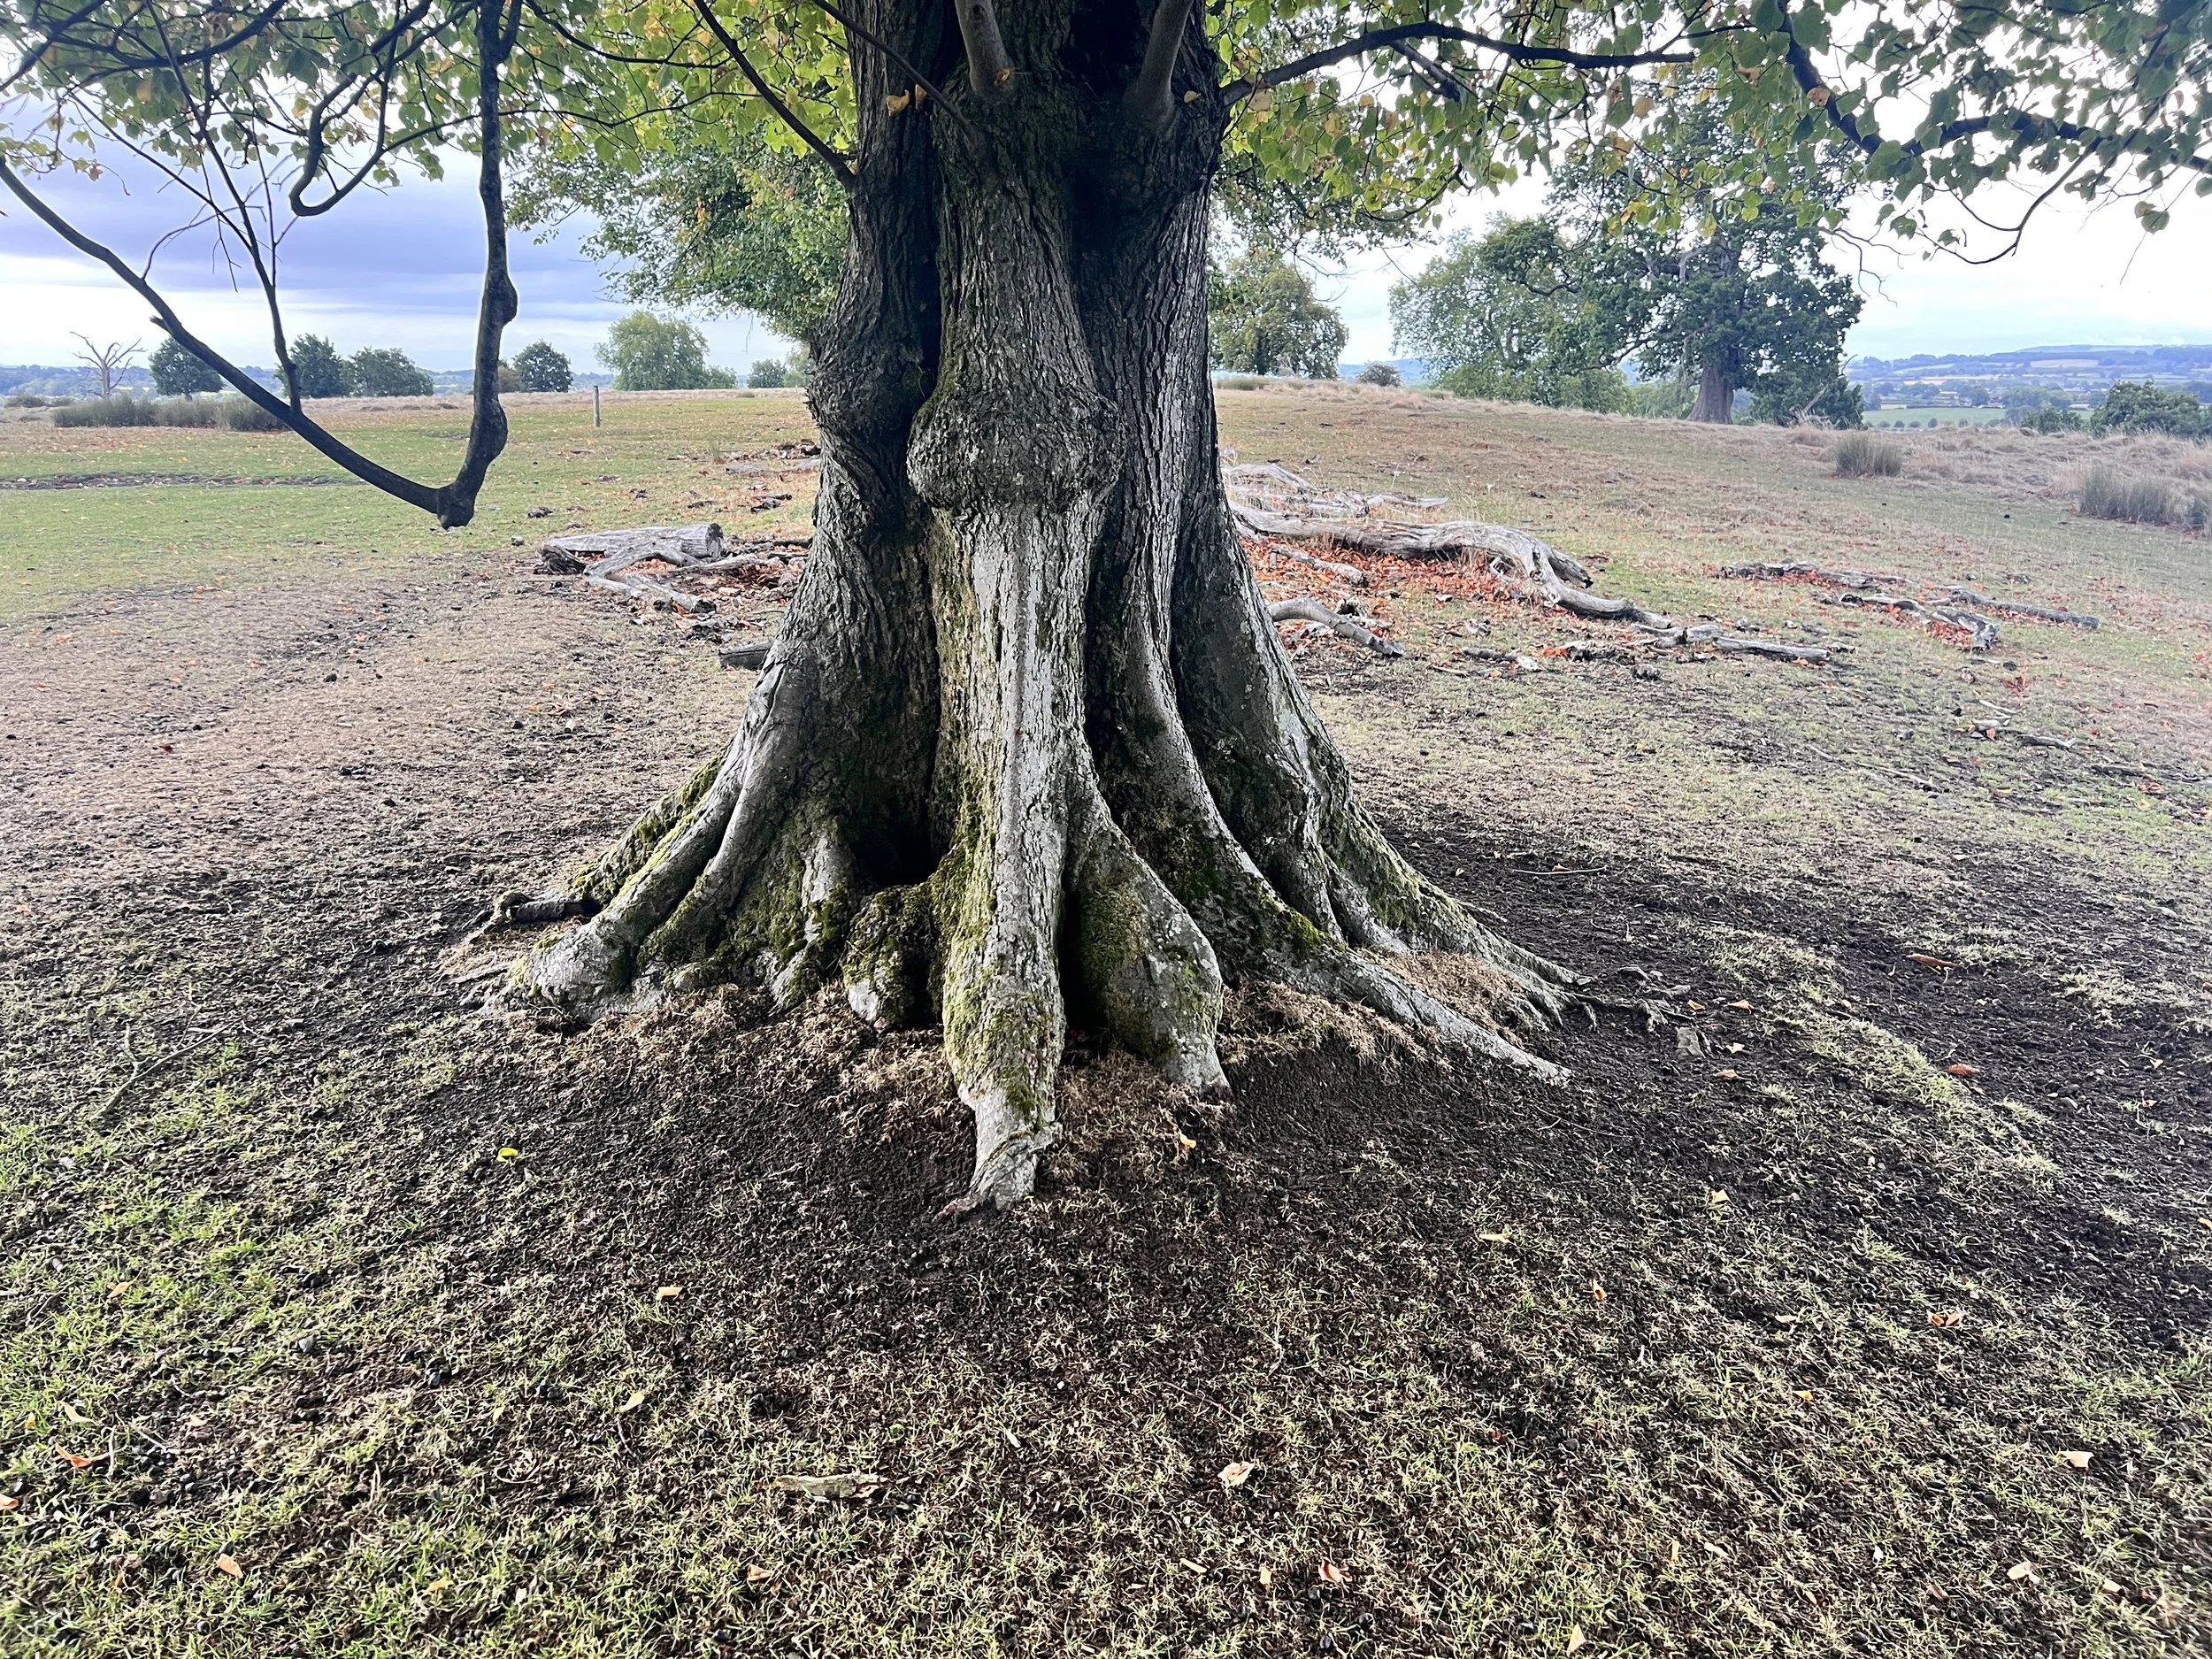
4. Rubs and Frays
Males thrash vegetation with antlers to mark territory and advertise dominance.
Fresh rubs:
Bright, pale wood where bark has been stripped.
Sap may be wet, with occasional hairs or velvet remnants.
Older rubs:
Darkened, weathered wood, rough edges.
Frays:
Heavy thrashing at higher points, sometimes with distinct tine marks above head height.
Species notes:
Red/Sika: Thick, high rubs on sturdy saplings or small trees.
Fallow: Rubs common near lekking grounds.
Roe: Smaller rubs, often on thin saplings.
Muntjac: Rarely leave noticeable rubs.
5. Scrapes and Wallows
Male deer use scrapes and wallows as territorial scent markers.
Scrapes:
Bare patches of soil, often oval.
Urine-soaked, with disturbed soil scattered around.
Wallows:
Muddy depressions created when stags roll to coat themselves in musk.
Usually near water or in damp ground.
The smell is strong and distinctive.
Photography tip: Set up near wallows well in advance, downwind, and stay motionless. A stag rolling in mud is one of the most dramatic behaviours to capture, but requires patience and preparation.
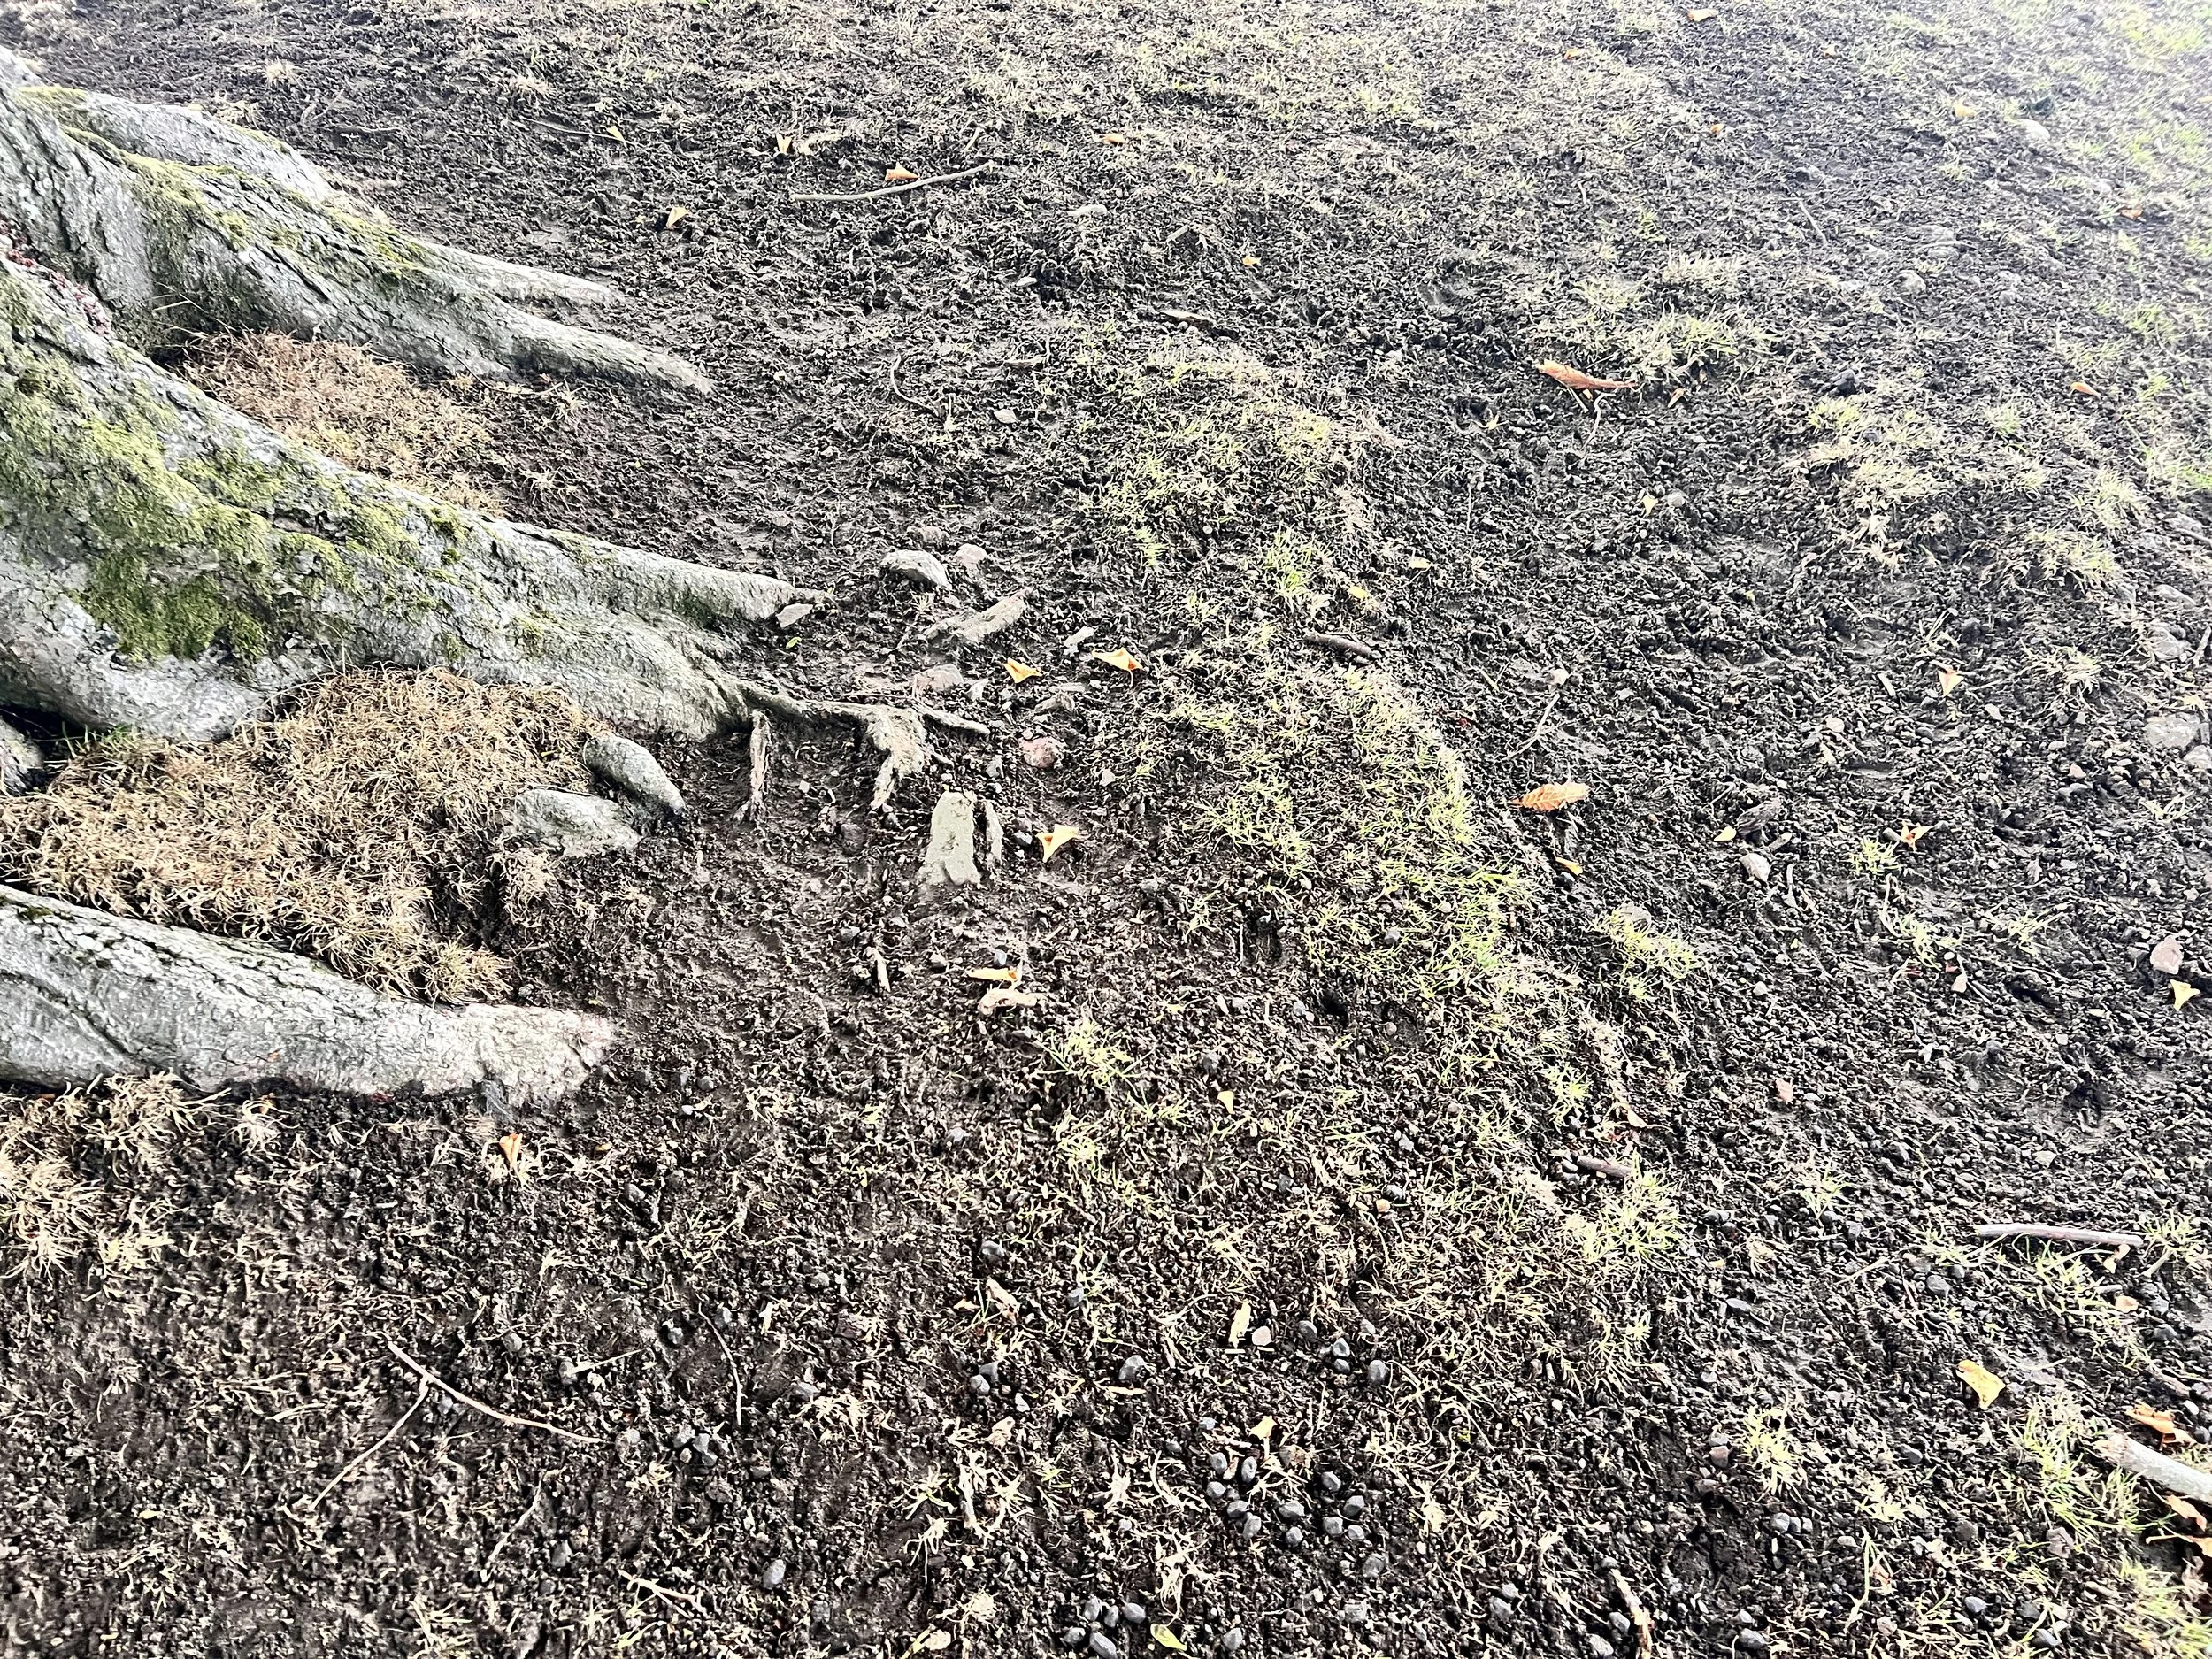
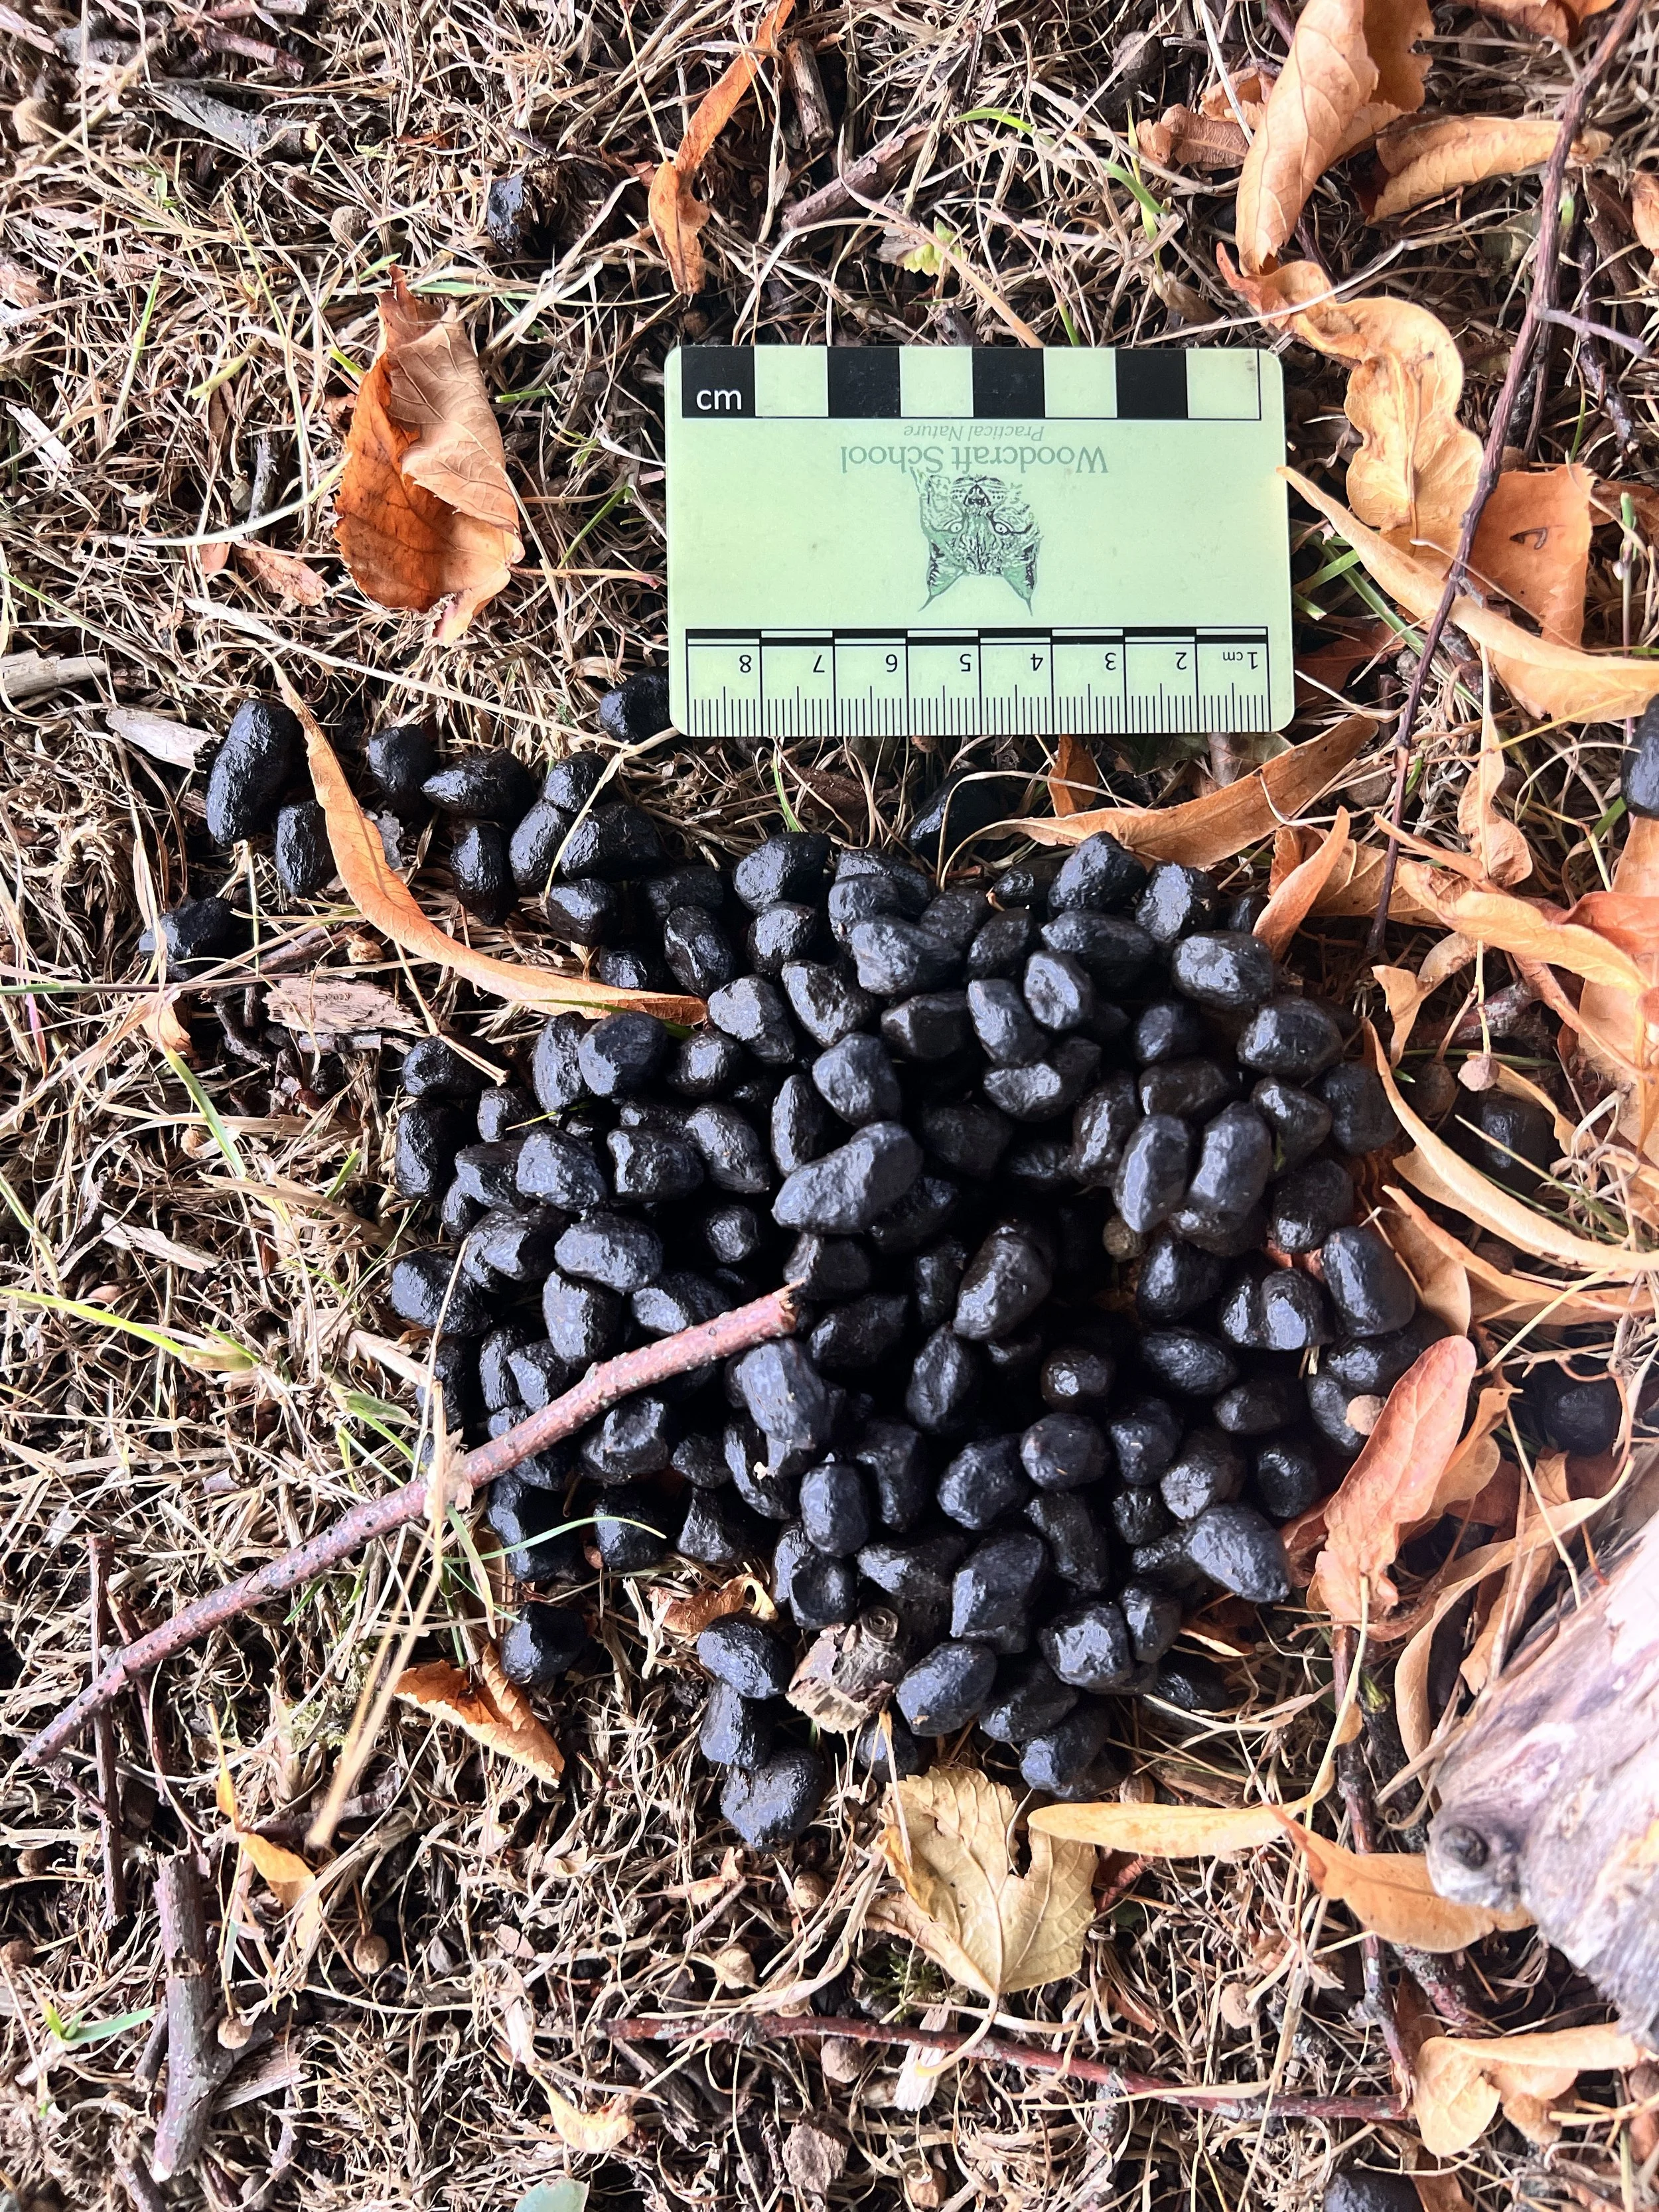
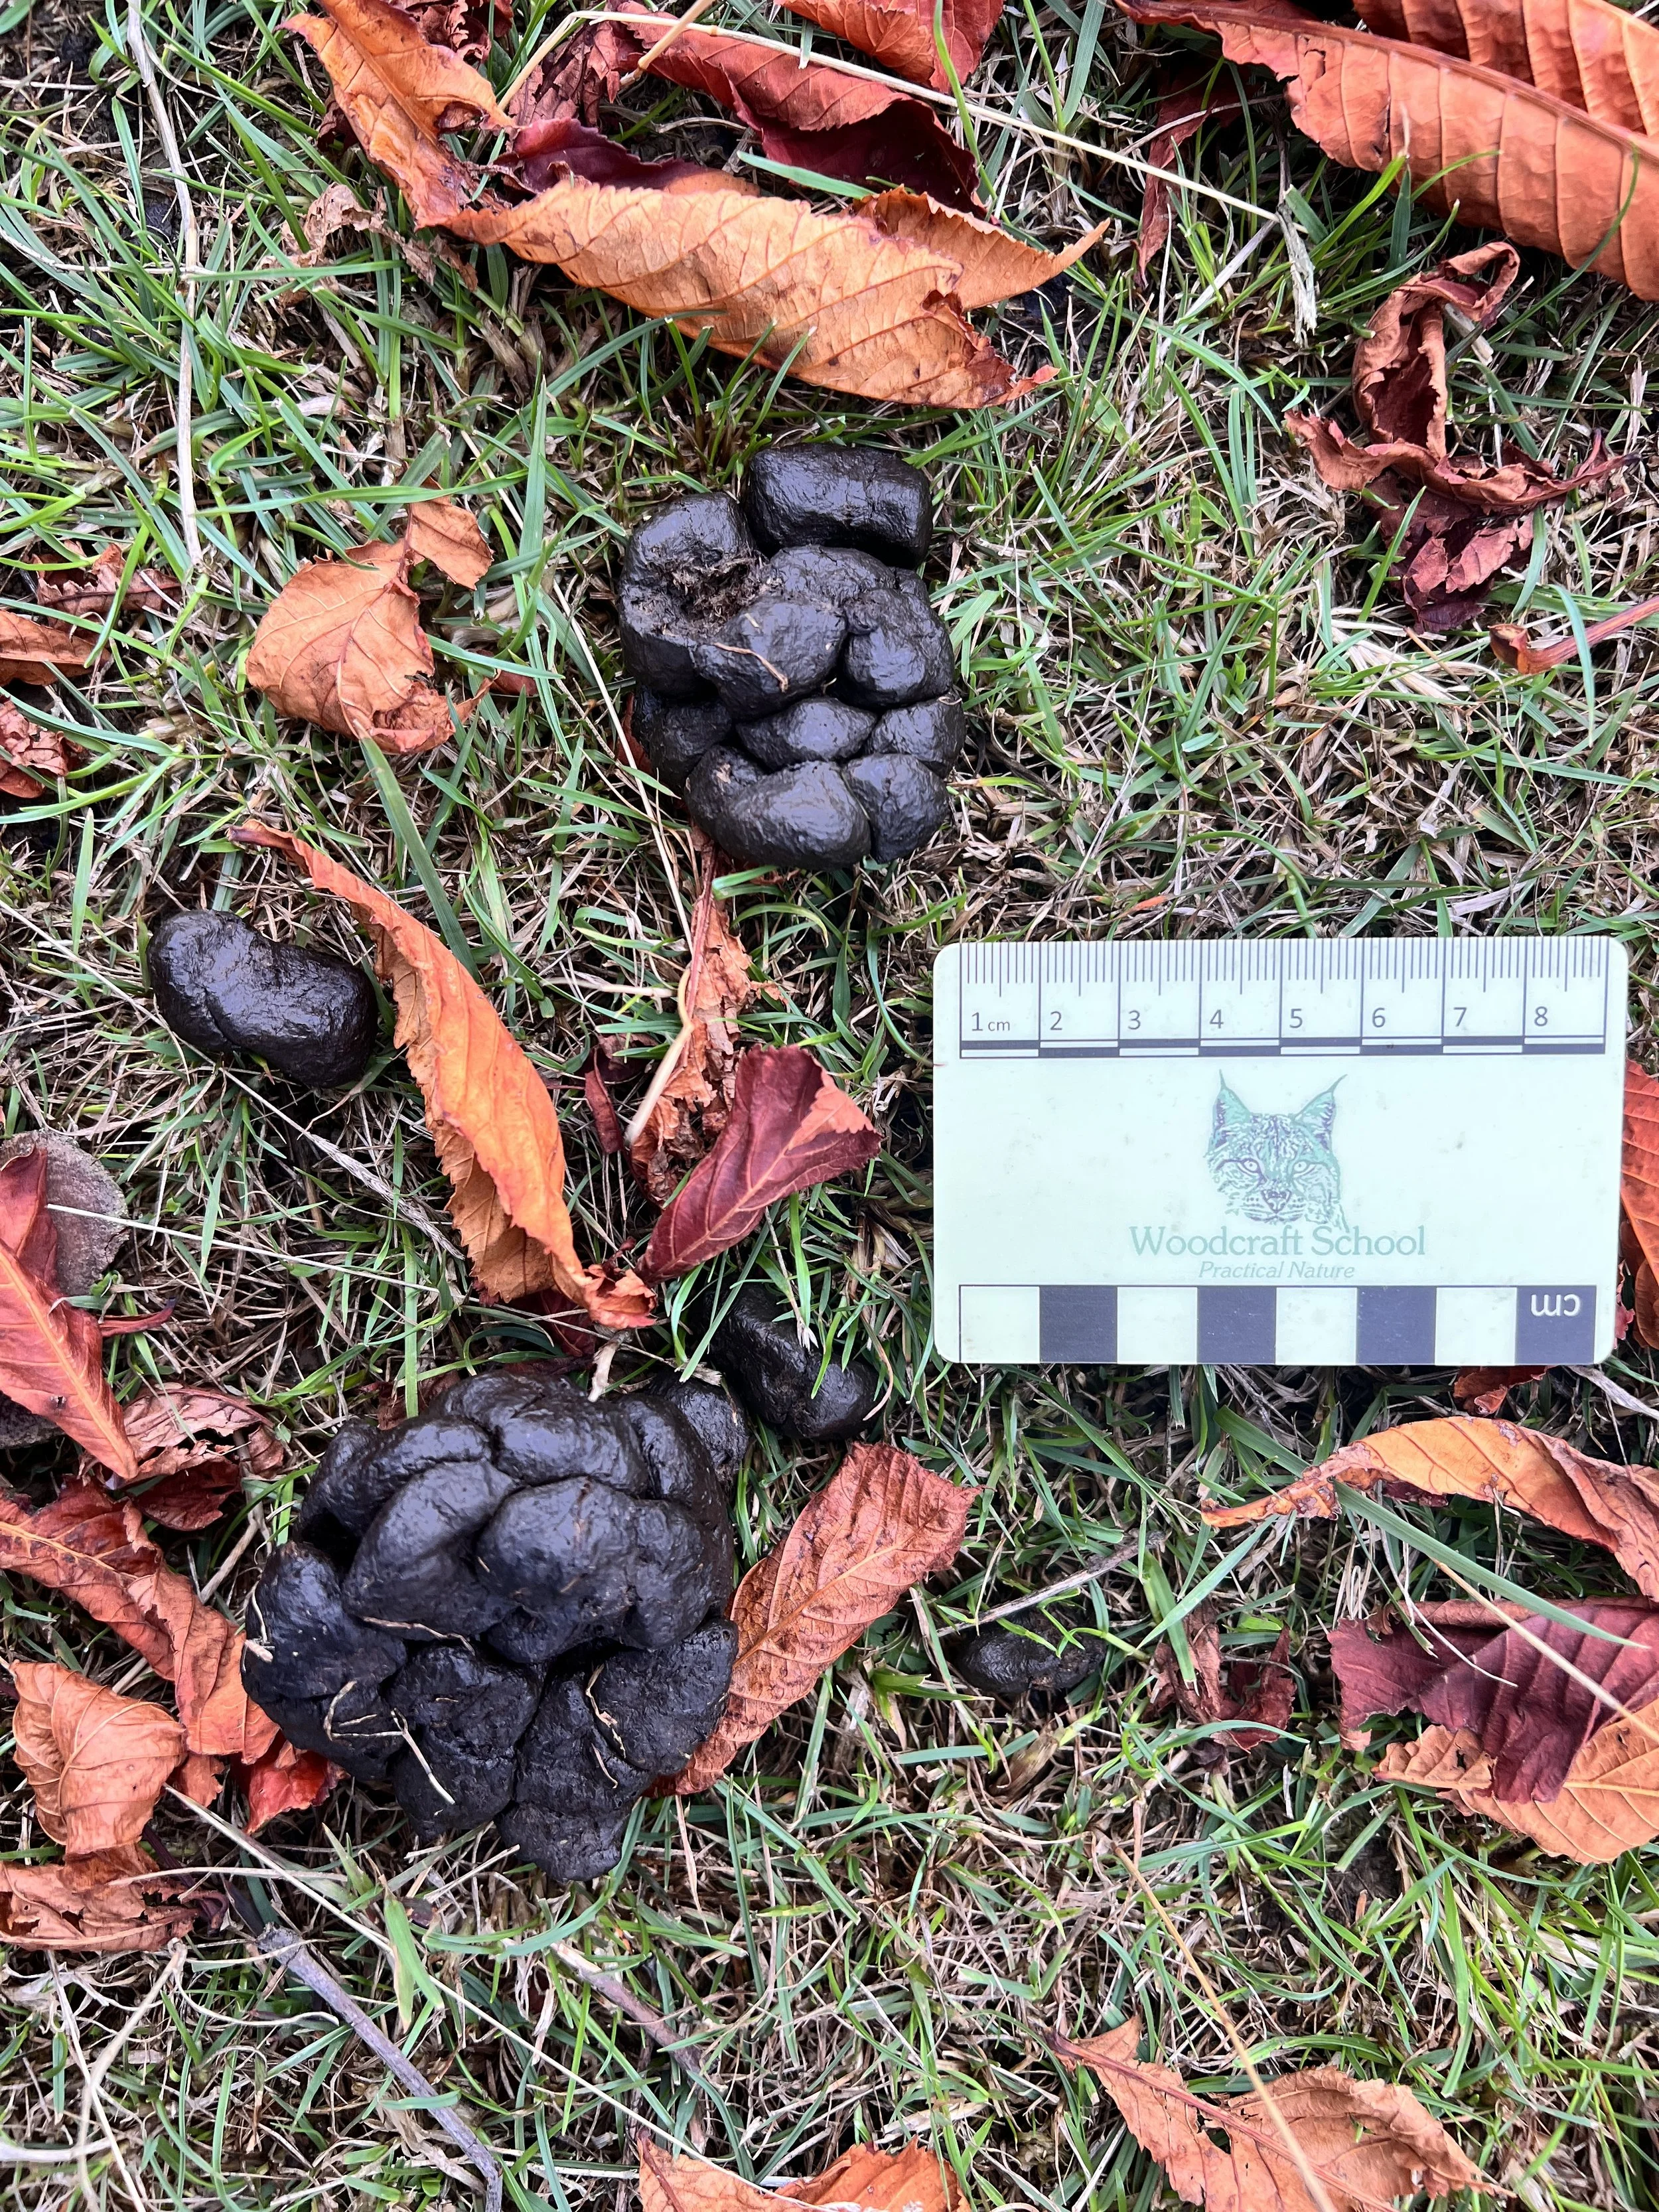
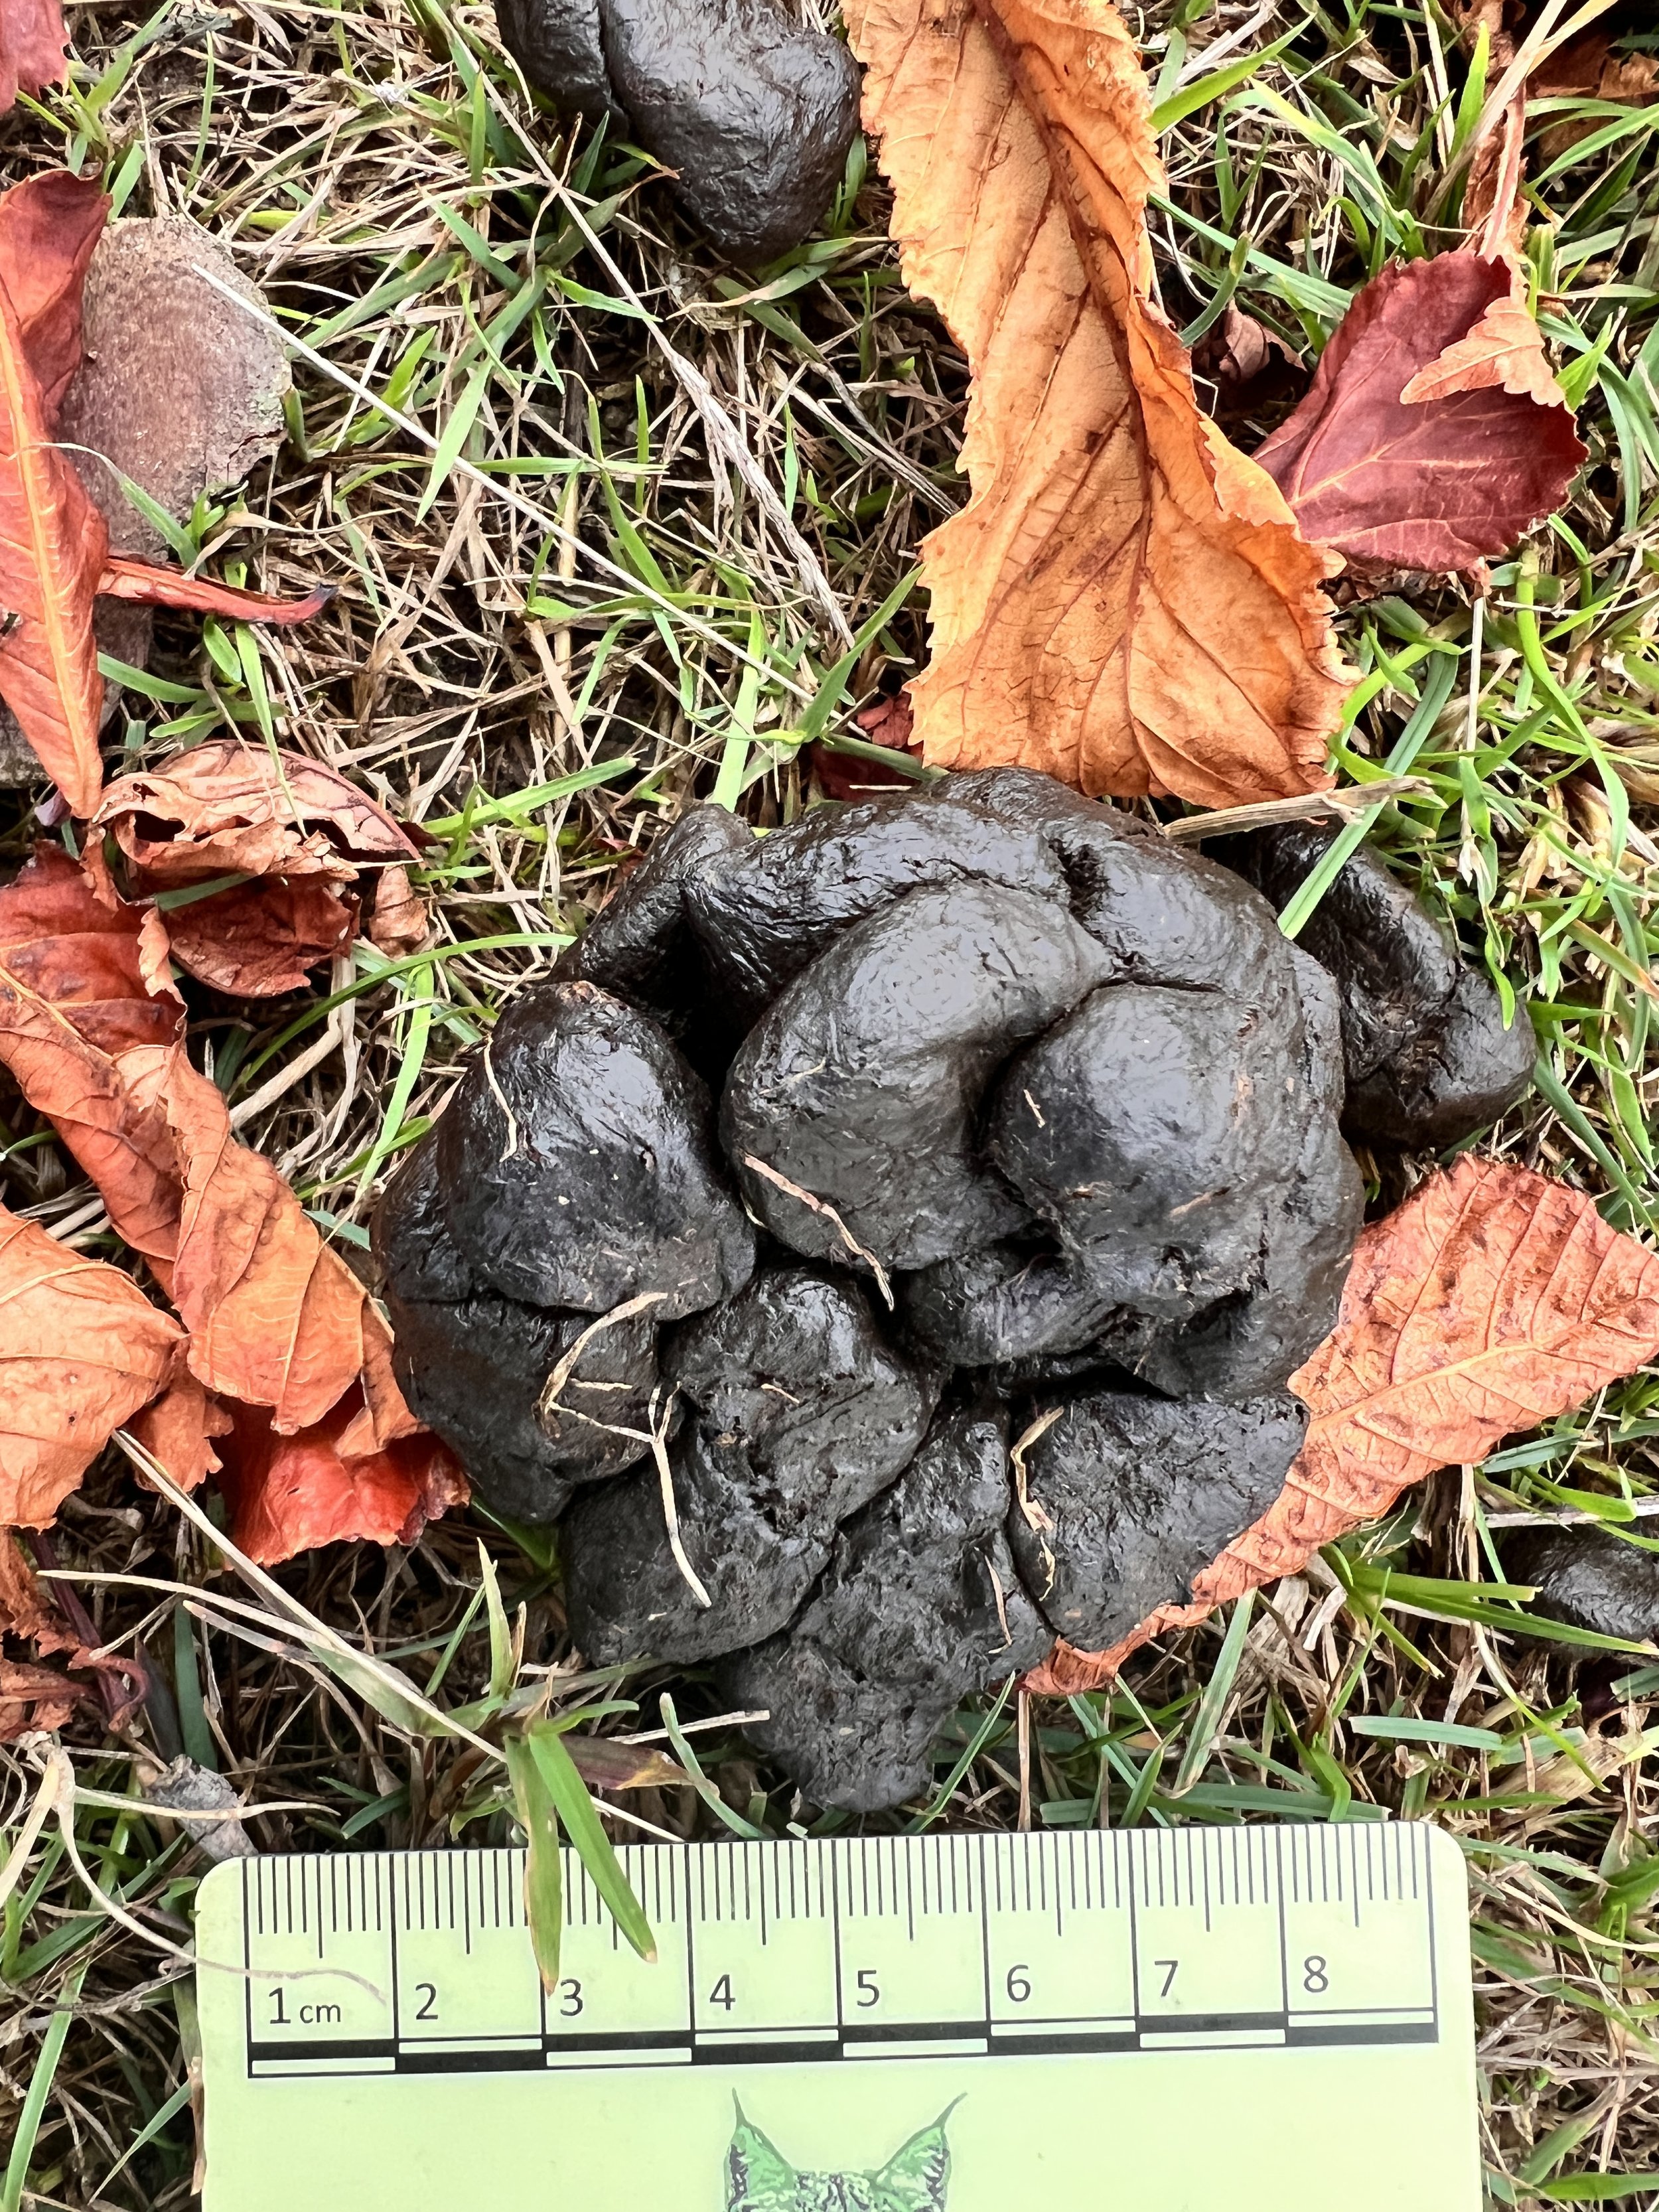
6. Droppings (Scats)
Droppings reveal both presence and activity levels.
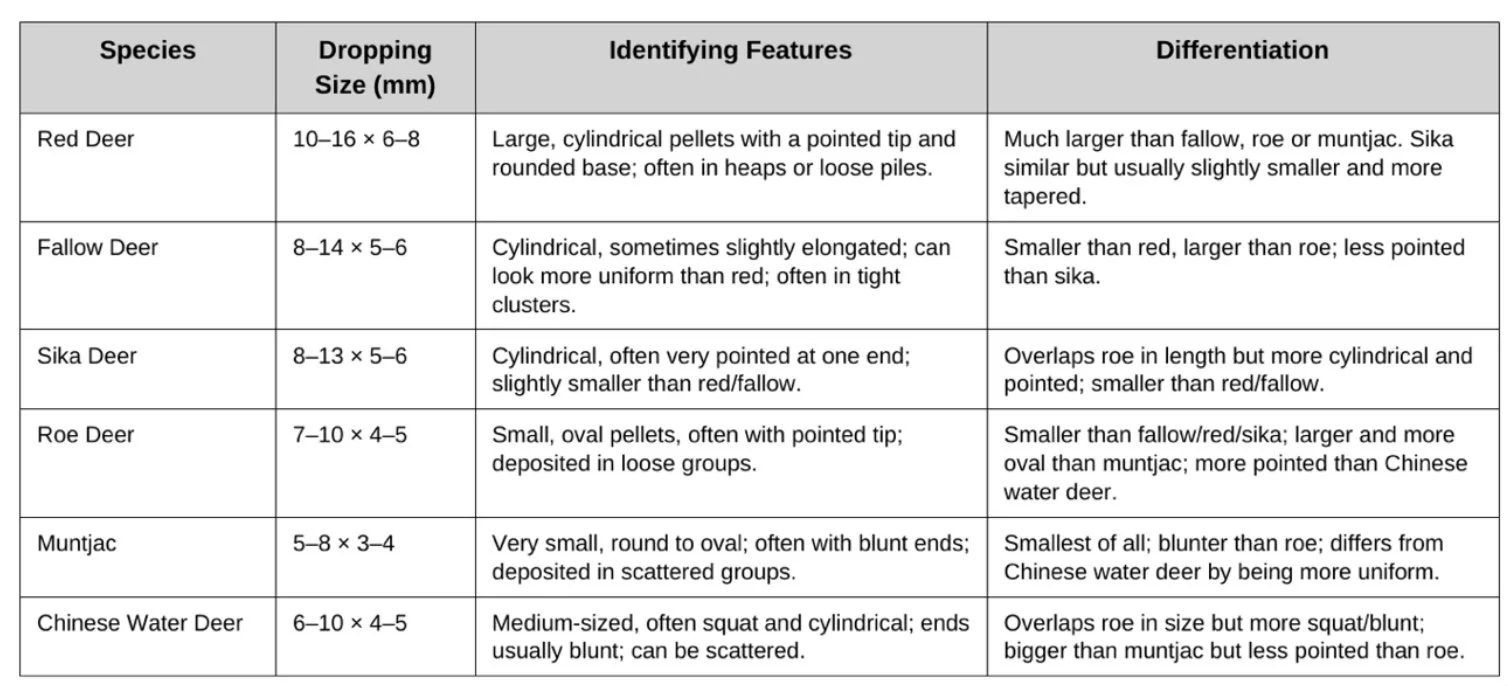
Freshness indicators:
Shiny, moist, and firm = recent, likely within hours.
Dull, cracked, or dry = older, possibly several days old.
7. Smell and Sound
As the rut approaches, smell and sound are vital for early detection.
Smells:
Active stags give off a heavy, musky odour.
Wallows and rutting stands carry scent even after deer have moved on.
Sounds:
Red Deer: Deep, resonant roars.
Fallow Bucks: Rhythmic groans or grunts.
Sika Deer: High-pitched, piercing whistles.
Roe Deer: Sharp, sudden barks.
Muntjac: Dog-like bark, repetitive and clear.
Listen carefully at dawn and dusk.
If you hear calls, stop, check wind direction, and move with extreme care.


8. Putting It All Together
Field signs work best when combined:
A trail of fresh slots leads into a clearing.
Nearby, rubs and frays show active marking.
The air smells strongly of musk.
A distant roar confirms a stag is holding territory.
You position yourself downwind and wait — ready before the action begins.
This methodical reading of signs allows you to predict events rather than react to them, giving you cleaner shots and minimal disturbance.
Step 5: Prepare Your Camera Gear
The rut unfolds at dawn and dusk in difficult, low light conditions. Prepare your kit now to avoid mistakes when the action peaks.
Lenses:
400–600mm allows for portraits to be taken at safe shooting distances.
70–200mm for environmental context shots.
Camera settings to practice now:
Shutter speed:
1/1000s+ for clashes.
1/500s for general movement.
1/400s for still portraits.
Aperture: f/4–f/5.6 to isolate the subject while keeping antlers sharp.
ISO: 1600–3200 pre-dawn or dusk, dropping as light improves.
Modes: Aperture Priority or Manual with Auto ISO for flexibility.
Support:
Use a monopod for mobility or a tripod for static setups. Practice switching between them now.
The more you rehearse these settings, the more natural and stress-free they’ll feel when it matters.

Step 6: Practice Your Approach
Deer are highly alert and sensitive to disturbance during the rut. Minimise your presence by preparing and practising your approach in advance:
Always stay downwind — scent gives you away first.
Move slowly and quietly, planning every footstep.
Use natural cover like bracken, trees, or terrain features to stay hidden.
Never get too close — rely on long lenses for detail.
Avoid visiting the same group repeatedly; rotate locations to reduce pressure.
Your goal is to arrive, photograph, and leave without the deer ever knowing you were there.
Step 7: Build a Workflow for the Rut
A repeatable workflow keeps you focused and efficient:
Scout: Visit sites early to map signs and access points.
Position: Choose a spot based on wind, cover, and light.
Wait quietly: Let the deer move naturally — don’t chase them.
Observe first: Watch behaviour before taking any shots.
Adjust settings: Prepare for low light and sudden movement.
Capture bursts: Use high-speed shooting for clashes.
Exit carefully: Leave without disturbing animals or blocking escape routes.
Step 8: Reduce Your Impact
The rut is physically draining for deer. Ethical fieldcraft ensures you don’t add unnecessary stress:
Use long lenses to keep distance instead of creeping closer.
Position yourself once and stay still rather than moving repeatedly.
Avoid blocking trails or escape routes.
Be aware of other photographers — too many people close to deer causes stress and unsafe situations.
When in doubt, step back!
There’s always another photographic opportunity, but disturbance during the rut can have lasting consequences.

Final Thoughts
The deer rut is nature at its most dramatic.
To capture it well, you must prepare like the deer themselves — weeks of quiet planning and groundwork leading to a few intense, unforgettable days.
Scout early.
Learn to read the land and the signs left by the deer.
Practise your approach and camera craft now, so when the roars echo through the autumn mist, you’re ready.
With preparation, you’ll get better images, protect the welfare of the animals, and experience the rut in a calm, respectful way that does justice to one of Britain’s most extraordinary wildlife events.
———————————
Frequently Asked Questions: UK Deer Rut
When is the deer rut in the UK?
The rut usually peaks in October. Red and fallow deer are most dramatic, but roe rut earlier in July–August, and muntjac can breed all year.
Where can I see the deer rut in the UK?
Top spots include Richmond Park, Exmoor, the New Forest, and the Scottish Highlands. In Gloucestershire, the Forest of Dean is excellent for fallow deer.
What signs show that the rut has begun?
Listen for roaring, groaning, or barking calls, look for ground scrapes and wallows, and watch stags thrash vegetation with their antlers.
Why do deer fight during the rut?
Males clash to win dominance and access to females. Most bouts are shoving matches, though they can escalate into fierce battles.
What’s the best time of day to photograph the rut?
Dawn and dusk. Stags are most active in low light, and the golden tones give atmosphere to your images.
What lens is best for photographing deer rutting?
A 300–600mm telephoto lens lets you capture behaviour without disturbing the deer. A tripod or monopod helps in low light.
How close can you get to rutting deer?
Never too close. Stags are unpredictable and aggressive. Use long lenses, stay hidden, and follow reserve guidelines.
Do all deer species in the UK rut at the same time?
No. Red and fallow peak in October, sika a little later, roe in midsummer, and muntjac all year.
What’s the safest way to watch the rut?
Find a vantage point downwind, stay still, and let the deer come to you. Avoid stepping into a stag’s territory.
Why is the rut important for photographers?
It’s one of the only times you’ll see deer displaying, clashing, and roaring. It offers unique behaviour and dramatic shots……if you’re patient and respectful.