
Build a “Weasel-Cam” and have your own “SpringWatch”
If you’ve ever tried to photograph or film small mammals, you’ll know how elusive they can be. Voles dash under cover, shrews barely sit still, and weasels are fast, nervous, and rarely seen in the open. That’s what makes filming them so satisfying — and so tricky.
This guide walks you through building a simple DIY mostela, a tunnel box that mimics natural shelter and uses a Blink wireless camera to discreetly record wildlife as it passes through. Originally designed by researchers to detect stoats and weasels, the mostela is a clever bit of kit you can adapt for your garden, woodland edge, or any wild space you want to observe more closely.
It’s cost-effective, easy to build, and, when combined with a WiFi-enabled camera, becomes a powerful, non-intrusive tool for filming wildlife naturally and ethically.

Why build a Mostela?
The mostela was developed by wildlife researchers to monitor mustelids — animals like stoats, weasels, and polecats — without trapping or disturbing them. These species are small, secretive, and rarely triggered by traditional trail cameras. They tend to move low to the ground, and prefer cover to being in the open……all of which makes them tricky to watch, and even trickier to film.
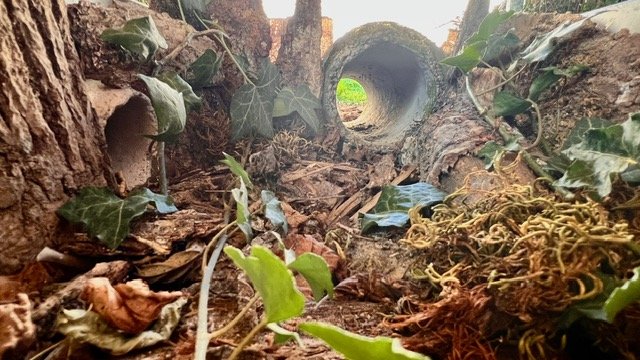
The mostela works by simulating a natural tunnel. An animal enters through a pipe that feels like a hollow log or burrow, follows it through a sheltered space, and is recorded without even realising it. The camera stays protected and hidden, and the whole system blends into the habitat.
It’s also incredibly versatile. Once set up, it can be left in place for months, creating consistent conditions that make animals more likely to investigate.
Why Blink Works So Well
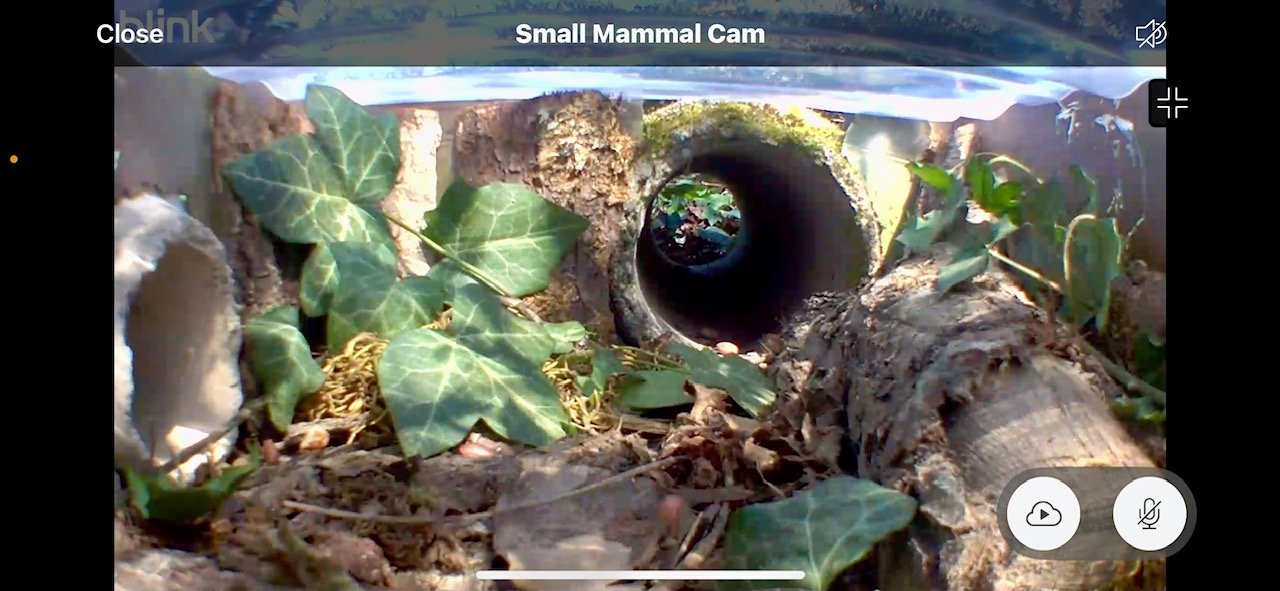
Unlike many trail cameras, the Blink Outdoor lets you monitor the tunnel in real time, with motion-triggered clips sent to your phone. You can live-view the box, check and tweak camera position when setting up, and then with the addition of a solar panel, leave it in place for months and allow it to automatically capture high-quality footage of species that are easily missed. It’s reliable, easy to use, and most importantly very low impact on the wildlife.
What You’ll Need
1 clear plastic storage box (approx. 40–50 cm long, 30 cm wide, 20 cm deep)
2 pieces of ceramic or stone pipe (plastic at a pinch), 30–40 cm long, 8–10 cm diameter — big enough for a weasel, cosy for a vole!
A Blink Outdoor WiFi camera (or similar)
Camouflage spray paint (green, brown, matt finish)
Natural materials (bark, moss, soil, dry leaves, ivy, etc.)
Saw or hole cutter
Optional: solar panel for camera or external battery pack
Step-by-Step Guide
1. Plan Your Layout / Cut your Holes
Position the two pipes so they’ll run into either end of the plastic box, or at right angles to each other. These are your “entrance tunnels.” Animals prefer to explore covered spaces, so this helps them feel secure. Use a saw or rotary tool to cut a hole in each short end of the box. Each hole should snugly fit one of your pipes. This keeps everything aligned and weatherproof.

2. Camouflage the Box
Spray the box inside and out using natural tones. This eliminates shine and helps it blend in. I chose not to paint the lid of the box as I wanted to film in colour and wanted to retain as much natural light as possible.

3. Naturalise the Interior
Line the base of the box with moss, bark, twigs, leaves and soil to create a textured box floor. You can even add bark and ivy to simulate a forest floor or hedgerow path.
4. Install the Camera
Follow the instructions that came with the Blink camera to get it connected to your WiFi network, and download the Blink app so you can control the camera settings from your phone. Mount the Blink Outdoor Camera inside the box, pointing straight down the tunnel from one end. This gives a clean, straight-on shot of any animal moving through.
5. Camouflage and Position
Place the mostela in a quiet, sheltered spot — next to a woodpile, ivy-covered bank, or in a hedgerow is ideal. Stack logs, bark, or brash around the box to keep it cool, dark and hidden. I chose not to cover the lid, again to maximise the amount of light available to the camera. Now is a good time to add the solar panel, facing towards the sun.


Tips for Better Results
Avoid strong scents – handle with gloves if possible
Don’t overbait – I placed a few sunflower seeds inside the tunnel just for the first 24 hours
Keep it shaded – it helps with lighting and temperature
Be patient – it might take a few days before animals explore the tunnels, although I was lucky and my first visitors were the same day.
Going Further: Improve Footage & Gather Data
Add soft LED lighting inside the lid for cleaner night footage
Use multiple cameras for front/rear or overhead angles
Try infrared-only setups for complete stealth
📊 Data Collection
Record and log each sighting: species, time, weather
Share results with your local mammal group or submit to iRecord
Use multiple mostelas in different habitats and compare activity
📸 Creative Photography
Use the footage to understand behaviour and plan manual stills
Capture behind-the-scenes clips to share your process
Edit and share “life in the tunnel” shorts on social media
Final Thoughts
This simple project opens up a world of secretive wildlife. Whether you’re filming for fun, for science, or for storytelling, a mostela gives you a discreet, ethical, and engaging way to get close to Britain’s shyest mammals. Combine it with a smart camera like Blink, and you’re not just watching nature — you’re part of it.
📥 Want a printable build guide or materials list? Let me know — I’m happy to share.
📸 Share your build or footage with me on Instagram @the.wildlifenomad
📧 Questions? Reach me at craig@thewildlifenomad.com