
Camera Smart: Which Mode Is Best for Wildlife Photography?
For years I shot wildlife almost exclusively in Aperture Priority. It felt natural, it felt fast and it gave me one less thing to think about when an animal suddenly appeared. But over time, especially as I spent more dawns and dusks working with mammals, I found myself fighting my settings more than I’d like. Light drops quickly at the margins of the day. Mist rolls in. A fox steps from the hedge into deep shade. A squirrel launches itself from a branch without warning while you’re set for static birds on a perch. In those moments, you want speed and control working hand in hand.
That shift in my own photography is what eventually pushed me towards Manual Mode with Auto ISO. Today, it’s the mode I recommend for most wildlife photographers once they understand the basics of exposure. It gives you the creative control of manual without the constant dial-spinning that often causes missed shots.
But rather than jump straight to the answer, it’s worth walking through each mode properly, understanding the strengths and weaknesses, and, just as important, the fieldcraft behind the decision. Because the truth is this: the mode you choose only matters if it helps you stay focused on the wildlife, not the camera.
This guide is written for beginners and intermediates, especially those stepping across from landscapes and wondering why wildlife feels so different. It’s for anyone who wants to understand why one mode works better than another, and how to set themselves up for success in real-world conditions.
The Real Question: What Do You Need From a Mode?
Wildlife photography has three challenges that influence everything else:
The subjects move unpredictably.
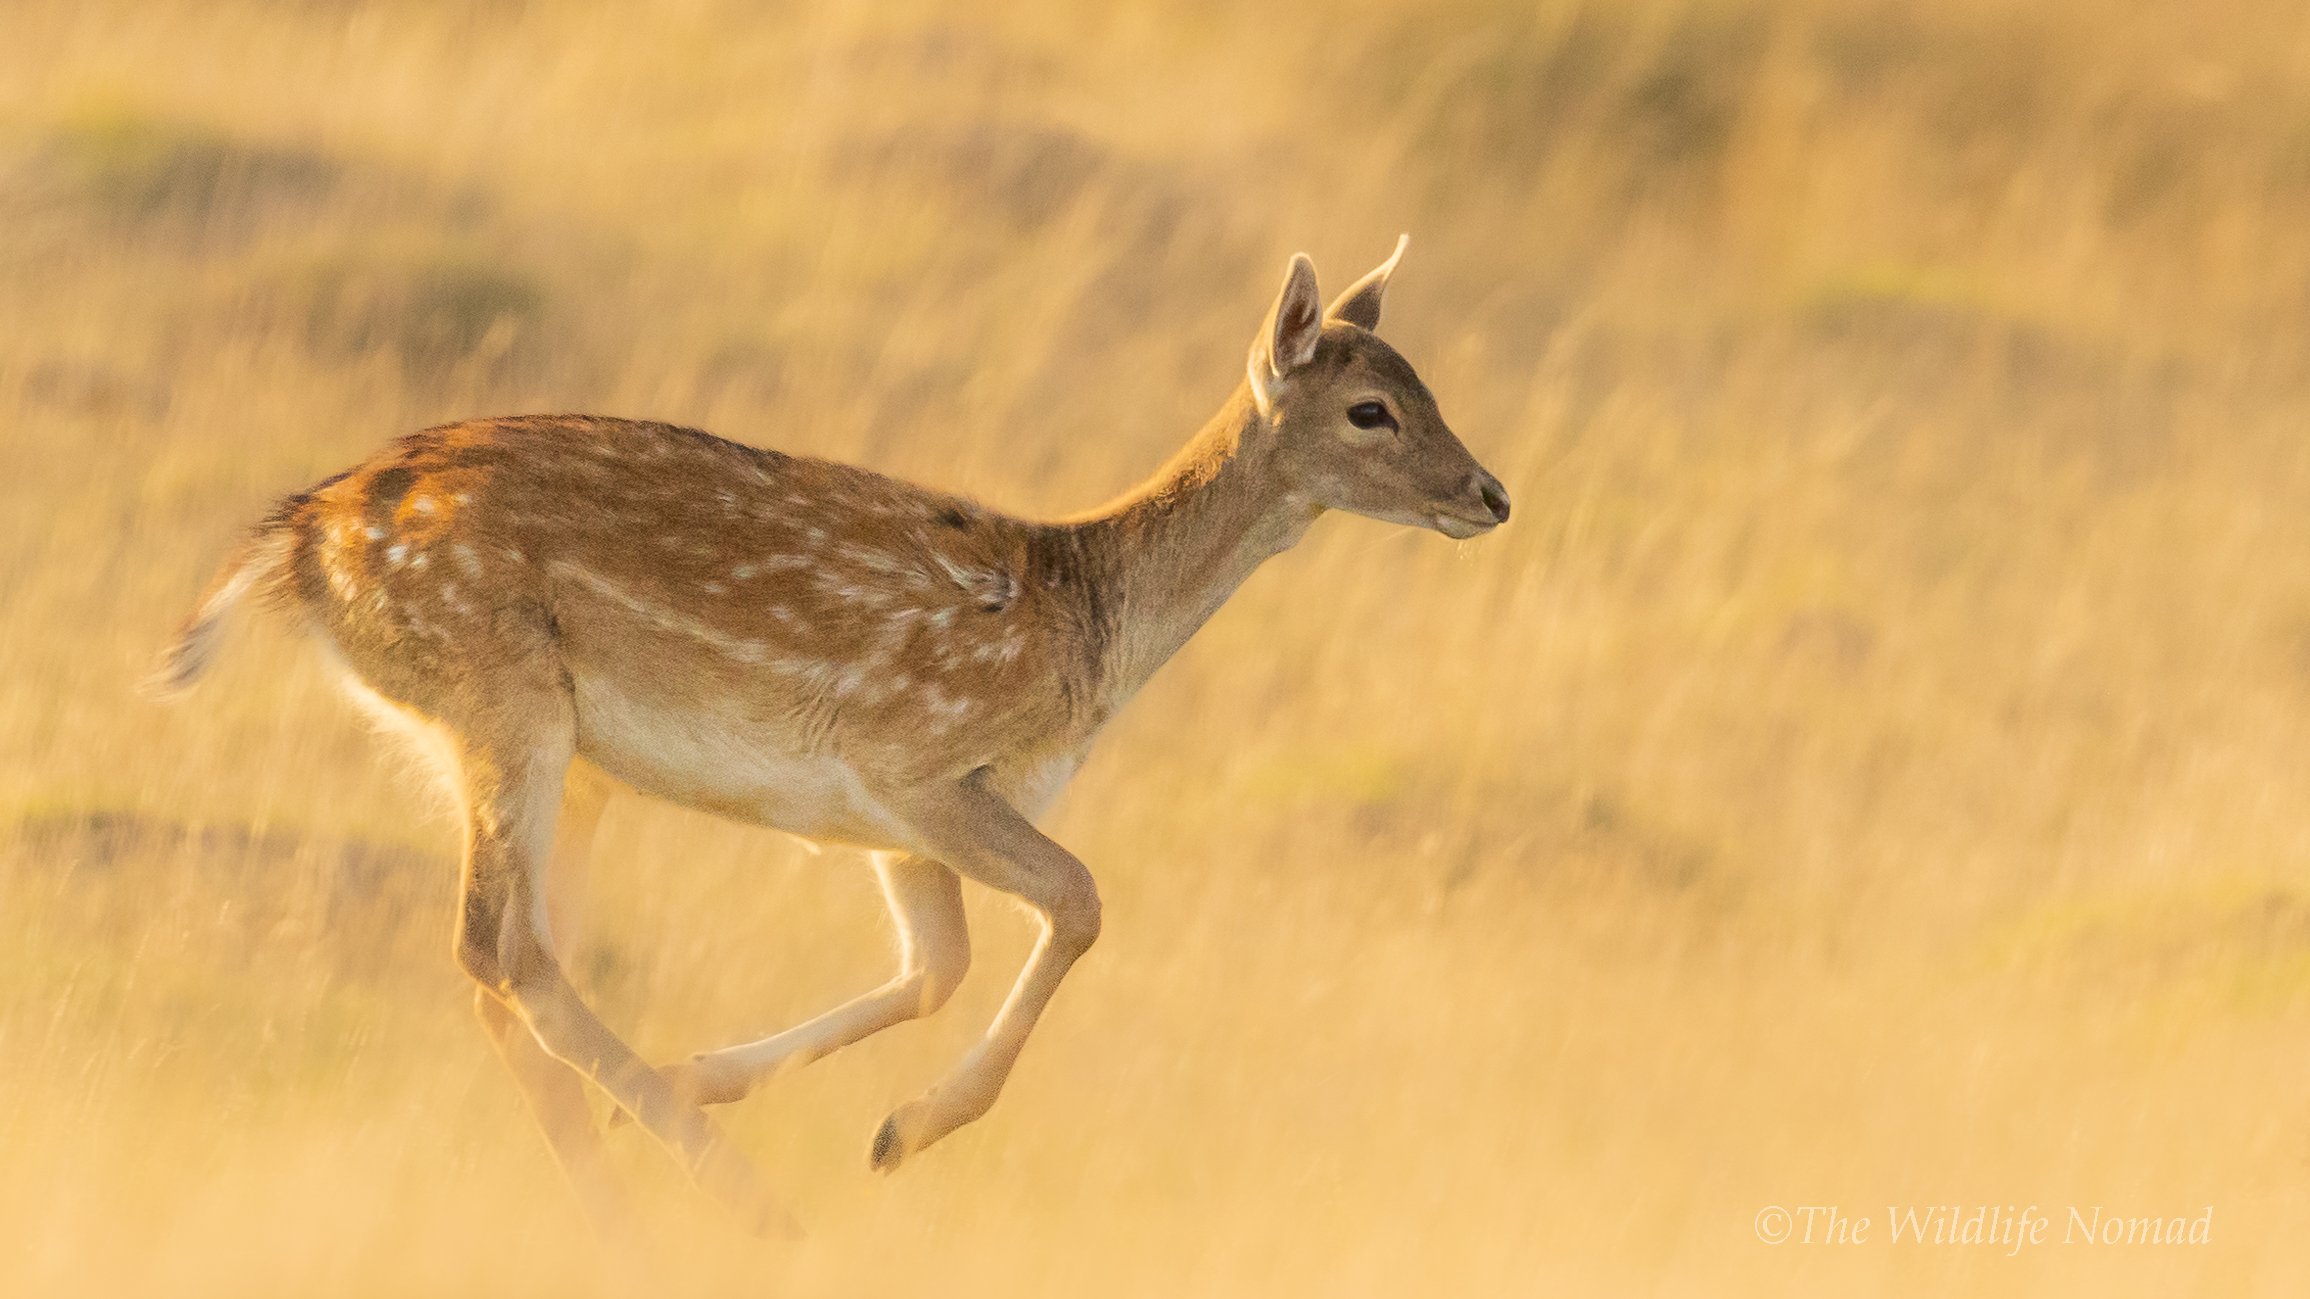
A bird turns its head, a roe deer breaks into a short sprint, a squirrel appears mid-leap. You often have half a second.Light changes constantly.
Most wildlife activity happens at dawn or dusk. In woodland, a step left or right can shift your exposure by an entire stop. Add mist, haze or heavy cloud, and the available light can drop without warning.You are usually at long focal lengths.
Whether it’s 400mm, 500mm or an 800mm zoom, long lenses magnify both the action and your mistakes. Shutter speeds need to be fast, and the camera needs to react instantly.
Any mode that demands too much fiddling, too much thinking, or too much time will cost you photographs. That’s why modes matter. Not because one is “correct,” but because some make your life easier when it actually counts.
Why Full Auto Fails Wildlife Photographers
Let’s get this out of the way early.
Full Auto Mode might be comforting at the start, but wildlife photographers should leave it behind as soon as possible. Auto chooses the focus point, not you. It guesses the exposure, not you. It prioritises low ISO over fast shutter speed, often producing sharp backgrounds and blurry subjects, the exact opposite of what you want.
It’s not “bad.” It’s simply designed for family outings, holidays and casual snapshots. Wildlife photography demands more control. Which leads us to the three modes that matter…….
Aperture Priority: The Classic Starting Point
For decades, Aperture Priority has been the go-to mode for wildlife shooters, and for good reason.
In Aperture Priority you choose:
Aperture
ISO
The camera chooses:
Shutter speed (based on the light)
You can override the brightness using Exposure Compensation.
Why People Love Aperture Priority
You control depth of field, the main creative tool in wildlife imagery.
You can react quickly: set f/5.6 or f/4 and the camera opens the shutter speed as needed.
You can work fast and keep an eye on your composition rather than your settings.
It’s intuitive, especially for people coming from landscape photography, and when the light is steady (like midday with deer in open fields) it works very well.
Where Aperture Priority Falls Short
I moved away from Aperture Priority for one simple reason: I found myself constantly riding the ISO dial.
Wildlife at dawn or dusk shifts between bright sky and deep shadow in seconds. If your ISO is fixed, you’re forced to keep making adjustments. And every time you look down to change it, you risk missing the moment.
This is exactly what happened to me recently. I was photographing static birds on sticks. My shutter speed had drifted down into slower values because the birds weren’t moving much. Then a squirrel launched itself along the stone wall below the tree, perfect behaviour, perfect composition….and I missed it completely. Settings wrong. No time to adjust.
That’s the reality of wildlife photography. Moments happen fast.
Aperture Priority is still a fantastic mode, especially if you’re ready to think about shutter speed more actively. But as you grow in confidence, something else gives you far more control.
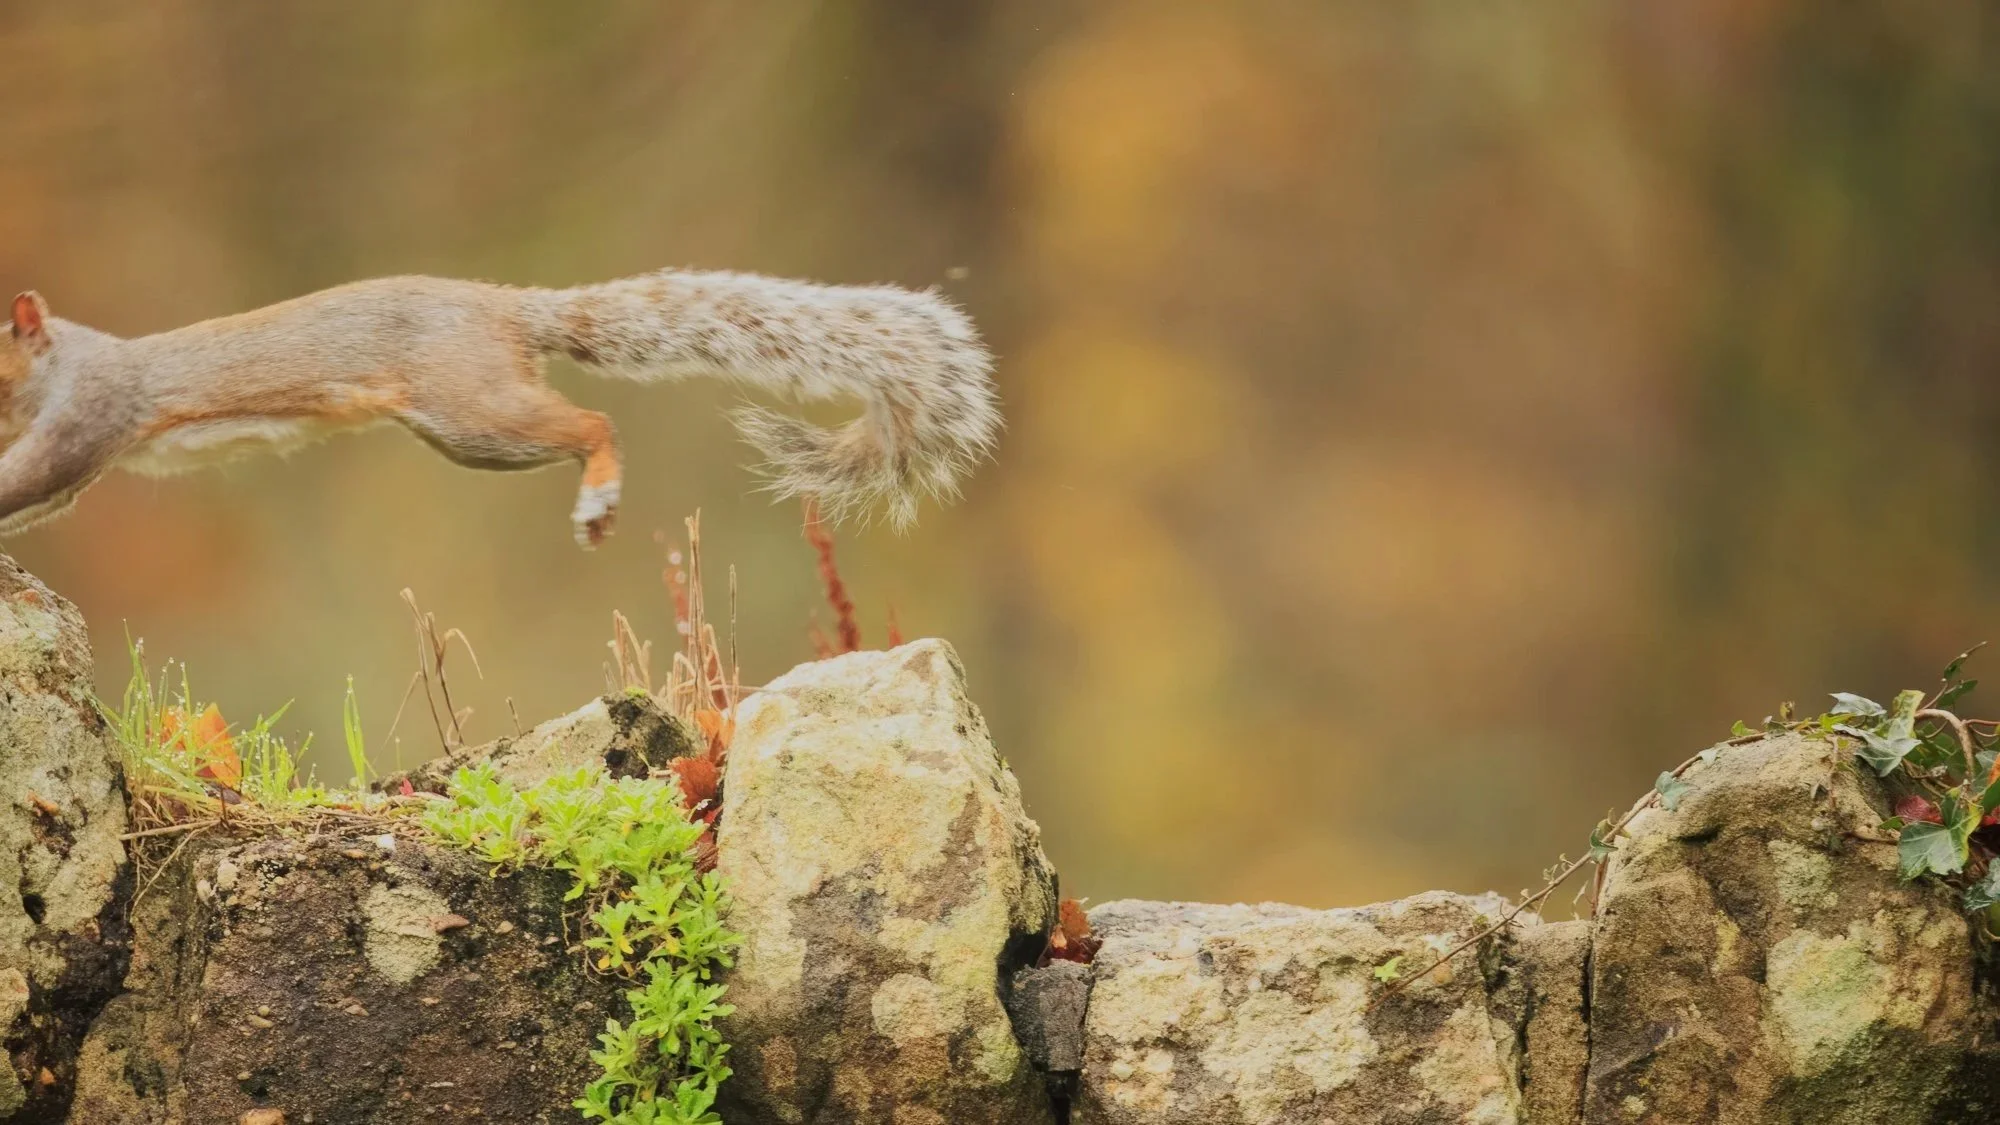
A soft and poorly framed image of a moving squirrel that I shot whilst in Aperture Mode (I was photographing birds perched on the tree above this wall). The softness I can blame on the mode, the poor framing is entirely my fault!
Shutter Priority: The Mode That Looks Helpful But Often Isn’t
On paper, Shutter Priority sounds perfect for wildlife.
You set:
The shutter speed
The ISO
The camera chooses:
The aperture
And this is where it falls apart.
Imagine you’re photographing a fox in woodland at sunrise. You choose 1/1000s to freeze motion. The camera tells you the “correct” aperture would have been f/1.8, but your lens only opens to f/5.6. The result? A badly underexposed image. This happens constantly in Shutter Priority because wildlife photography lives in low light. The camera simply runs out of aperture before it can give you the exposure you need. Beginners often don’t notice until they check the histogram later. This is why most wildlife shooters, myself included, don’t recommend Shutter Priority for general wildlife work.
It can be useful for very specific things (panning blur, intentional motion), but for day-to-day wildlife it creates more problems than it solves.
Why Manual + Auto ISO Is the Sweet Spot
This is the mode I use for nearly everything now. For many wildlife photographers, especially those with mirrorless cameras like my Canon R6, it’s becoming the industry standard.
In Manual with Auto ISO you control:
Shutter speed
Aperture
The camera chooses:
ISO
This hits the perfect balance:
1. You control creative depth-of-field decisions.
Want a creamy background behind a red deer in ferns? Shoot at the lowest f-number. Want all three cubs sharp? Stop down to f/8–f/11.
You decide. Not the camera.
2. You set the shutter speeds wildlife actually needs.
My own baseline rules are simple:
General mammals: ~1/1000s
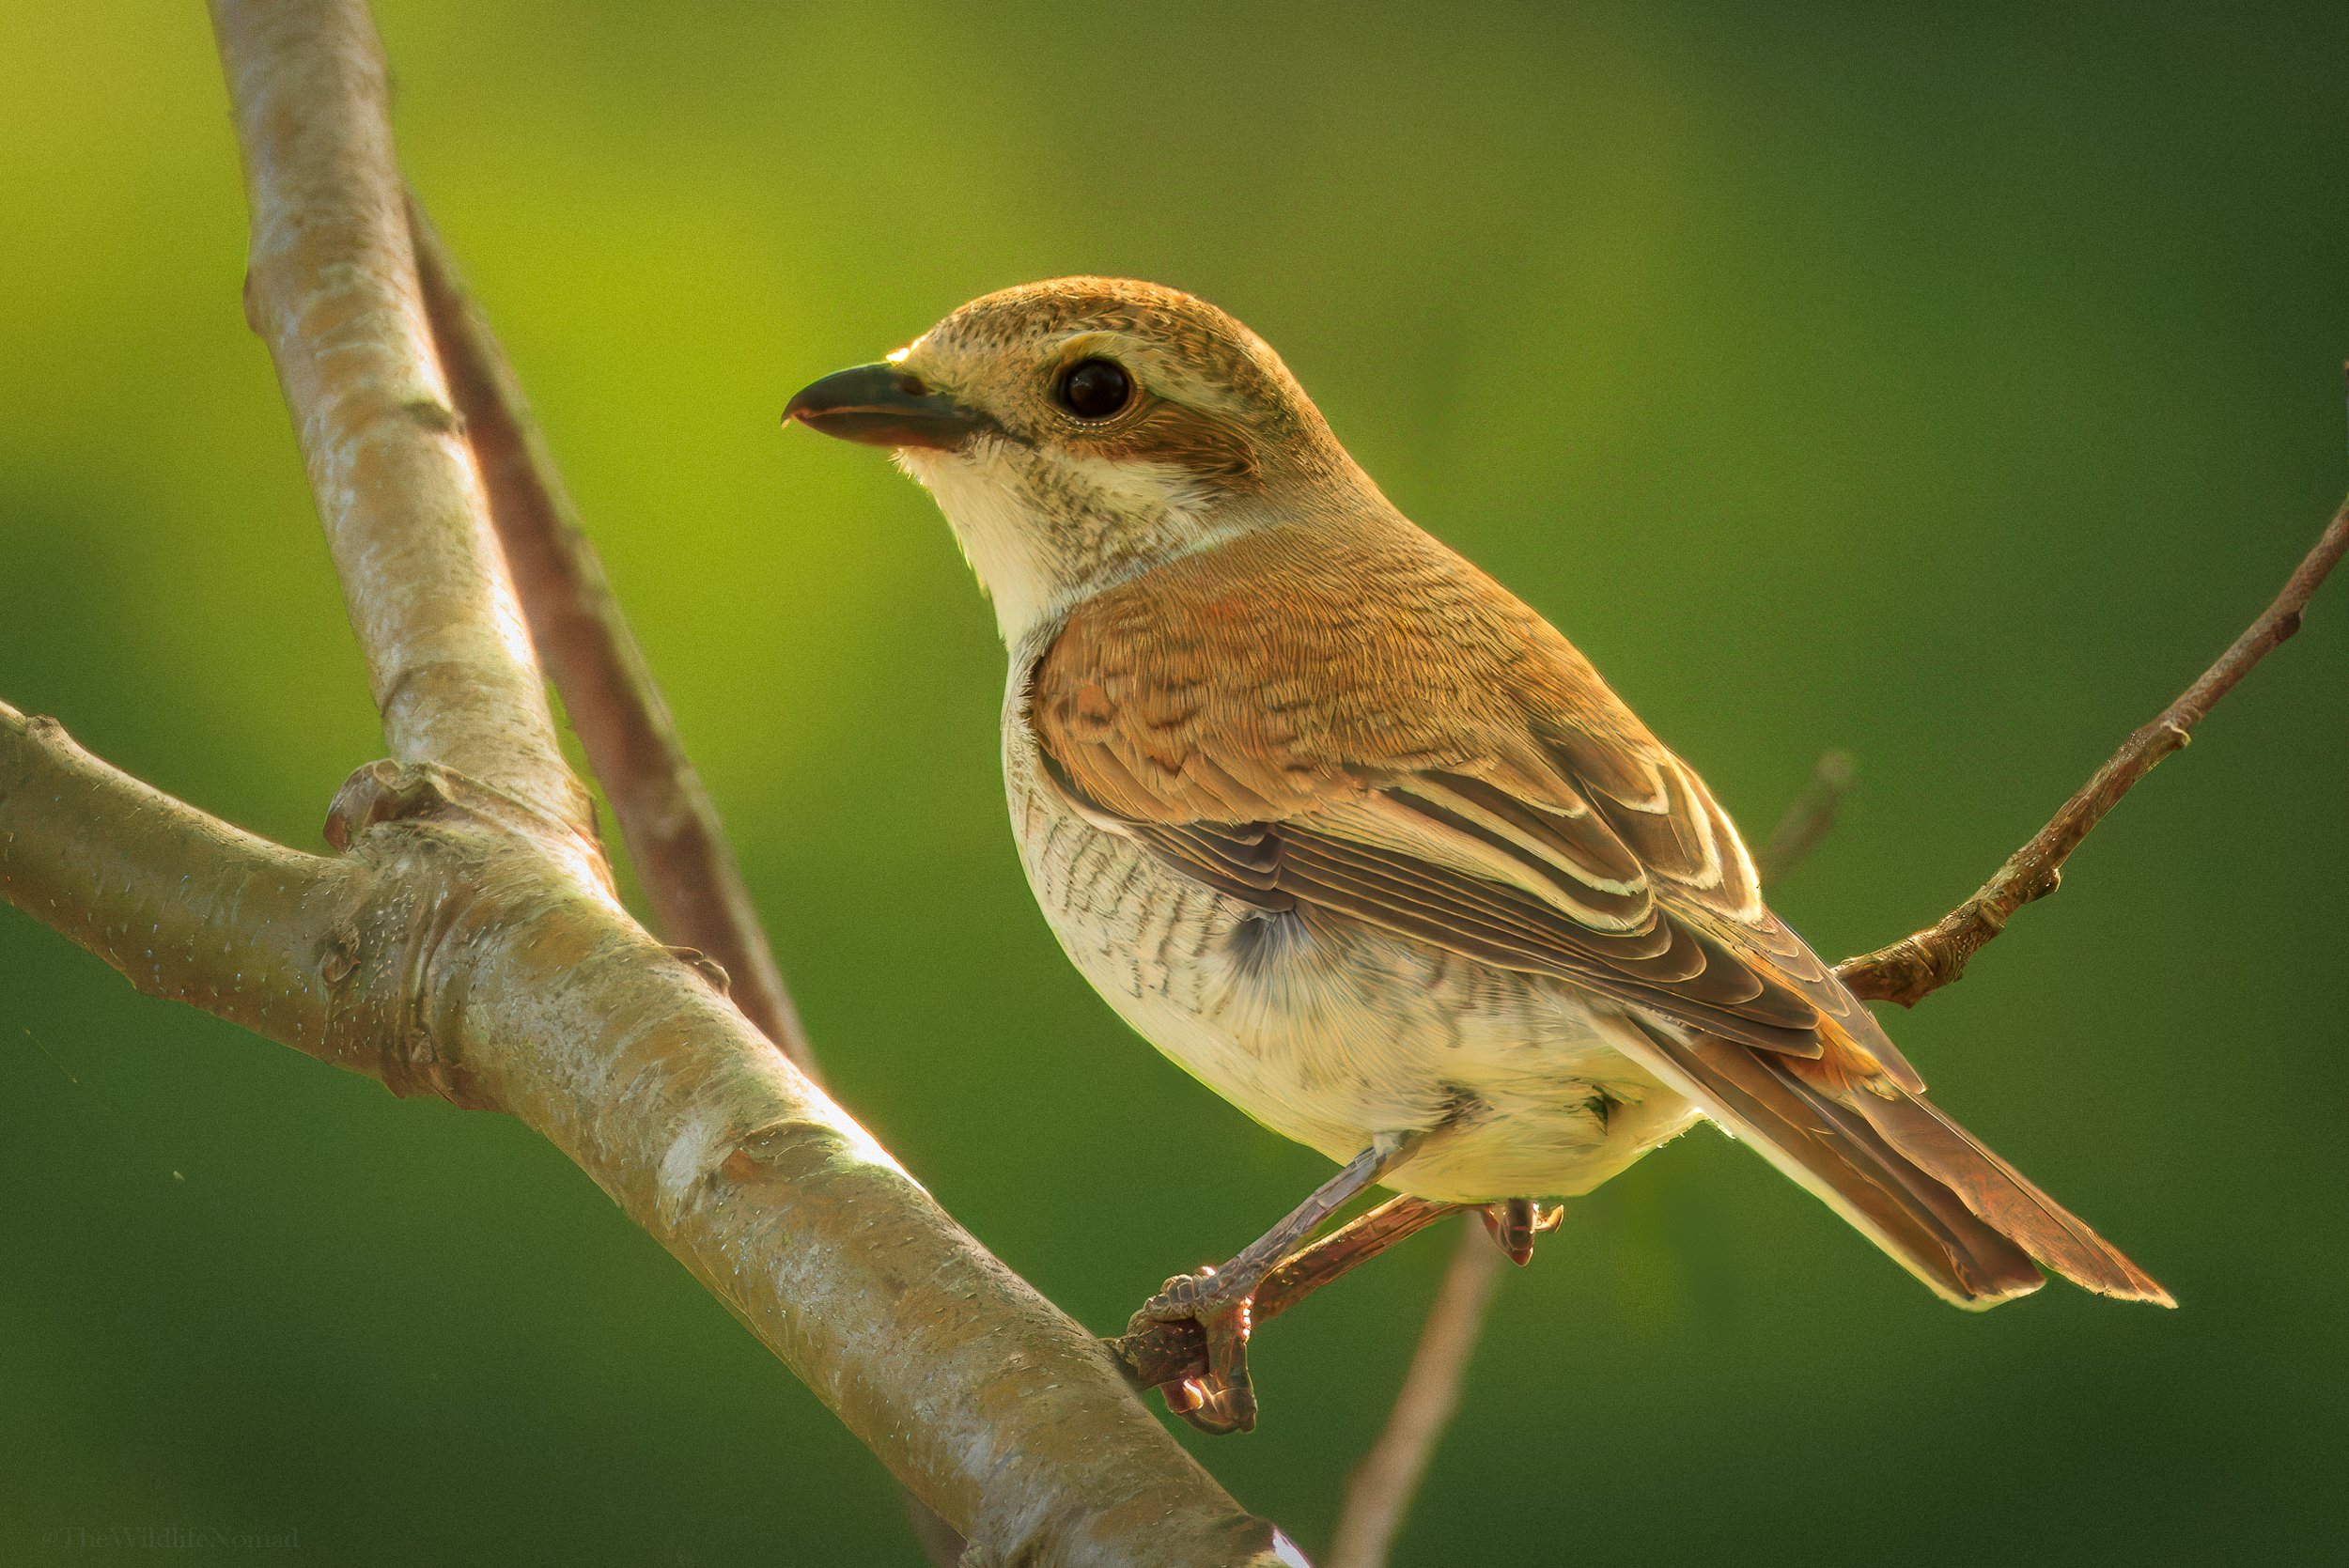
Birds on perches: ~1/1000s
Birds in flight: 1/2000s to 1/3000s
Foxes / badgers (slow-moving): 1/1500s or 1/1300s
Long lenses: Minimum of 2×focal length when possible (500mm → aim for 1/1500s, 800mm → aim for 1/1800s, where light allows)
These give consistently sharp results without fuss.
3. Auto ISO reacts instantly to changing light.
This is the real game-changer.
Dawn woodland? A fox steps into deep shadow? A deer moves from open field into hedge shade? Mist rolls downhill and softens your available light by a full stop?
Auto ISO fixes it before you’ve had time to think. This is why I now rarely shoot anything else. I get to control what matters: depth of field and shutter speed, while the camera handles the rest. Here is a blog you should read about how to handle changing light
4. Modern sensors can handle high ISO surprisingly well.
On my Canon R6, I’m comfortable up to ISO 12,800. Noise reduction software today is good enough to make these files very usable.
If you’re still learning, this is where the histogram comes in. Beginners mistake blown highlights for noise or exposure issues. Learn the histogram early. It’s as important as your lens.
5. You maintain consistency across lens changes.
Especially with variable-aperture zooms like the RF 200–800mm, where f/9 at 800mm limits your light drastically. Manual + Auto ISO simply adapts around the lens.
6. It lets you focus on fieldcraft, not fiddling.
Wildlife photography is 80% fieldcraft: reading behaviour, watching wind, moving quietly, positioning yourself well. Any mode that reduces faff gives you more time for the part that really matters.
Photographing Brown Hare is a good example where Manual + Auto ISO comes into its own as they are subjects that can go from static to moving like a rocket and often in poor light. To get close you also need to be constantly thinking about your position in relation to the wind so having Auto ISO is one less thing to have to worry about.
When Aperture Priority Is Still Useful
Despite everything above, I still recommend Aperture Priority in two situations:
1. Beginners moving off Auto Mode
Aperture Priority is a safe stepping stone:
You learn depth of field
You learn exposure compensation
You learn how shutter speed behaves
You start to see how ISO affects noise
It teaches the building blocks of exposure without overwhelming someone new to wildlife photography.
2. When light is stable and animals are predictable
Wide, flat fields at midday.
Large mammals with slow, predictable movement.
Learning sessions at nature reserves.
Birds waiting on perches.
In these situations, Aperture Priority gives you speed and control with little risk.
Fieldcraft, Ethics and Choosing the Right Mode
Your mode only matters if it supports your fieldcraft. A few principles worth weaving into your decision:
1. Minimise disturbance
The less time your eye is glued to your camera dials, the more time you spend reading behaviour.
Wildlife reveals itself when you’re calm, quiet and still, not when you’re busy adjusting settings.
Manual + Auto ISO reduces this friction massively.
2. Let wildlife reveal itself
Moments happen when animals feel safe.
Fiddling with wheels and buttons pulls your mind out of the moment.
Modes that simplify your workload help you stay present.
3. Think before you shoot
Understanding your mode is part of THINKing ethically:
Truthful, Humane, Informed, Necessary, Kind (read the blog explaining this in detail here)
Choosing the right mode keeps you from chasing shots or adjusting too late when an animal is stressed or uncomfortable.
Beginner-Friendly Settings Guide
A simple (and very generalised) overview to help beginners start strong:
Static mammals (deer, rabbits, squirrels on logs)
Mode: Manual + Auto ISO
Shutter speed: 1/1000s
Aperture: widest for subject isolation
ISO limit: camera-dependent (R6 → ~12,800)
Moving mammals (foxes, badgers, roe deer)
Shutter speed: 1/1500s
Aperture: f/5.6–f/9 depending on lens
Tip: watch your histogram as shadows deepen
Birds on perches
Shutter speed: 1/1000s
Aperture: wide open
Tip: use small AF point to avoid focusing on twigs
Birds in flight
Shutter speed: 1/2000s (or higher)
Aperture: as wide as possible
Auto ISO: minimum shutter speed rule if available
These starting points give beginners a framework that’s easy to adapt.
Final Verdict: The Best Mode for Wildlife Photography
If you want one answer….one mode that consistently keeps up with real wildlife, real light and real field conditions, the winner is clear:
Manual Mode with Auto ISO.
You control what matters. The camera handles the rest.
It’s fast, reliable, adaptable and well-suited to modern mirrorless bodies.
But here’s the nuance:
Aperture Priority is an excellent stepping stone out of Auto.
It remains useful in stable light with slow, predictable subjects.
Shutter Priority is rarely the best choice for wildlife unless used intentionally for creative motion.
For anyone serious about developing their wildlife photography, Manual + Auto ISO gives you the consistency and confidence to work in difficult light, long lenses and unpredictable behaviour, the exact conditions where real wildlife images are made. The more you shoot, the more you’ll find that anything reducing mental load helps you stay focused on behaviour, fieldcraft and ethics, and that’s ultimately where the strongest wildlife images come from.
Other Useful Blog Articles in the Camera Smart Series
Camera Smart: Mastering Metering and Exposure for Stunning Wildlife Photography
Camera Smart: Mastering Image Stabilisation for Wildlife Photography
Camera Smart: Mastering Custom Buttons
———————————————————
FAQ: Camera Modes for Wildlife Photography
Why are my wildlife photos still blurry even when I use fast shutter speeds?
Blurry images aren’t always caused by shutter speed alone. Long lenses amplify camera shake, poor hand-holding technique, or unstable footing. Heat haze, subject movement toward or away from the camera, and missed autofocus can all create softness too. Even at 1/1000s, a lens at 800mm can still show shake. Good support, controlled breathing, and choosing the smallest reliable AF point all help.
Why do my images look noisy even though the exposure looks correct?
Noise isn’t only about high ISO. Underexposed shadows pushed in editing cause far more noise than a clean ISO 6400 file exposed correctly in-camera. Shooting against bright skies, heavy mist, or deep woodland shade often underexposes animals. Using your histogram and exposure compensation helps keep the subject close to mid-tones and reduces noise in the final file.
How do changing weather conditions (mist, haze, cloud) affect camera mode choice?
Mist and haze reduce contrast and available light, tricking metering systems into underexposing subjects. With Manual + Auto ISO, the camera lifts ISO automatically as visibility drops, keeping shutter speed stable during sudden fog or cloud cover. In Aperture Priority, you must watch for slow shutter speeds creeping in unnoticed. Understanding how weather affects exposure is just as important as choosing a mode.
Is Auto ISO safe to use for wildlife, or will it ruin image quality?
Auto ISO is safe as long as you set a maximum ISO limit appropriate for your camera. Modern bodies (like your Canon R6) cope with ISO 12,800 without issue when files are exposed well. Noise becomes problematic only when Auto ISO pushes up because shutter/aperture are set too conservatively or the subject is heavily backlit. Set a realistic ceiling, monitor your histogram, and Auto ISO works in your favour, not against you.
How do I balance mode choice with good fieldcraft?
Modes matter, but fieldcraft matters more. The best mode is the one that keeps you present, quiet and aware of behaviour. If a mode forces you to look down and change settings constantly, it breaks concentration and increases disturbance. Manual + Auto ISO reduces that cognitive load. You keep control where it counts while staying focused on wildlife — which is where the best photographs come from.