
Camera Smart: Cracking the Code of Metering and Exposure in Wildlife Photography
In part 2 of the “Camera Smart” series we looked at image stabilisation Plenty of good strong light is a wildlife photographer’s greatest gift (as far as shake free images are concerned) but light is also our and greatest frustration. Animals move between shadow and glare, skies flare behind them, and plumage swings from black to dazzling white. How you handle exposure and metering will decide whether your image holds detail and atmosphere, or whether it ends up clipped, dull, or noisy.
This blog will guide you through the technical side of metering and exposure, showing how to make quick, confident decisions in the field. Each example comes directly from my own portfolio, using real-world situations to bring the theory to life.

1. Understanding Exposure
Exposure is controlled by aperture, shutter speed, and ISO. This “triangle” is your toolkit for balancing light, sharpness, and noise.
Wildlife complicates this because subjects are fleeting. You rarely get to meter a scene calmly before the moment happens. That’s why understanding how your camera thinks about light is essential, and that’s where metering comes in.
2. What is Metering?
Metering is how your camera measures light to suggest an exposure. It assumes the world averages out to mid-grey. That’s fine for evenly lit fields, but a barn owl in half-shadow or a raven on snow will fool the system every time.
To overcome this, you must know the metering modes and when to override them.
3. Metering Modes in Wildlife Photography
3.1 Evaluative/Matrix Metering
Measures the whole frame and biases towards the focus point. Excellent for balanced light, but struggles with extremes.

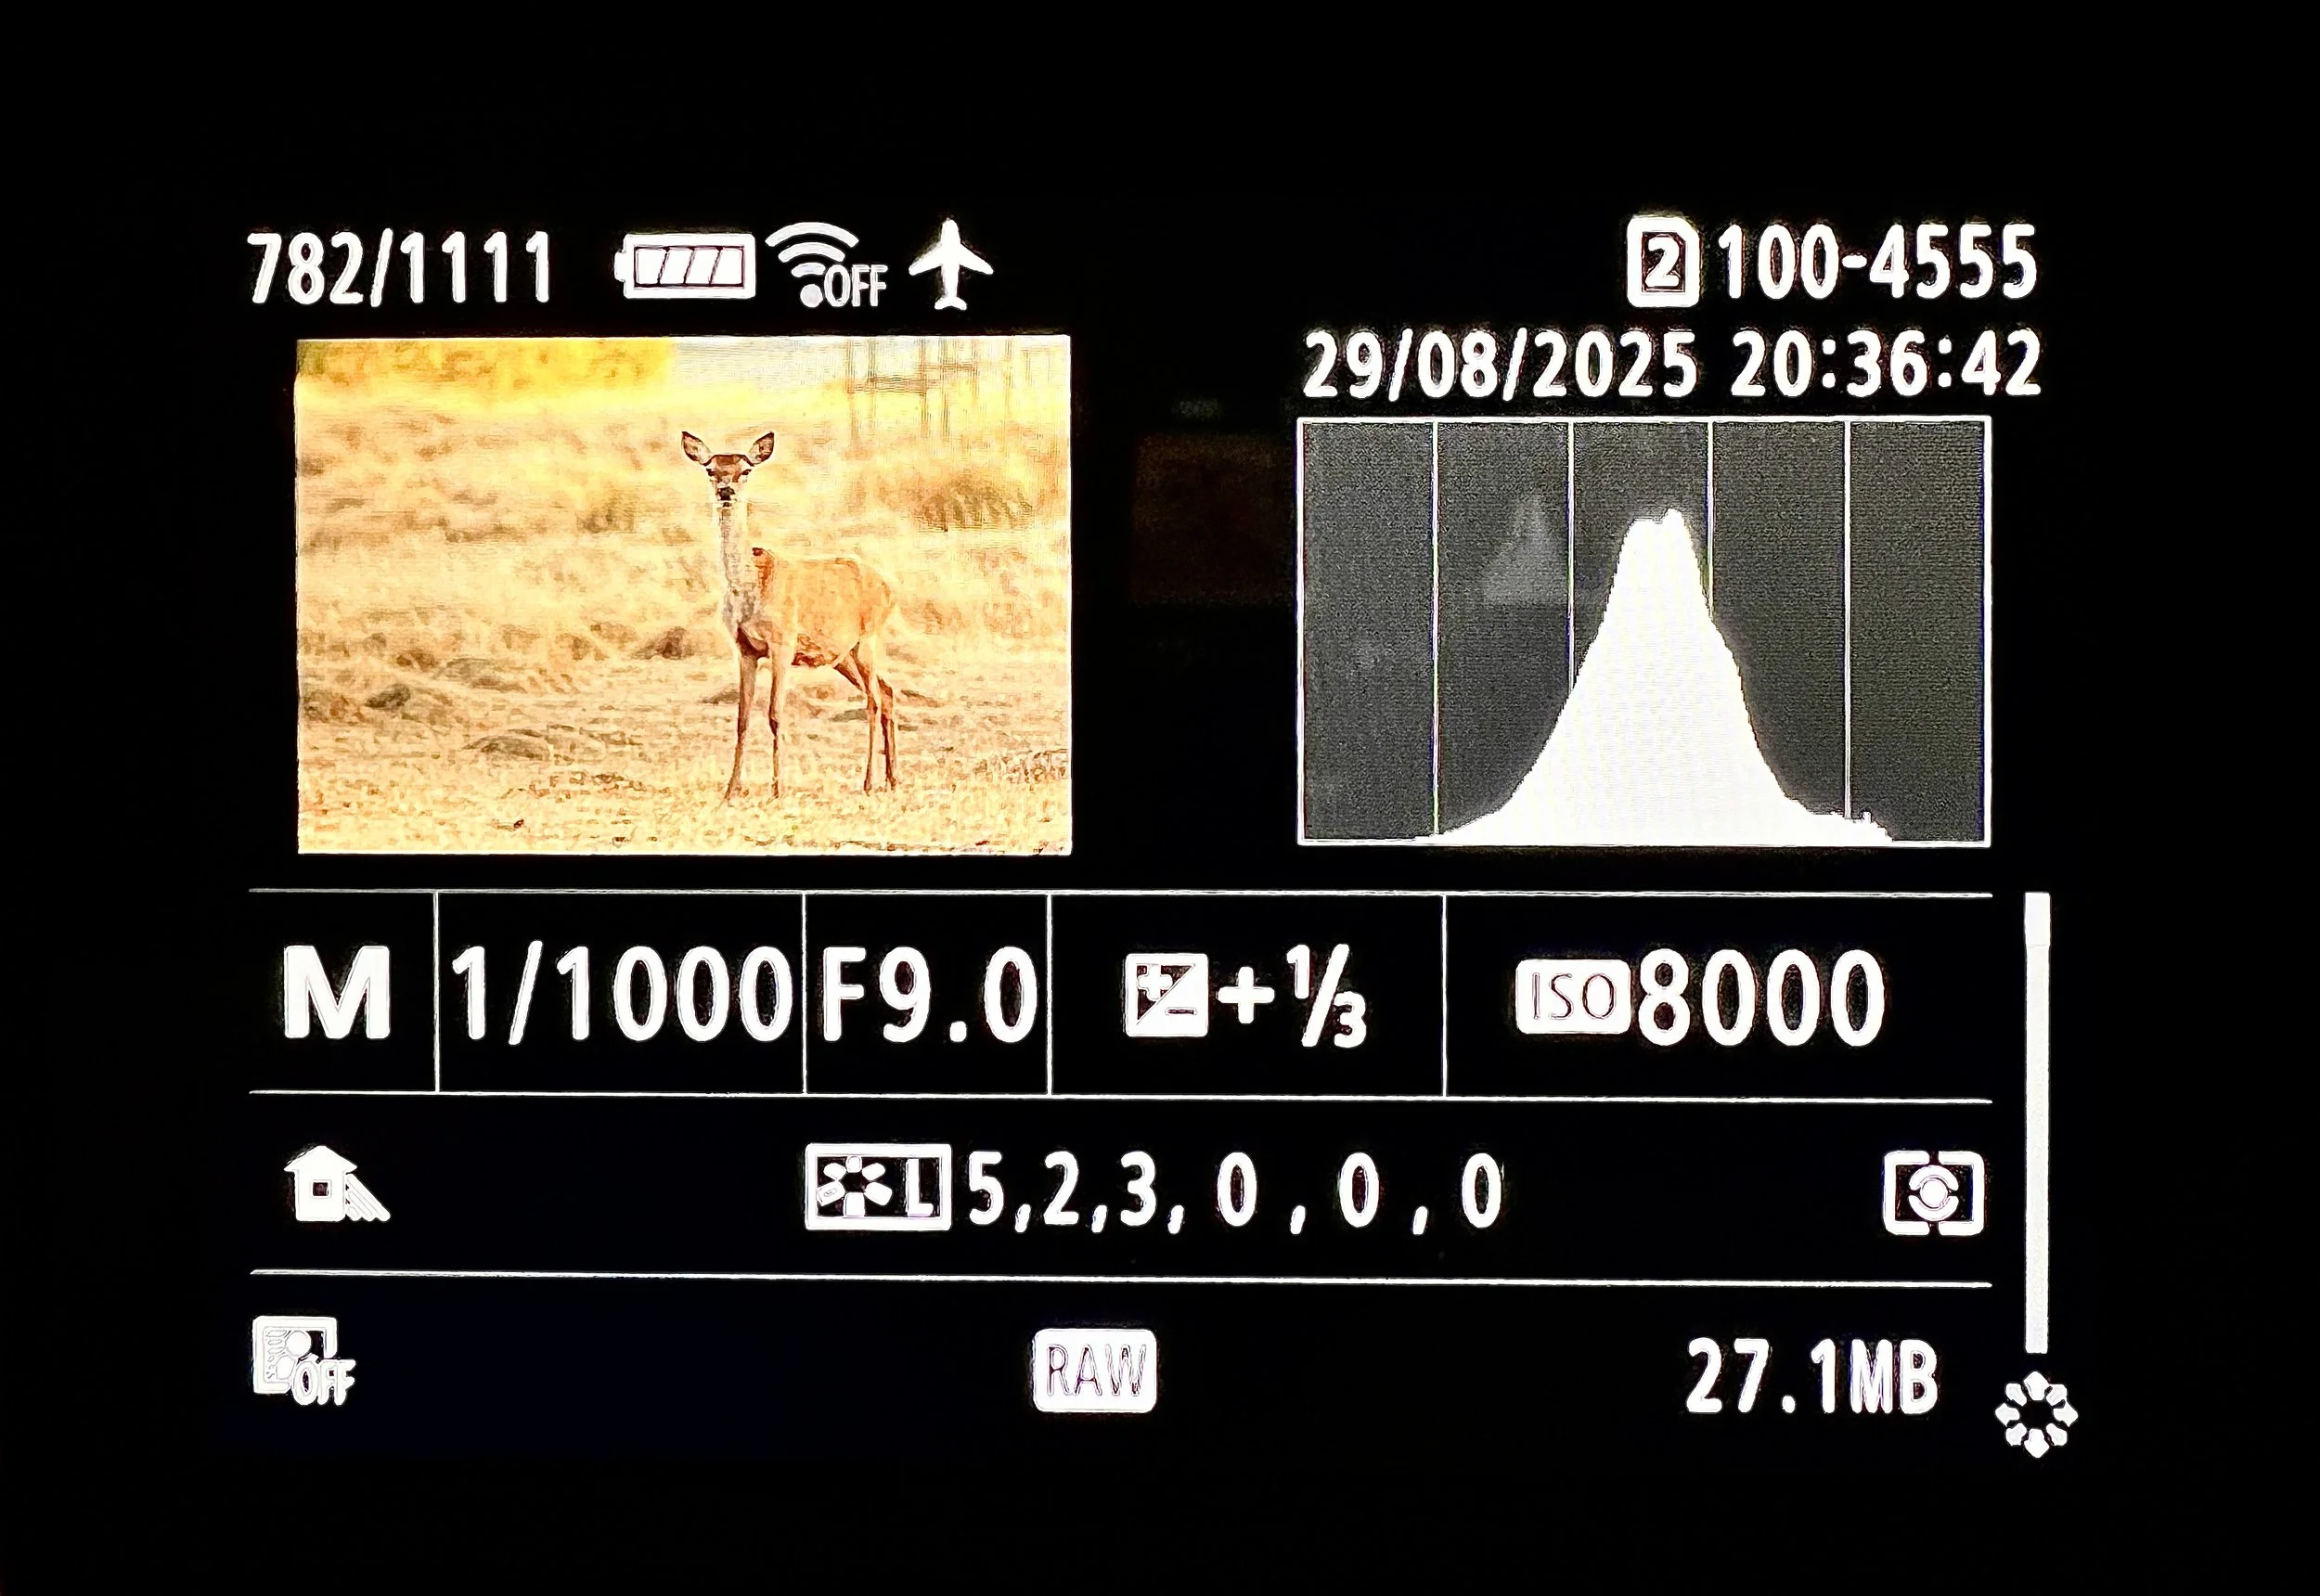
Evaluative metering often leaves the subject dark, trying to balance the sky, as in the case of this fallow deer. this can be rectified in editing, but wouldn’t it be better to get it right “in camera”?
3.2 Centre-Weighted Metering
Prioritises the central frame. Useful when your subject fills the middle (e.g. seal on a beach), but less effective for small, off-centre birds.
3.3 Spot Metering
Reads just 1–5% of the frame. This is your best friend for tricky wildlife subjects: white owls, dark foxes, birds in clutter.
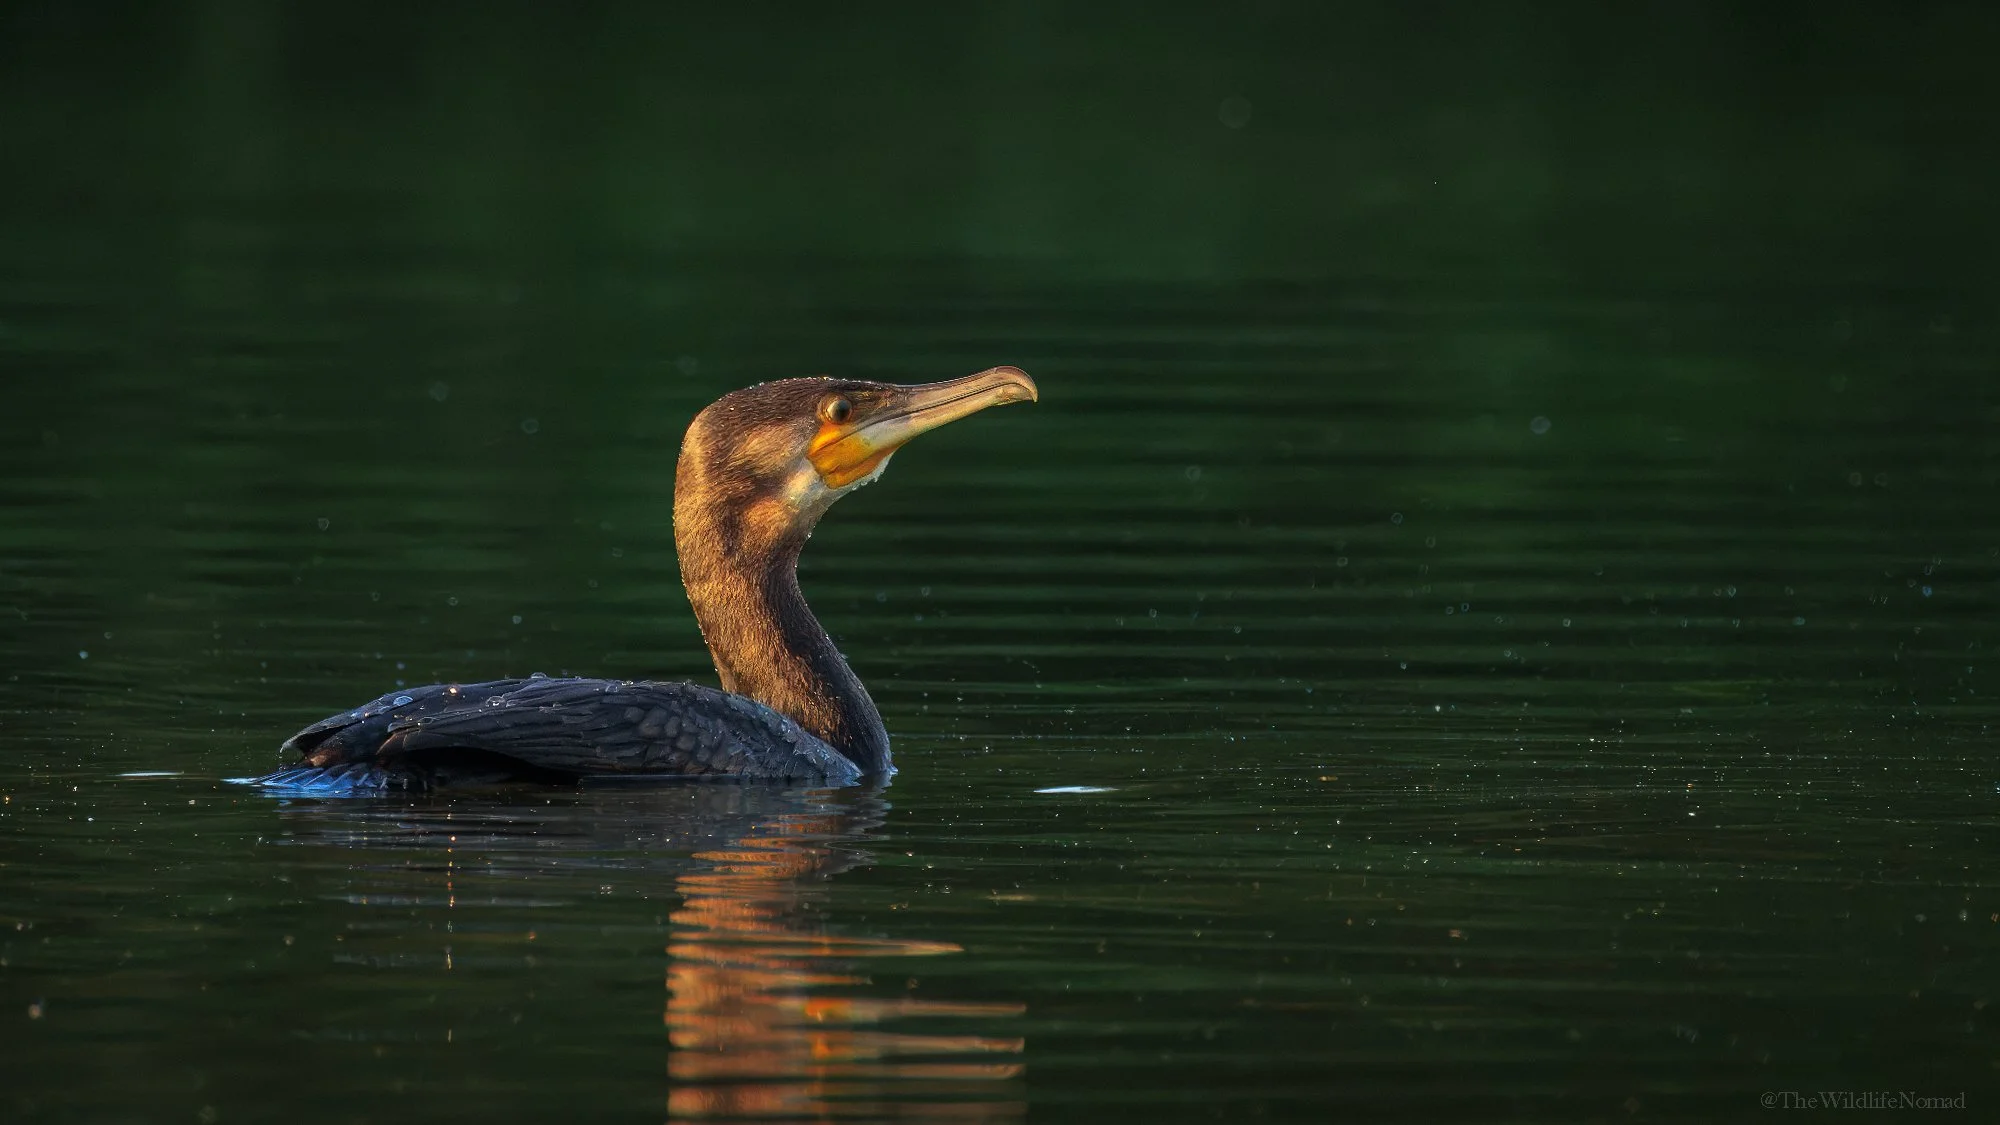
Spot metering ensures the colourful comorant’s face retains detail, in this tricky lighting.
3.4 Partial Metering
Covers a slightly larger central area (around 8–12%). Useful compromise for medium subjects where background tones vary but aren’t extreme.

The Red Backed Shrike, although a different colour has the same tone as the bracken in this image. It was exposed using partial metering.
4. Exposure Compensation in the Field
Even with the right metering, cameras misjudge. Exposure compensation lets you fix it instantly. Exposure compensation can be set on most DSLR using custom buttons, as shown in part 1 of our “Camera Smart” series. Here’s a few examples of my go to settings:
Snowy or pale background (including skies): add +1 EV.
Backlit silhouettes: reduce exposure (-1 EV).
Misty dawn: slight underexposure (-0.3 to -0.7 EV) preserves atmosphere.

Underexposing by 1/3 stop helps retain the ethereal quality of this woodpigeon in white willow image which was shot in very misty conditions.
Underexposure enhances depth and atmosphere, whilst ensuring the burst of light on to the leaves doesn’t blow out all detail.
5. Reading the Histogram
Forget trusting the LCD alone — histograms show the truth.
Left-heavy = underexposed, losing shadows.
Right-clipped = overexposed, blown highlights.
Balanced without clipping = healthy exposure.
Train yourself to glance at the histogram during lulls in action. You’ll find it’s a much more reliable indicator of exposure than the image rendered on your tiny camera LCD.
6. Real-World Challenges
6.1 Light on Light
Typically swans, owls, or gulls in snow, or light coloured deer with light backgrounds. Without correction, they’ll look dull. Add exposure to reveal brightness but be careful of clipping.

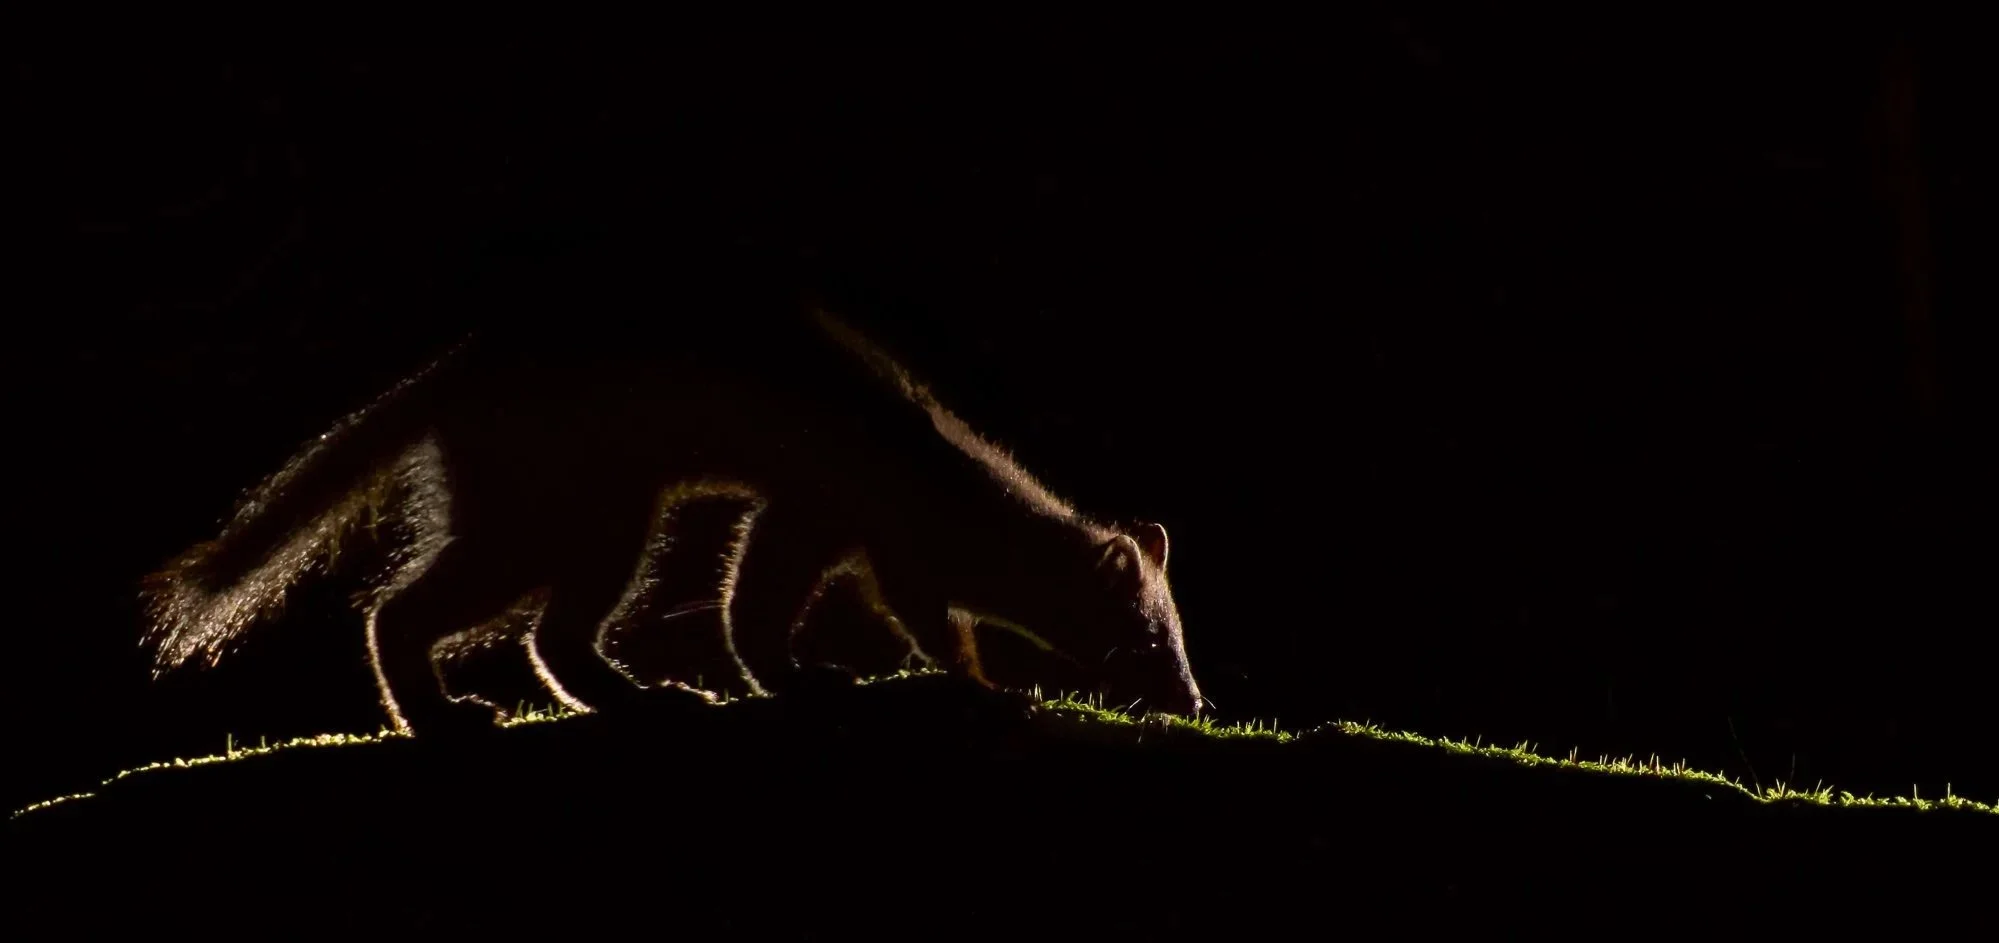
6.2 Dark on Dark
Ravens, pine martens, or blackbirds in woodland. The camera tries to brighten too much, blowing details. Dial exposure down.
6.3 Backlighting and Silhouettes
Dawn and dusk add drama but confuse meters. Decide early: silhouette (meter sky or ice in this case) or detailed subject (spot meter on animal).

6.4 Reflections and Water
Water doubles brightness and fools evaluative metering. Expose for the subject, not the reflection.

6.5 Mixed Light in Woodland or Reeds
Patchy forest light causes extremes. A heron in reeds with water behind is a good example — meter carefully to keep subject detail.

7. Advanced Techniques
Exposure Bracketing: Fire off three exposures when conditions shift rapidly.
Manual with Auto ISO: Control aperture and shutter, let ISO adapt.
Highlight Warnings (“Blinkies”): Enable alerts to avoid burnt feather detail.
Pre-Emptive Settings: Anticipate light changes, for example, set exposure before an owl emerges into the field.
8. Practice and Reflex Building
Skill comes from repetition. Practise on pets, garden birds, or common wildlife in varied light. Over time, your fingers adjust EV or metering mode instinctively, leaving you free to concentrate on fieldcraft and composition.
9. Common Pitfalls to Avoid
Blind trust in auto modes.
Ignoring histograms.
Over-using exposure compensation.
Forgetting subject priority — the background doesn’t matter if the animal is wrong.
Conclusion
Exposure and metering are where art meets technical mastery. When you learn to read light — and out-think your camera — you protect the truth of wildlife encounters.
The reward? Feather detail in a barn owl, atmosphere in misty dawns, clarity in reflections, and dignity in silhouettes. Master this, and your images will hold not just beauty, but honesty.
Part 1 of the Camera Smart series can be found here and deals with assigning custom buttons on your camera so you can recall your most commonly used settings when photographing wildlife.
Part 2 deals with image stabilisation and how to get sharper images, even in tough conditions like low light photography. You can read that blog article here.
————————————
FAQ — Metering & Exposure for Wildlife Photography
Q1: What metering mode is best for wildlife photography?
There’s no single best mode, but many wildlife photographers favour spot metering when the subject is in tricky light, such as a white owl against a dark forest. This ensures the camera meters for the animal itself rather than the background. Evaluative (matrix) metering works well in balanced light, while centre-weighted metering is useful when a larger subject fills the centre of the frame.
Q2: Why do my wildlife images often come out underexposed or overexposed?
Your camera is designed to expose scenes to a mid-tone grey. This fails when your subject is much brighter or darker than average — for example, a raven on snow or a swan against reeds. Common reasons for poor exposure include:
Relying only on automatic metering without correction.
Using the wrong metering mode for the scene.
Ignoring the histogram and relying on the LCD preview.
Shutter speed, aperture, or ISO limitations forcing the camera into compromise.
Q3: When and how should I use exposure compensation (EV)?
Exposure compensation lets you override your camera’s judgement. Use +EV when photographing dark subjects against snow or sky, as the camera will underexpose. Use –EV in backlit scenes to protect highlight detail or when shooting silhouettes. In patchy woodland light, small adjustments (± 0.3 or 0.7) can fine-tune exposure.
Q4: Should I underexpose slightly to protect highlights?
Yes, many photographers prefer to underexpose a little, especially when shooting RAW, to avoid losing highlight detail. It is easier to recover shadows than blown highlights. However, too much underexposure increases noise, so keep adjustments subtle.
Q5: How can I use the histogram to judge exposure in the field?
The histogram shows you whether your exposure is balanced.
A graph bunched to the left means underexposed shadows.
A graph clipped to the right means blown highlights.
A well-distributed curve without clipping is ideal.
Checking the histogram regularly helps you avoid relying on the LCD preview, which can be misleading in bright conditions.